
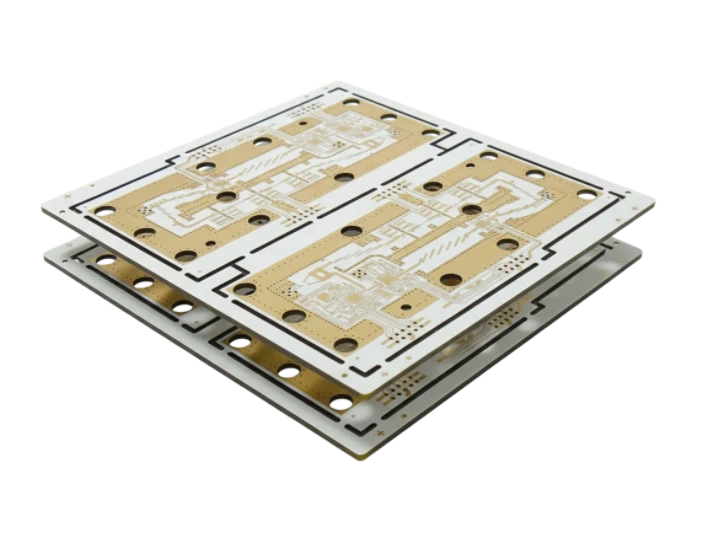
An AES/EBU PCB should be treated as a controlled-transmission-line design, not simply as an analog audio board carrying digital data. For the conventional balanced professional AES3 interface, the critical electrical target is a nominal 110Ω balanced transmission path from transmitter through the interconnect to the receiver.
The practical design decision is therefore not “FR4 or exotic RF laminate?” It is whether the selected stackup, trace geometry, termination network, connector transition, transformer interface, and fabrication controls can preserve the intended AES3 electrical interface.
For most AES3 equipment, ordinary FR4 PCB construction can be appropriate. What matters is establishing a manufacturable geometry from the actual stackup, routing it consistently, and defining how the finished PCB will be verified.
Standards boundary: AES3 defines the digital audio interface; it does not automatically qualify a particular PCB stackup, laminate, trace geometry, or finished product. Board fabrication evidence verifies the PCB against the fabrication specification. Functional AES3 compliance and end-product qualification remain responsibilities of the equipment designer and system-level validation process.
What Does an AES/EBU PCB Actually Need to Control?
AES3 carries two channels of digital audio over several possible physical media. This article focuses on the familiar balanced professional interface, normally associated with shielded twisted-pair cabling and XLR connections.
The PCB portion sits inside that transmission path. Its job is to avoid introducing unnecessary discontinuities before the signal reaches the cable or receiver.
The Audio Engineering Society identifies AES3 as its two-channel digital audio interface standard. EBU Tech 3250 likewise specifies a serial digital interface for two channels of sampled audio. Component manufacturers implementing AES3 receivers commonly specify a balanced 110Ω interface and show termination and transformer circuits around their devices.
That makes the PCB problem concrete: preserve the intended impedance environment and implement the transmitter or receiver manufacturer's recommended interface correctly.
Which AES/EBU PCB Decisions Matter Most?
Use the following matrix before routing. It separates parameters that affect fabrication from choices that belong to the circuit or system designer.
| Decision | Main risk if wrong | What should be verified |
|---|---|---|
| Stackup and trace geometry | Impedance shifts after fabrication | Final dielectric construction, copper thickness, width and spacing |
| Reference plane | Return-path discontinuity and increased EMI | AES route remains referenced to the intended continuous plane |
| Termination topology | Reflections or incorrect receiver loading | Resistor value and placement follow the selected transmitter/receiver circuit |
| Transformer implementation | Incorrect impedance transformation, isolation, or bandwidth behavior | Approved transformer and vendor-recommended network |
| Connector transition | Local discontinuity at large pads or long breakout | Short, direct transition with controlled geometry where practical |
| Pair symmetry | Differential-to-common-mode conversion | Similar routing environment for both conductors |
| Fabrication tolerance | Finished board misses design impedance | Agreed impedance target, tolerance, coupon structure, and test method |
| System validation | PCB passes fabrication test but equipment still fails | Receiver lock, interoperability, waveform/eye or other product-level tests |
This distinction matters for purchasing as well. A PCB supplier can manufacture and measure a controlled-impedance structure, but it cannot infer the correct AES3 termination circuit or certify the finished audio product solely from Gerber files.
How Should You Build the 110Ω Stackup?
Do not select an arbitrary trace width from an online example and transfer it to your layout. Differential impedance depends on the complete transmission-line geometry: conductor width and thickness, pair spacing, dielectric height, dielectric properties, solder mask conditions, and surrounding copper.
Start with the intended PCB stackup, then determine a manufacturable geometry with your PCB supplier before design release. For prototype and production continuity, the fabrication drawing should identify the controlled pair, target impedance, applicable layers, and agreed tolerance.
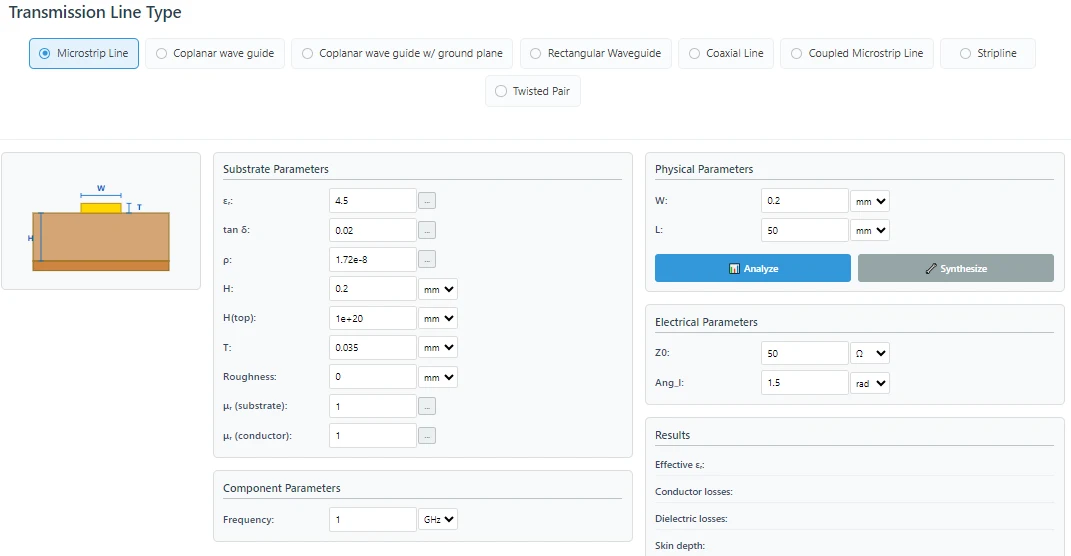
An impedance calculator is useful during preliminary design, but the fabrication stackup is the manufacturing reference. Pressed dielectric thickness and finished copper conditions may differ from nominal values used during early calculations.
Is standard FR4 sufficient for AES3?
In many AES3 products, yes. The interface does not automatically justify an expensive low-loss microwave laminate.
Material selection should instead consider the complete board: assembly temperature, layer count, thickness tolerance, available prepreg constructions, environmental requirements, and whether the same PCB also carries substantially faster interfaces.
If USB, Ethernet, high-speed memory, RF, or other demanding signals share the board, their requirements may drive the laminate choice even when AES3 alone would not.
How Should the AES3 Pair Be Routed?
Route the balanced AES3 connection as a defined pair using the geometry established for the chosen stackup. Keep the two conductors in comparable electromagnetic environments and avoid unnecessary changes in width, spacing, reference plane, or layer.
A continuous reference is preferable to deliberately routing across plane boundaries. If a layer transition is unavoidable, analyze the complete transition rather than assuming that differential signaling eliminates return-path concerns.
Placement also matters. Keep the external connector, transformer or interface network, and transmitter/receiver circuitry arranged so the controlled section is direct and free of unnecessary branches.

Avoid adding serpentine length matching simply to satisfy an arbitrary routing rule. AES3 pair symmetry matters, but unnecessary meanders create their own discontinuities. Correct topology and clean routing are more valuable than chasing an unsupported universal skew number.
Where Should Termination and Transformers Be Placed?
The correct circuit depends on the AES3 transmitter or receiver being used, so the component datasheet should govern the implementation.
For example, Cirrus Logic's CS8416 receiver documentation describes the professional interface as balanced with a nominal 110Ω input environment, shows a 110Ω termination across the receiver input, and strongly recommends transformer coupling even though a transformer is not universally mandatory under AES3.
That illustrates an important design rule: do not treat “110Ω PCB” as a substitute for the interface circuit. The trace impedance, receiver termination, transformer ratio, source network, and cable collectively determine the electrical transition.
Keep interface components close enough that long uncontrolled branches are avoided. Do not add ground-plane voids beneath transformer or connector pads as a generic recipe. Local plane modifications can sometimes be justified by a modeled transition or component recommendation, but arbitrary voiding can create a worse discontinuity than the one it is intended to solve.
What Usually Causes an AES/EBU PCB to Fail?
The most useful failure analysis starts with the symptom and asks for evidence rather than immediately blaming jitter or laminate quality.
| Symptom | Likely investigation | Evidence to request or measure |
|---|---|---|
| Receiver unlocks or becomes intermittent with longer cables | Termination, impedance discontinuities, signal attenuation | Schematic review, impedance data, receiver waveform |
| Prototype works but another fabrication lot does not | Stackup or etch variation | Lot-specific stackup and impedance report |
| Failure appears only after a PCB revision | Layer, geometry, connector, or return-path change | CAD/Gerber diff and revised stackup |
| EMI increases after rerouting | Return path or common-mode conversion | Layout inspection and emissions comparison |
| TDR coupon passes but equipment fails | Circuit or transition problem outside the coupon | Actual interface waveform and component implementation |
| Only one port fails on a multi-channel design | Local placement, routing, soldering, or component fault | Port-to-port comparison and assembly inspection |
A passing coupon confirms the representative fabricated transmission-line structure. It does not prove that every connector pad, transformer footprint, via transition, termination network, cable, receiver, and clock-recovery circuit performs correctly.
What Should Be Verified Before Fabrication Release?
Use a staged release rather than waiting for assembled hardware to discover an impedance problem.
First, freeze the electrical topology: transmitter/receiver device, termination, transformer where used, connector and protection components. Next, obtain a realistic fabrication stackup and calculate the 110Ω pair from that construction. Route the interface without stubs or uncontrolled plane crossings, then run the normal DFM review.
Before releasing production files, make sure the fabrication notes identify which nets or layers require impedance control. If TDR verification is required, agree with the manufacturer on the coupon design, target, tolerance, reporting method, and whether test data must accompany every lot.
This is also where a high-frequency PCB manufacturing workflow can be useful—not because AES3 is a microwave interface, but because controlled impedance requires disciplined stackup and verification.
What Evidence Should Procurement Request From the PCB Supplier?
The strongest supplier question is not “Do you make AES/EBU PCBs?” It is “Can you manufacture this specific controlled-impedance construction and show that the agreed requirement was met?”
For supplier comparison and release, request the proposed production stackup before fabrication, confirmation of the controlled-impedance layers and geometry, the impedance target and manufacturing tolerance, and the agreed verification method. Where the project requires it, include coupon/TDR results, material identification, finished board thickness information, and other inspection records in the purchase specification.
Do not assume that TDR testing, cross-section reports, material certificates, or impedance reports are standard deliverables for every order. Define required evidence in the RFQ and purchase documentation.
AES/EBU PCB Release Gate
A design is ready to release when engineering and procurement can answer all of these questions:
- Is the selected interface the balanced AES3 implementation for which the 110Ω requirement applies?
- Does the schematic follow the transmitter/receiver and transformer manufacturers' recommended topology?
- Has the pair geometry been calculated from the intended production stackup rather than a generic example?
- Can the supplier fabricate that geometry with an agreed impedance tolerance?
- Does the route avoid unnecessary stubs, plane crossings, and uncontrolled transitions?
- Are the connector, transformer, and termination placements reviewed as part of the transmission path?
- Is the required fabrication evidence defined before the purchase order?
- Is there a separate product-level test plan for AES3 interoperability and receiver performance?
What Should You Send for an AES/EBU PCB RFQ?
A useful RFQ gives the PCB manufacturer enough information to review feasibility without asking it to reverse-engineer the electrical intent.
Send the fabrication data, drawing, required layer count and finished thickness, proposed or required material family, and the controlled-impedance specification. Identify the AES3 differential nets and layers clearly and state the nominal 110Ω requirement plus the project-approved tolerance rather than assuming a universal fabrication tolerance.
Also specify whether the manufacturer may adjust trace geometry to compensate for its production stackup and whether those adjustments require your approval before fabrication.
For quotation, include prototype or production quantity and explicitly request any evidence needed for release, such as impedance test results or stackup confirmation. You can submit the package through the PCB quote page.
FAQ
Does an AES/EBU PCB need backdrilling?
Usually not for AES3 alone. Backdrilling should be justified by the actual via structure and signal-integrity analysis, not added automatically because a PCB carries digital audio. A thick board containing other much faster interfaces may have separate reasons to control via stubs.
Can AES3 and S/PDIF use the same PCB routing rule?
No. They may transport closely related digital audio data, but their electrical interfaces are different. Balanced professional AES3 uses a nominal 110Ω environment; consumer S/PDIF is normally an unbalanced 75Ω interface. Design the physical layer for the interface actually implemented.
Should the XLR shield connect directly to digital ground?
That is a product-level grounding and EMC decision, not a universal PCB fabrication rule. Chassis, shield, signal-ground, safety, and EMC strategy should be defined for the equipment architecture rather than improvised during PCB routing.
Do I need a controlled-impedance coupon on every order?
Only if your engineering or quality plan requires it. The appropriate sampling and reporting plan depends on product risk, supplier process control, lot requirements, and the evidence needed for release.
Can a PCB manufacturer certify that my product is AES3 compliant?
PCB manufacturing evidence can demonstrate conformity to specified board parameters such as construction and controlled impedance. AES3 interoperability and finished-product qualification require system-level verification beyond bare-board fabrication.
From Controlled-Impedance PCB to Qualified AES3 Product
A reliable AES/EBU PCB starts with a simple boundary: 110Ω is a transmission-line requirement, not a complete design specification. The engineer must select the proper AES3 interface circuit and validate the finished equipment; the fabricator must build the approved stackup and controlled geometry; procurement and quality must define what evidence is required to release each build.
When those responsibilities are explicit, material selection becomes easier, supplier comparisons become objective, and troubleshooting moves from guesswork to measurable evidence.
For projects that require controlled-impedance fabrication, review APTPCB's manufacturing capabilities and include the stackup, 110Ω requirement, affected layers, quantity, and required verification records in your RFQ.