Key Takeaways
Reliability testing is the final gatekeeper before a product reaches the customer, and establishing a robust profile is critical for success.
- Definition: Burn in profiling is the systematic characterization of thermal and electrical stress applied to a PCB to precipitate early failures.
- Core Goal: It aims to eliminate "infant mortality" defects described by the bathtub curve before shipping.
- Key Metrics: Temperature ramp rates, dwell times, and voltage margins are the primary variables that define a successful profile.
- Misconception: It is not simply "baking" a board; it requires active monitoring and dynamic electrical loads.
- Integration: Effective profiling works best when combined with fct coverage planning to ensure functional logic is tested under stress.
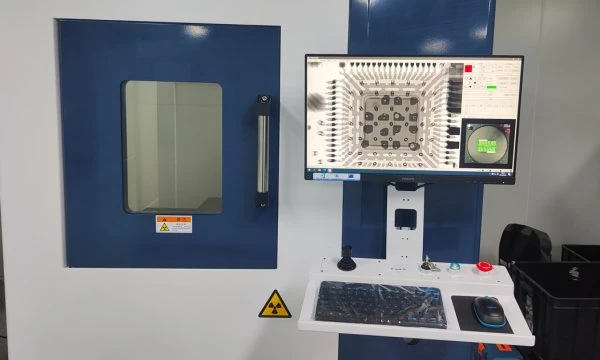
- Validation: A profile must be validated using "golden units" and thermal couples to ensure no components are overstressed.
- Partnering: Working with a manufacturer like APTPCB (APTPCB PCB Factory) ensures your profiles match production capabilities.
What burn in profiling really means (scope & boundaries)
Having established the core takeaways, we must first define the specific boundaries and technical scope of this process.
Burn in profiling is the engineering process of designing a specific set of environmental and electrical conditions that a Printed Circuit Board Assembly (PCBA) must endure to verify reliability. Unlike a standard functional test which checks if a board works at room temperature, burn-in testing forces the board to operate under elevated stress. The "profiling" aspect refers to the precise curve of temperature over time, the sequence of power application, and the duration of exposure.
The scope of this process includes three distinct phases:
- Thermal Characterization: Determining the safe maximum and minimum temperatures for the specific Bill of Materials (BOM).
- Electrical Stress Definition: Deciding on voltage margins (often Vcc + 10%) and clock speeds to stress silicon dies.
- Time-Duration Analysis: Calculating the necessary duration to statistically cover the infant mortality period without eating into the useful life of the product.
It is important to distinguish this from HALT (Highly Accelerated Life Testing). HALT is a destructive test used during design to find breaking points. Burn in profiling is a non-destructive screening process used in production (HASS - Highly Accelerated Stress Screening) to filter out weak units.
At APTPCB, we emphasize that a profile is not static. It evolves based on yield data. If zero failures occur over six months, the profile might be too lenient. If healthy boards are failing due to thermal overstress, the profile is too aggressive.
Metrics that matter (how to evaluate quality)
Once the scope is defined, engineers must quantify the stress levels using specific, measurable data points.
A burn in profile is only as good as the metrics used to control it. Without precise measurement, you risk damaging good product or passing bad product. The following table outlines the critical metrics that must be defined in your engineering documentation.
| Metric | Why it matters | Typical range or influencing factors | How to measure |
|---|---|---|---|
| Chamber Ambient Temperature | Defines the baseline thermal stress applied to the assembly. | 85°C to 125°C (Industrial/Auto). Consumer may be lower (50°C-70°C). | Calibrated chamber sensors placed near the Device Under Test (DUT). |
| Junction Temperature (Tj) | The actual temperature inside the silicon die, which is the failure point. | Must stay below the absolute max rating (e.g., 150°C) but high enough to accelerate defects. | Thermal diodes on the chip or calculated via Theta-JA and power dissipation. |
| Temperature Ramp Rate | Rapid changes in temperature cause mechanical stress on solder joints (CTE mismatch). | 5°C/min to 20°C/min. Higher rates increase mechanical stress screening. | Thermocouples attached to the PCB surface during profile validation. |
| Dwell Time | The duration the board sits at the target temperature to ensure thermal saturation. | 15 minutes to 48 hours. Depends on the thermal mass of the PCB. | Timer controls synchronized with thermal sensors. |
| Voltage Margin (V-margin) | Running at higher/lower voltages stresses transistor gates and exposes weak oxides. | ±5% to ±10% of nominal voltage. | Programmable Power Supplies (PPS) with read-back capability. |
| Current Consumption (Idd) | Changes in current draw under stress indicate internal shorts or degradation. | Baseline ±10%. Spikes indicate latch-up or soft failures. | Precision shunts or Hall effect sensors on power rails. |
| Airflow Velocity | Ensures heat is removed from high-power components to prevent runaway. | 200 to 600 LFM (Linear Feet per Minute). | Anemometers placed in the airflow path. |
| Signal Integrity (Eye Height) | Verifies that high-speed signals remain valid under thermal stress. | Must meet interface standards (PCIe, DDR) at max temp. | Oscilloscopes connected via high-temp probes (during validation). |
Selection guidance by scenario (trade-offs)
Understanding the metrics allows us to select the appropriate profiling strategy based on the specific industry and product requirements.
Not all PCBs require the same level of scrutiny. A toy drone does not need the same burn in profiling as an automotive airbag controller. Selecting the right profile involves balancing cost, throughput, and reliability risk.
Scenario 1: Automotive Safety Critical (ADAS/ECU)
- Profile Type: Dynamic Burn-In with Temperature Cycling.
- Conditions: High temperatures (125°C), active software loops, voltage margining.
- Trade-off: Extremely high cost and long test time (24-48 hours).
- Why: Zero defects are acceptable. The cost of a recall exceeds the cost of testing.
Scenario 2: High-End Consumer Electronics (Laptops/Phones)
- Profile Type: Static or Low-Load Burn-In.
- Conditions: Moderate temperature (60°C-80°C), constant power, limited functional monitoring.
- Trade-off: Moderate cost, faster throughput (4-8 hours).
- Why: Balances warranty costs against production volume.
Scenario 3: Aerospace & Defense
- Profile Type: HASS (Highly Accelerated Stress Screening).
- Conditions: Extreme rapid thermal ramps (>20°C/min), multi-axis vibration combined with thermal.
- Trade-off: High risk of damaging good units if the profile is not perfectly tuned. Very expensive fixtures.
- Why: Equipment must survive harsh environments; infant mortality must be eliminated entirely.
Scenario 4: Medical Devices (Class III)
- Profile Type: Monitored Dynamic Burn-In.
- Conditions: Stable elevated temperature, continuous logging of leakage currents and sensor accuracy.
- Trade-off: High documentation burden and validation time.
- Why: Regulatory compliance (FDA) and patient safety are paramount.
Scenario 5: Industrial Controllers (PLC)
- Profile Type: Power Cycling.
- Conditions: Repeatedly turning the unit on and off at elevated temperatures.
- Trade-off: Stresses power supplies and capacitors more than logic.
- Why: Failures in industrial settings are often due to power surges or startup stress.
Scenario 6: Low-Cost IoT Devices
- Profile Type: Sample-Based Burn-In.
- Conditions: Only 5-10% of the production lot undergoes burn-in.
- Trade-off: Risk of some early failures reaching the market.
- Why: Unit cost is too low to justify 100% burn-in. Relies on statistical process control.
From design to manufacturing (implementation checkpoints)

After selecting the appropriate scenario, the focus shifts to the tactical execution of the profile throughout the product lifecycle.
Implementing burn in profiling is not something that happens only at the factory. It starts during the PCB design phase. If the board is not designed for testability, profiling will be inaccurate or impossible.
The following checkpoints guide you from the initial design file to the final manufacturing floor.
1. Thermal Simulation (Design Phase)
- Recommendation: Use CFD (Computational Fluid Dynamics) software to predict hotspots.
- Risk: Without this, the burn-in oven might overheat specific components (like power FETs) beyond their absolute max, causing false failures.
- Acceptance: Simulation shows all Tj (Junction Temperatures) < Max Rating at the burn-in ambient temp.
2. Component Selection (BOM Phase)
- Recommendation: Ensure all components are rated for the burn-in temperature.
- Risk: Using commercial grade (0°C-70°C) parts in an industrial burn-in (85°C) will destroy them.
- Acceptance: BOM review confirms industrial or automotive grade parts where necessary.
3. Test Point Strategy (Layout Phase)
- Recommendation: Place test points for critical voltage rails and "heartbeat" signals accessible to pogo pins.
- Risk: Inability to monitor the device status during the burn-in cycle.
- Acceptance: DFM guidelines are followed to ensure test point accessibility.
4. Burn-In Board (BIB) Design
- Recommendation: Design a robust carrier board (BIB) that can withstand thousands of thermal cycles. Use high-temp laminates (like Polyimide or high-Tg FR4).
- Risk: The test fixture fails before the product does.
- Acceptance: BIB material Tg > Burn-in Temp + 20°C.
5. FCT Coverage Planning
- Recommendation: Integrate fct coverage planning into the burn-in logic. The firmware running during burn-in should exercise as many memory blocks and peripherals as possible.
- Risk: The chip gets hot, but the logic gates inside are not actually switching, leaving defects undetected.
- Acceptance: Code coverage analysis shows >90% of active logic is toggled during the loop.
6. Flying Probe Pre-Screening
- Recommendation: Utilize flying probe best practice to test for shorts/opens before placing boards in the burn-in oven.
- Risk: A shorted board could catch fire or damage the expensive burn-in socket.
- Acceptance: 100% of boards pass isolation tests before burn-in.
7. Profile Validation (First Article)
- Recommendation: Instrument a "Golden Unit" with thermocouples to verify the actual profile matches the oven settings.
- Risk: The air is 85°C, but the heavy copper ground planes keep the board at 60°C (insufficient stress).
- Acceptance: Thermal profile data matches the theoretical target within ±2°C.
8. Data Logging Infrastructure
- Recommendation: Ensure the manufacturing database can log serial numbers against burn-in results.
- Risk: Loss of traceability. If a field failure occurs, you cannot verify if that specific unit passed burn-in.
- Acceptance: Database successfully records Pass/Fail/Log for every serial number.
9. Socket Maintenance Plan
- Recommendation: Burn-in sockets degrade over time due to heat and oxidation.
- Risk: False failures due to poor contact resistance.
- Acceptance: Schedule defined for socket cleaning or replacement (e.g., every 5,000 cycles).
10. Cool Down Procedure
- Recommendation: Control the cooling ramp rate just as strictly as the heating ramp.
- Risk: Thermal shock cracking ceramic capacitors (MLCCs) if cooled too fast.
- Acceptance: Cool down rate < 5°C/minute.
Common mistakes (and the correct approach)
Even with a rigorous checklist, engineering teams often fall into specific traps that undermine the effectiveness of the profiling process.
Experience at APTPCB has shown that many "reliability failures" are actually "test process failures." Avoiding these common pitfalls saves time and money.
The "Set and Forget" Mentality
- Mistake: Defining a profile once and never updating it.
- Correction: Review field return data quarterly. If infant mortality exists in the field, the burn-in is too weak. If yield is too low but parts are functional, the burn-in is too harsh.
Ignoring Self-Heating
- Mistake: Setting the oven to the maximum component rating (e.g., 85°C) without accounting for the heat generated by the device itself.
- Correction: Calculate: $T_{ambient} = T_{max_junction} - (Power \times \theta_{JA})$. The oven must be cooler than the max rating to allow for self-heating.
Static vs. Dynamic Confusion
- Mistake: Applying power but no clock signals (Static Burn-In) for CMOS devices.
- Correction: CMOS only stresses when switching. Use Dynamic Burn-In to effectively screen modern ICs.
Insufficient Airflow
- Mistake: Densely packing boards in the chamber, blocking airflow.
- Correction: Ensure spacing allows turbulent airflow across all surfaces. Verify with an anemometer during setup.
Overlooking Moisture Sensitivity
- Mistake: Taking boards from cold storage directly to a hot burn-in oven.
- Correction: Follow MSL (Moisture Sensitivity Level) guidelines. Bake boards to remove moisture before high-temp stress to prevent "popcorning."
Poor Socketing
- Mistake: Using cheap sockets that oxidize at high temperatures.
- Correction: Invest in high-quality, high-temp rated test sockets (e.g., PEEK material with gold-plated pogo pins).
Lack of Diagnostics
- Mistake: The system reports "FAIL" but gives no data on why.
- Correction: The burn-in software must log exactly which test failed, at what temperature, and at what time.
Skipping the Control Group
- Mistake: Not keeping a set of golden units to verify the test rig itself.
- Correction: Run known good units periodically to ensure the test equipment hasn't drifted.
FAQ
To further clarify the nuances of burn in profiling, here are answers to the most frequently asked questions from our clients.
Q: How long should a burn-in cycle last? A: It depends on the reliability goal. A typical range is 4 to 48 hours. For high-reliability automotive parts, it might be longer. The duration should be determined by Weibull analysis of failure rates.
Q: Is burn-in destructive? A: It is intended to be non-destructive to "good" parts but destructive to "weak" parts. If a part fails burn-in, it is scrapped. The surviving parts are considered reliable.
Q: Can I use my reflow oven for burn-in? A: Generally, no. Reflow ovens are designed for short, high-heat spikes (soldering). Burn-in ovens are designed for long-duration, stable temperature holds with electrical connections to the boards.
Q: What is the difference between Burn-In and Run-In? A: Burn-In usually implies elevated temperature and stress. Run-In often refers to running the device at room temperature for a period to check for basic assembly errors, often without the extra thermal stress.
Q: Does burn-in reduce the life of the product? A: Technically, yes, it uses up a small fraction of the component's life. However, this fraction is negligible compared to the total lifespan (e.g., 24 hours vs. 10 years), and the benefit of removing early failures outweighs this cost.
Q: How much does burn in profiling add to the cost? A: It adds cost in three ways: energy consumption, equipment depreciation, and time (WIP inventory). However, for complex PCB manufacturing services, the cost of a field failure is often 10x to 100x the cost of the test.
Q: Do I need burn-in for prototypes? A: Usually not. Prototypes are for design verification. Burn-in is a production process for process control and reliability screening.
Q: What happens if the power goes out during burn-in? A: The profile is compromised. Most quality standards require the cycle to be restarted or at least extended to ensure the total time at temperature is met.
Q: Can I do burn-in at the wafer level? A: Yes, WLBI (Wafer Level Burn-In) is common for semiconductor manufacturers. However, board-level burn-in is still needed to catch soldering and assembly defects.
Q: How do I determine the acceleration factor? A: The Arrhenius equation is typically used to calculate how much time is saved by increasing temperature. It models the acceleration of chemical degradation processes.
Related pages & tools
For those looking to deepen their understanding of PCB reliability and manufacturing, the following resources are essential.
- PCB Manufacturing Services: Explore how APTPCB integrates testing into the production line.
- DFM Guidelines: Learn how to design your board to survive burn-in and testing.
- Impedance Calculator: Ensure your traces maintain integrity even under thermal variation.
Glossary (key terms)
The following table defines the specialized terminology used throughout this guide.
| Term | Definition |
|---|---|
| Infant Mortality | Failures that occur very early in a product's life, usually due to manufacturing defects. |
| Bathtub Curve | A graph showing failure rates over time: high at the start (infant mortality), low in the middle (useful life), and high at the end (wear out). |
| DUT | Device Under Test. The PCBA or component currently undergoing the burn-in process. |
| BIB | Burn-In Board. A specialized PCB used to hold multiple DUTs inside the oven and provide electrical connections. |
| ESS | Environmental Stress Screening. A broad category of tests including burn-in, vibration, and thermal cycling. |
| HALT | Highly Accelerated Life Testing. A destructive test used during design to find weak points. |
| HASS | Highly Accelerated Stress Screening. A production screen derived from HALT limits to filter defects. |
| Arrhenius Equation | A formula used to calculate the acceleration factor of reliability testing based on temperature. |
| Thermal Runaway | A positive feedback loop where rising temperature causes rising current, which causes further temperature rise, leading to destruction. |
| Soak Time | The time required for the entire mass of the DUT to reach the target temperature of the chamber. |
| Golden Unit | A known good unit used to verify that the test equipment and profile are functioning correctly. |
| Electromigration | The gradual movement of ions in a conductor due to current density, accelerated by high temperatures. |
| Popcorning | Damage caused when moisture trapped inside a component turns to steam during rapid heating. |
Conclusion (next steps)
Burn in profiling is not merely a manufacturing step; it is a strategic commitment to quality. By systematically applying thermal and electrical stress, you transform the theoretical reliability of a design into the proven durability of a shipped product.
To implement a successful profile, remember to:
- Define your metrics (Temperature, Voltage, Time) based on the specific environment your product will face.
- Integrate testability into the design phase (Test points, Thermal simulation).
- Validate the profile with physical measurements on Golden Units.
- Continuously monitor yield data to refine the parameters.
When you are ready to move from prototype to mass production, providing clear requirements is essential. When requesting a quote from APTPCB, please include your Gerber files, stackup details, and specifically your burn-in requirements (temperature range, duration, and electrical load). This allows us to plan the appropriate fixtures and oven capacity for your project.
Reliability is engineered, not accidental. Contact APTPCB today to discuss how we can ensure your products stand the test of time.