Key Takeaways
- Definition: Co-packaged optics baseboard quality refers to the signal integrity, thermal stability, and mechanical flatness of the PCB substrate hosting both the ASIC and optical engine.
- Critical Metrics: Insertion loss at high frequencies (112G/224G PAM4) and warpage control are the two most significant quality indicators.
- Material Selection: Standard FR-4 is insufficient; ultra-low loss materials (like Megtron 8 or Rogers) are mandatory for CPO applications.
- Thermal Management: Quality is often determined by the board's ability to dissipate heat from the ASIC without affecting the temperature-sensitive optical components.
- Manufacturing Precision: Layer registration and backdrilling depth accuracy must be tighter than standard IPC Class 3 requirements.
- Validation: Testing must move beyond standard electrical continuity to include TDR (Time Domain Reflectometry) and VNA (Vector Network Analysis) measurements.
- Assembly Impact: The flatness of the baseboard directly dictates the yield of the
Co-packaged optics baseboard assemblyprocess.
What “nal pluggable optics where the transceiver is at the faceplate, Co-packaged Optics (CPO) baseboard quality” means (scope & boundaries)
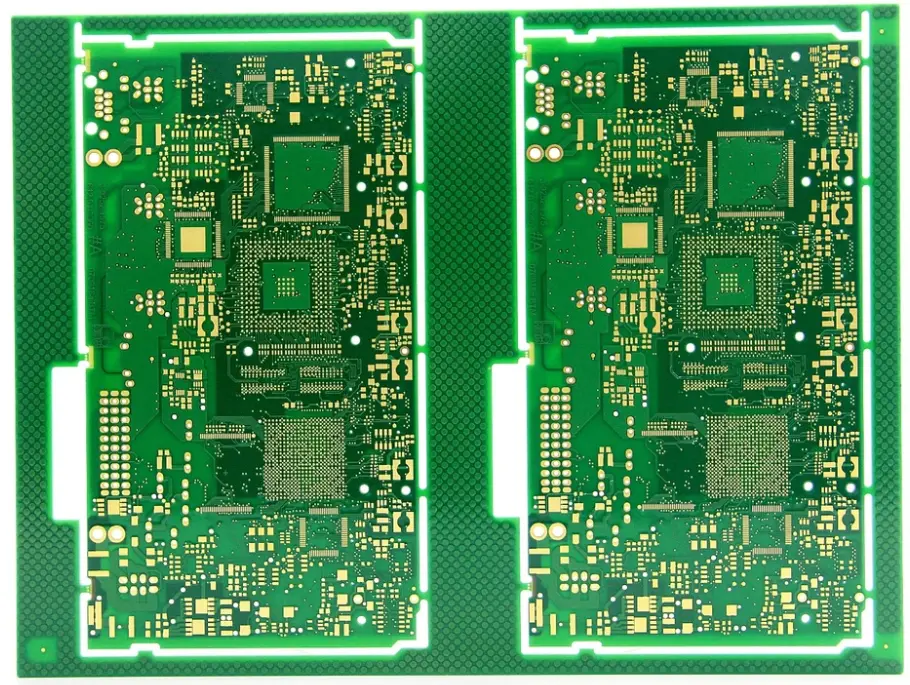
To understand the specific requirements of this technology, we must first define the scope of Co-packaged optics baseboard quality. Unlike traditional pluggable optics where the transceiver is at the faceplate, Co-packaged Optics (CPO) moves the optical engine onto the same substrate as the switch ASIC. This shift fundamentally changes the role of the baseboard (PCB).
The baseboard is no longer just a carrier for power and low-speed signals. It becomes an integral part of the high-speed optical link. Quality in this context is defined by the board's ability to support extreme data rates (often 51.2 Tbps or higher per chip) while maintaining mechanical rigidity under significant thermal stress.
At APTPCB (APTPCB PCB Factory), we define CPO baseboard quality through three primary lenses:
- Signal Integrity: The ability to transmit high-frequency signals over short distances with minimal attenuation.
- Thermal Reliability: The capacity to handle the heat flux from a high-power ASIC while keeping optics cool.
- Mechanical Stability: The resistance to warping during reflow, which is critical for the precise alignment of optical fibers and interposers.
If a manufacturer cannot guarantee tight impedance control and flatness, the Co-packaged optics baseboard will fail, regardless of the quality of the chips mounted on it.
Metrics that matter (how to evaluate quality)
Building on the definition of scope, we must quantify quality using specific, measurable data points. The following table outlines the critical metrics used to evaluate Co-packaged optics baseboard quality.
| Metric | Why it matters | Typical range or influencing factors | How to measure |
|---|---|---|---|
| Insertion Loss (IL) | High loss degrades the signal before it reaches the optical engine, causing bit errors. | < 0.8 dB/inch @ 56 GHz (depending on material). | Vector Network Analyzer (VNA). |
| Differential Impedance | Mismatches cause signal reflections (return loss), reducing effective bandwidth. | 85Ω or 100Ω ± 5% (tighter than standard ±10%). | TDR (Time Domain Reflectometry). |
| Board Warpage (Bow/Twist) | Excessive warpage prevents proper seating of the large ASIC and optical engines during assembly. | < 0.5% (often < 0.1% for CPO interposers). | Shadow Moiré Interferometry. |
| CTE (z-axis) | High expansion breaks plated through-holes (PTH) and microvias during thermal cycling. | < 40 ppm/°C (below Tg); Material choice is key. | TMA (Thermomechanical Analysis). |
| Registration Accuracy | Misalignment of layers ruins the signal path in high-density interconnects (HDI). | ± 25µm or better for advanced builds. | X-Ray Inspection. |
| Surface Roughness | Rough copper creates "skin effect" losses at high frequencies (100G+). | < 2µm (Rz); Use HVLP or VLP copper foil. | Profilometer / SEM. |
| Thermal Conductivity | Heat must move away from the ASIC efficiently to prevent optical degradation. | > 0.6 W/mK (dielectric); Copper balance is vital. | Laser Flash Method. |
| Glass Transition (Tg) | Determines the temperature where the board becomes mechanically unstable. | > 180°C (High Tg required for lead-free assembly). | DSC (Differential Scanning Calorimetry). |
Selection guidance by scenario (trade-offs)
Once you understand the metrics, the next step is selecting the right materials and stackups for your specific application. There is no "one size fits all" for Co-packaged optics baseboard quality. Different scenarios require prioritizing different attributes.
Scenario 1: The Ultra-High Speed Core (224G SerDes)
- Priority: Signal Integrity.
- Trade-off: Cost is secondary.
- Guidance: You must use the lowest loss materials available. Standard high-speed laminates may not suffice. Look for materials with a Dissipation Factor (Df) of 0.002 or lower.
- Recommended Material: Panasonic Megtron 8 or similar advanced laminates.
- Design Focus: Shortest possible trace lengths and backdrilling are mandatory.
Scenario 2: The High-Density Data Center Switch
- Priority: Routing Density and Layer Count.
- Trade-off: Manufacturing complexity increases.
- Guidance: These boards often exceed 40 layers. The challenge is registration. You need a manufacturer capable of advanced HDI (High Density Interconnect) with multiple lamination cycles.
- Design Focus: Use Any-Layer HDI or stacked microvias to route signals out of the dense ASIC BGA.
Scenario 3: The Cost-Sensitive Enterprise Edge
- Priority: Balance between Performance and Price.
- Trade-off: Slightly higher insertion loss is acceptable for shorter traces.
- Guidance: You might use a hybrid stackup. Use expensive low-loss material for the high-speed signal layers and standard FR-4 for power/ground layers to reduce total BOM cost.
- Design Focus: Careful stackup planning to prevent warpage due to mixed materials (CTE mismatch).
Scenario 4: The High-Thermal Load Environment
- Priority: Heat Dissipation.
- Trade-off: Signal routing space is reduced by thermal vias.
- Guidance: The baseboard must act as a heat spreader. Heavy copper weights (2oz or more) on inner layers help, but they make etching fine lines harder.
- Design Focus: Incorporate coin embedding or extensive thermal via farms under the ASIC.
Scenario 5: The Compact Optical Module
- Priority: Miniaturization.
- Trade-off: Repairability is near zero.
- Guidance: Requires extremely fine lines and spaces (30µm/30µm). This pushes the boundary of subtractive PCB manufacturing and may require mSAP (Modified Semi-Additive Process).
- Design Focus: Strict
Co-packaged optics baseboard designrules regarding annular rings and pad sizes.
Scenario 6: Prototype and R&D Validation
- Priority: Speed of Fabrication.
- Trade-off: Material availability may dictate the build.
- Guidance: Use materials that are in stock. While they might not match the final production spec perfectly, they allow for functional logic testing.
- Design Focus: Design with wider margins to accommodate material substitution if necessary.
From design to manufacturing (implementation checkpoints)
Selecting the scenario sets the strategy, but rigorous checkpoints during the manufacturing process ensure the final Co-packaged optics baseboard quality. This section details the journey from digital file to physical board.
1. Stackup Verification
- Recommendation: Validate impedance calculations using a field solver before starting fabrication.
- Risk: Incorrect dielectric thickness leads to impedance mismatch.
- Acceptance: Impedance Calculator results match the fabrication drawing within ±5%.
2. Material Preparation
- Recommendation: Bake materials to remove moisture before lamination.
- Risk: Delamination or "measling" during high-temperature reflow.
- Acceptance: Moisture content checks and adherence to manufacturer storage guidelines.
3. Inner Layer Imaging
- Recommendation: Use Laser Direct Imaging (LDI) for trace widths below 3 mil.
- Risk: Traditional film exposure cannot resolve the fine lines required for CPO routing.
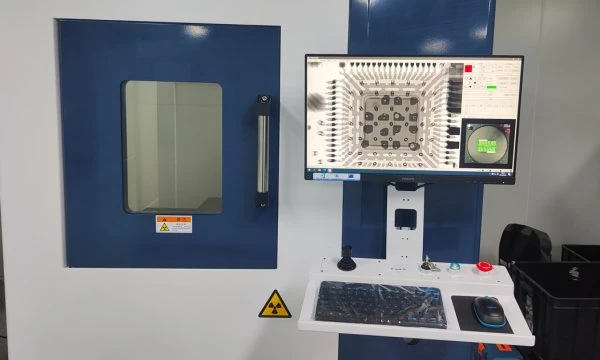
- Acceptance: Automated Optical Inspection (AOI) showing no opens, shorts, or "dish-down" defects.
4. Lamination and Registration
- Recommendation: Use X-ray alignment systems for high-layer count boards (20+ layers).
- Risk: Layer-to-layer misalignment causes drill breakout, severing connections.
- Acceptance: X-ray drill coupons showing registration within tolerance (typically < 2 mil).
5. Drilling and Backdrilling
- Recommendation: Backdrill all high-speed vias to remove stubs.
- Risk: Via stubs act as antennas, causing severe signal resonance and loss.
- Acceptance: Cross-section analysis verifying stub length is less than 6-8 mils (or as specified).
6. Plating (Via Filling)
- Recommendation: Use VIPPO (Via-in-Pad Plated Over) for BGA areas.
- Risk: Dimples in pads cause voids in the solder joints of the ASIC.
- Acceptance: IPC Class 3 plating thickness requirements (typically average 25µm).
7. Surface Finish Application
- Recommendation: ENEPIG or Immersion Silver are preferred for high-frequency applications.
- Risk: ENIG can sometimes lead to "black pad" or higher insertion loss due to nickel thickness.
- Acceptance: XRF measurement of gold/palladium/nickel thickness.
8. Electrical Testing
- Recommendation: Perform 4-wire Kelvin testing for critical nets.
- Risk: Standard flying probe tests might miss high-resistance latent defects.
- Acceptance: 100% Pass on netlist comparison.
9. Warpage Measurement
- Recommendation: Measure flatness at room temperature and reflow temperature.
- Risk: Board bows during assembly, causing open joints on the large ASIC package.
- Acceptance: Warpage meets the specific
Co-packaged optics baseboard checklistcriteria (usually < 0.1% for the ASIC area).
10. Final Visual Inspection
- Recommendation: Inspect under high magnification for solder mask encroachment on pads.
- Risk: Mask on pads prevents proper soldering.
- Acceptance: Compliance with IPC-A-600 Class 3 standards.
Common mistakes (and the correct approach)
Even with a solid plan, errors can occur. Here are common pitfalls in Co-packaged optics baseboard best practices and how to avoid them.
Mistake 1: Ignoring the Fiber Weave Effect
- The Error: Using standard glass weave styles (like 106 or 7628) for high-speed differential pairs.
- The Consequence: One leg of the differential pair travels over glass, the other over resin, causing skew and signal degradation.
- The Fix: Specify "spread glass" or mechanically rotate the design 10 degrees relative to the panel weave.
Mistake 2: Underestimating Copper Balance
- The Error: Designing layers with uneven copper distribution (e.g., large copper pours on one side, sparse traces on the other).
- The Consequence: Severe warping during lamination and reflow, making the board unusable for CPO assembly.
- The Fix: Use thieving (dummy copper) to balance the copper density across all layers and the x/y axis.
Mistake 3: Neglecting Thermal Vias in Pad Design
- The Error: Placing thermal vias too far from the heat source or tenting them improperly.
- The Consequence: The ASIC overheats, throttling performance or damaging the nearby optics.
- The Fix: Implement a dense array of filled and capped vias directly under the thermal pads of components.
Mistake 4: Over-reliance on Datasheet Dk/Df Values
- The Error: Using the "marketing" Dk/Df values from a datasheet for simulation.
- The Consequence: Simulation results do not match real-world performance because Dk/Df varies with frequency and resin content.
- The Fix: Request the specific Dk/Df tables for the exact frequency (e.g., 50GHz) and resin content of the prepreg being used.
Mistake 5: Poor Backdrill Depth Control
- The Error: Specifying a backdrill depth that is too close to the functional internal layer.
- The Consequence: The drill cuts into the active trace, destroying the board.
- The Fix: Allow a safety margin (typically 8-10 mils) between the target depth and the functional layer, and choose a manufacturer with high-precision depth control.
Mistake 6: Inadequate Cleanliness
- The Error: Allowing ionic contamination on the board surface.
- The Consequence: Electrochemical migration (dendrite growth) under the tight spacing of CPO components, leading to shorts.
- The Fix: Specify strict ionic cleanliness testing (Rose Test or Ion Chromatography) beyond standard requirements.
FAQ
Following the common mistakes, here are answers to the most frequent questions regarding Co-packaged optics baseboard quality.
Q1: What is the main difference between a standard line card and a CPO baseboard? A standard line card routes signals to the faceplate (pluggable modules). A CPO baseboard routes signals to an optical engine mounted directly next to the ASIC, requiring much higher density and tighter signal integrity controls.
Q2: Why is surface flatness so critical for CPO? CPO assemblies often use large interposers or direct attachment methods. If the baseboard is not flat, the thousands of connection points (bumps) will not make contact simultaneously during reflow, leading to open circuits.
Q3: Can I use FR-4 for Co-packaged optics baseboards? Generally, no. Standard FR-4 has too much signal loss for the 112G or 224G speeds used in CPO. You need Low-Loss or Ultra-Low-Loss materials.
Q4: How does APTPCB handle the backdrilling requirements for CPO? We utilize controlled-depth drilling machines with electrical sensing to ensure the stub is removed without damaging the internal connection.
Q5: What is the typical layer count for these boards? They typically range from 20 to 40+ layers, depending on the switch capacity and routing density.
Q6: How do you test for signal integrity during manufacturing? We use TDR (Time Domain Reflectometry) on test coupons included on the production panel to verify impedance. For insertion loss, specific test structures can be measured.
Q7: Does the choice of surface finish affect signal quality? Yes. Nickel in ENIG can add loss at very high frequencies. Immersion Silver or ENEPIG are often preferred for their better skin-effect performance.
Q8: What information is needed for a DFM review of a CPO baseboard? We need the Gerber files, drill files, IPC netlist, stackup requirements, material specifications, and any special constraints regarding warpage or backdrilling.
Q9: How does glass weave skew affect CPO performance? At high speeds, the difference in dielectric constant between glass and resin causes timing mismatches (skew) in differential pairs. Using spread glass helps mitigate this.
Q10: What is the lead time for manufacturing a CPO baseboard? Due to the complexity (lamination cycles, backdrilling, testing), lead times are longer than standard boards, typically 3-5 weeks depending on material availability.
Related pages & tools
To further assist in your design and procurement process, utilize these resources from APTPCB:
- DFM Guidelines: Detailed rules for designing manufacturable high-speed boards.
- Impedance Calculator: Verify your trace widths and spacing before finalizing the stackup.
- Rogers PCB Materials: Explore high-frequency material options suitable for CPO applications.
Glossary (key terms)
Understanding the terminology is essential for specifying Co-packaged optics baseboard quality.
| Term | Definition |
|---|---|
| ASIC | Application-Specific Integrated Circuit; the main switch chip on the baseboard. |
| Backdrilling | The process of drilling out the unused portion of a plated through-hole (stub) to improve signal integrity. |
| CPO | Co-packaged Optics; integrating optics and silicon in the same package or on the same substrate. |
| CTE | Coefficient of Thermal Expansion; how much a material expands when heated. Mismatches cause reliability issues. |
| Df (Dissipation Factor) | A measure of how much signal energy is lost as heat in the dielectric material. Lower is better. |
| Dk (Dielectric Constant) | A measure of a material's ability to store electrical energy; affects impedance and signal speed. |
| HDI | High Density Interconnect; PCB technology using microvias, blind vias, and buried vias. |
| PAM4 | Pulse Amplitude Modulation 4-level; a modulation scheme used for high-speed data transmission (e.g., 112G). |
| SerDes | Serializer/Deserializer; a functional block that converts parallel data to serial data for high-speed transmission. |
| Skew | The time difference between the arrival of two signals that should be synchronous (e.g., in a differential pair). |
| Stub | The unused portion of a via that acts as an antenna, causing signal reflections. |
| Tg (Glass Transition) | The temperature at which the PCB resin changes from a hard, glassy state to a soft, rubbery state. |
| VIPPO | Via-in-Pad Plated Over; a technology allowing vias to be placed directly in component pads to save space. |
| Warpage | The deviation from flatness of the PCB, critical for the assembly of large BGA packages. |
Conclusion (next steps)
Achieving high Co-packaged optics baseboard quality is not an accident; it is the result of deliberate material selection, precise design, and advanced manufacturing capabilities. As data rates climb toward 1.6T and 3.2T, the margin for error on the baseboard vanishes. The PCB is no longer just a support structure; it is an active component in the signal chain.
To ensure your project succeeds, focus on the metrics that matter: insertion loss, impedance stability, and mechanical flatness. Avoid common mistakes like ignoring glass weave effects or underestimating thermal loads.
When you are ready to move from concept to production, APTPCB is ready to assist. For a comprehensive DFM review and accurate quotation, please provide:
- Complete Gerber files (RS-274X).
- Detailed stackup with material specifications (e.g., Megtron 7/8).
- Drill files including backdrill definitions.
- Impedance requirements and test coupons.
- Warpage and tolerance specifications.
By partnering with an experienced manufacturer, you ensure that your Co-packaged optics baseboard design translates into a reliable, high-performance product ready for the demands of next-generation data centers.