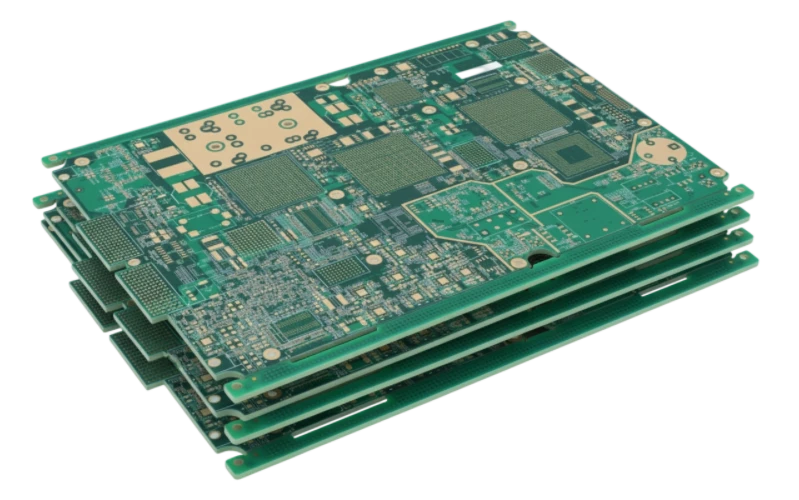
Precision measurement is the backbone of modern industrial and energy systems, and the Efficiency Meter PCB is the critical component that ensures this accuracy. Whether monitoring electrical consumption in a smart grid or analyzing chemical composition in a water treatment plant, the printed circuit board serves as the stable platform for sensitive sensing circuitry. This guide provides a complete roadmap for engineers and procurement managers, moving from initial definitions to final manufacturing validation.
Key Takeaways
Before diving into technical specifications, here are the core concepts that drive successful meter board production.
- Definition Scope: An Efficiency Meter PCB is not limited to power; it includes boards for conductivity, pH, and flicker measurement.
- Signal Integrity is Paramount: Low noise and stable impedance are more critical here than in standard logic boards.
- Material Matters: High-voltage energy meters require high CTI (Comparative Tracking Index) materials, while RF meters need low-loss laminates.
- Environmental Protection: Surface finishes must withstand the specific environment (e.g., corrosive fluids for pH meters).
- Validation is Non-Negotiable: Testing must go beyond standard E-Test to include functional accuracy checks.
- Cost vs. Performance: Over-specifying materials can kill a budget, but under-specifying leads to measurement drift.
- Manufacturing Partner: Early DFM engagement with APTPCB (APTPCB PCB Factory) ensures design intent survives the fabrication process.
What Efficiency Meter PCB really means (scope & boundaries)
Building on the key takeaways, it is essential to define exactly what falls under the umbrella of an Efficiency Meter PCB.
This term refers to a printed circuit board designed specifically for devices that measure the ratio of useful output to total input (efficiency) or related physical parameters. These boards are characterized by their need for high precision, low drift, and often, isolation between high-voltage inputs and low-voltage processing logic.
The scope includes several specialized sub-categories:
- Energy Meter PCB: Measures electrical power consumption. Key requirements include high voltage isolation and thermal stability to prevent measurement drift under load.
- Demand Meter PCB: Tracks peak power usage over time. These often require robust memory integration and reliable clock circuits.
- Conductivity Meter PCB: Used in industrial liquids to measure ionic concentration. These require high surface insulation resistance (SIR) to prevent leakage currents from skewing sensitive analog readings.
- pH Meter PCB: Measures acidity/alkalinity. These deal with extremely high impedance inputs, requiring guard rings and specialized layout techniques to prevent noise coupling.
- Flicker Meter PCB: Analyzes voltage fluctuations. These require high-speed sampling capabilities and excellent signal integrity.
Efficiency Meter PCB metrics that matter (how to evaluate quality)
Once the scope is defined, we must establish the specific metrics that determine if a board is fit for purpose.
Unlike standard consumer electronics, where "works/doesn't work" is the binary standard, an Efficiency Meter PCB is judged on how accurately it works. The following table outlines the critical performance indicators.
| Metric | Why it matters | Typical Range / Factors | How to measure |
|---|---|---|---|
| Comparative Tracking Index (CTI) | Prevents electrical breakdown between tracks under high voltage. | PLC 0 (>600V) for industrial; PLC 3 for consumer. | IEC 60112 standard tracking test. |
| Surface Insulation Resistance (SIR) | Critical for pH and Conductivity meters; prevents leakage. | >10^12 Ohms (humidity dependent). | IPC-TM-650 2.6.3.3 test method. |
| Thermal Coefficient of Expansion (z-axis) | Ensures vias do not crack during thermal cycling in outdoor meters. | < 3.5% (50°C to 260°C). | TMA (Thermomechanical Analysis). |
| Impedance Control Tolerance | Vital for Flicker meters and high-speed data transmission. | ±5% or ±10% depending on frequency. | TDR (Time Domain Reflectometry). |
| Solder Mask Dielectric Strength | Acts as the first line of defense against arcing. | >500V per mil typical. | Hi-Pot testing on finished board. |
| Copper Thickness Consistency | Affects current sensing accuracy in shunt-based meters. | ±10% of nominal thickness. | Cross-section analysis or micro-resistance test. |
How to choose Efficiency Meter PCB: selection guidance by scenario (trade-offs)
Understanding these metrics helps in selecting the right board configuration for your specific application.
There is no "one size fits all" solution. You must balance cost, durability, and precision. Below are common scenarios and the recommended approach for each.
1. Scenario: Smart Grid Energy Meter (Outdoor)
- Priority: High voltage safety and longevity.
- Trade-off: Higher cost for robust materials vs. lower maintenance.
- Selection: Use FR4 with High CTI (>600V). Opt for Heavy Copper PCB if the meter handles high current directly.
- Why: Outdoor environments expose the PCB to humidity and temperature swings; standard FR4 may track or carbonize.
2. Scenario: Handheld pH Meter (Laboratory)
- Priority: Extremely high input impedance and low leakage.
- Trade-off: Layout complexity vs. signal stability.
- Selection: Standard FR4 is acceptable, but requires "Guard Rings" on the outer layers and thorough cleaning before coating.
- Why: pH probes produce millivolt signals at giga-ohm impedance; even a fingerprint can ruin accuracy.
3. Scenario: Industrial Conductivity Meter (Chemical Plant)
- Priority: Corrosion resistance.
- Trade-off: Surface finish cost vs. sensor life.
- Selection: Choose ENIG (Electroless Nickel Immersion Gold) or Hard Gold. Avoid OSP or Silver.
- Why: Harsh chemical vapors can tarnish silver or copper, altering resistance readings.
4. Scenario: High-Frequency Flicker Meter
- Priority: Signal integrity and sampling speed.
- Trade-off: Material cost vs. measurement bandwidth.
- Selection: Consider High Frequency PCB materials (like Rogers) if sampling >1GHz, or high-performance FR4 for lower ranges.
- Why: Standard FR4 loss tangents may attenuate the rapid voltage changes the meter tries to detect.
5. Scenario: Low-Cost Residential Demand Meter
- Priority: Mass production cost.
- Trade-off: Lower precision tolerance vs. volume pricing.
- Selection: Standard TG130-140 FR4, HASL finish, 2-layer stackup.
- Why: Cost is the primary driver; the environment is controlled (indoor), reducing the need for exotic materials.
6. Scenario: Aerospace Power Efficiency Monitor
- Priority: Reliability under vibration and thermal shock.
- Trade-off: High NRE (Non-Recurring Engineering) costs vs. zero failure rate.
- Selection: Polyimide or high-TG FR4 with IPC Class 3 fabrication standards.
- Why: Failure is not an option; the board must survive extreme G-forces.
Efficiency Meter PCB implementation checkpoints (design to manufacturing)

After selecting the right type, the focus shifts to execution to ensure the design is manufacturable.
Use this checklist when moving from the CAD phase to production with APTPCB.
Creepage and Clearance:
- Recommendation: Verify high-voltage traces meet UL/IEC standards (e.g., >3mm for 220V mains).
- Risk: Arcing or safety certification failure.
- Acceptance: DRC (Design Rule Check) report.
Analog/Digital Separation:
- Recommendation: Physically separate the high-voltage metrology section from the low-voltage communication logic.
- Risk: Noise coupling affecting measurement accuracy.
- Acceptance: Visual inspection of ground plane splits.
Surface Finish Selection:
- Recommendation: Use ENIG for flat pads (BGA/QFN) and corrosion resistance. See PCB Surface Finishes for details.
- Risk: Poor solder joints or oxidation affecting sensor contacts.
- Acceptance: Solderability test.
Thermal Management:
- Recommendation: Add thermal vias under current-sensing shunts or power management ICs.
- Risk: Localized heating causing resistance drift.
- Acceptance: Thermal simulation or IR scan on prototype.
Solder Mask Webbing:
- Recommendation: Ensure minimum 4mil solder mask dam between pads.
- Risk: Solder bridging on fine-pitch measurement ICs.
- Acceptance: DFM review report.
Test Points:
- Recommendation: Place test points on all critical power and signal rails for ICT (In-Circuit Test).
- Risk: Inability to calibrate the meter during assembly.
- Acceptance: Test coverage analysis.
Stackup Symmetry:
- Recommendation: Ensure balanced copper distribution to prevent warping.
- Risk: Board bowing, making it difficult to fit into the meter enclosure.
- Acceptance: Bow and twist measurement (<0.75%).
Silkscreen Clarity:
- Recommendation: Ensure polarity marks for CTs (Current Transformers) and capacitors are clear.
- Risk: Reverse installation of polarized components.
- Acceptance: Visual inspection.
Efficiency Meter PCB common mistakes (and the correct approach)
Even with a solid plan, specific errors can derail an Efficiency Meter PCB project.
- Mistake 1: Ignoring Leakage Currents.
- Correction: For pH/Conductivity meters, failing to use guard rings or routing sensitive traces near high-voltage lines allows leakage that mimics the signal. Always guard sensitive nodes.
- Mistake 2: Underestimating Inrush Current.
- Correction: Energy meters often see massive inrush currents. Thin traces will fuse. Use trace width calculators based on IPC-2152 for peak surge, not just average current.
- Mistake 3: Wrong Material for Environment.
- Correction: Using standard FR4 in a high-humidity outdoor meter leads to CAF (Conductive Anodic Filament) growth. Specify CAF-resistant materials.
- Mistake 4: Poor Grounding Strategy.
- Correction: Creating ground loops creates antennas for noise. Use a star ground topology where the analog and digital grounds meet at a single point (usually the power supply).
- Mistake 5: Neglecting Conformal Coating.
- Correction: Assuming the enclosure is enough. Moisture enters everywhere. Plan for PCB Conformal Coating in the design phase (keep keep-out zones clear).
- Mistake 6: Over-reliance on Autorouters.
- Correction: Autorouters do not understand signal sensitivity. Manually route the critical metrology section.
Efficiency Meter PCB FAQ (cost, lead time, materials, testing, acceptance criteria)
To clarify the nuances of avoiding these mistakes, here are answers to the most frequent questions we receive.
1. What factors influence the cost of an Efficiency Meter PCB? The primary cost drivers are the material type (High CTI FR4 vs. Standard), layer count (4-layer is common for noise reduction), and surface finish (ENIG costs more than HASL). High-voltage testing requirements also add a small premium.
2. What is the typical lead time for Efficiency Meter PCB prototypes? Standard prototypes usually take 3-5 days. However, if specialized materials like Rogers (for flicker meters) or heavy copper (for energy meters) are required, lead times may extend to 7-10 days.
3. Which materials are best for high-voltage Energy Meter PCBs? We recommend FR4 materials with a Comparative Tracking Index (CTI) of PLC 0 or PLC 1. This ensures the material resists tracking breakdown at voltages exceeding 600V.
4. How do you perform testing for Efficiency Meter PCB reliability? Beyond standard E-Test (Open/Short), we recommend High Potential (Hi-Pot) testing to verify isolation, and Ionic Contamination testing to ensure the board is clean enough for sensitive pH/conductivity measurements.
5. What are the acceptance criteria for Efficiency Meter PCBs? Acceptance is usually based on IPC-A-600 Class 2 or Class 3 standards. For metering, specific attention is paid to solder mask integrity (no voids) and hole wall quality (no voids in plating) to ensure consistent resistance.
6. Can I use a flexible PCB for a handheld meter? Yes. A Rigid-Flex PCB is often ideal for handheld meters as it allows the sensor head to be angled relative to the display and battery, saving space and improving ergonomics.
7. Why is impedance control important for a Flicker Meter PCB? Flicker meters analyze rapid voltage changes. If the PCB traces do not match the source impedance, signal reflections occur, distorting the waveform and leading to inaccurate flicker calculations.
8. How does copper thickness affect Demand Meter PCB accuracy? If the meter uses a shunt resistor on the PCB to measure current, variations in copper thickness can alter the resistance of the path, introducing thermal errors. Consistent plating is vital.
Resources for Efficiency Meter PCB (related pages and tools)
To further assist in your design process, utilize these related resources:
- DFM Guidelines: Essential for ensuring your layout can be manufactured efficiently. View DFM Guidelines.
- Material Selection: Deep dive into the properties of different laminates. Explore Materials.
- Surface Finishes: Compare ENIG, HASL, and OSP for your specific environment. Compare Finishes.
Efficiency Meter PCB glossary (key terms)
Finally, clear communication requires a shared vocabulary. Here are the essential terms used in this field.
| Term | Definition |
|---|---|
| CAF (Conductive Anodic Filament) | An electrochemical migration of copper along the glass fibers in the PCB, causing shorts. |
| CTI (Comparative Tracking Index) | A measure of the electrical breakdown (tracking) properties of an insulating material. |
| Creepage Distance | The shortest distance between two conductive parts along the surface of the insulation. |
| Clearance Distance | The shortest distance between two conductive parts through the air. |
| Guard Ring | A copper trace connected to a low-impedance voltage source that surrounds a sensitive high-impedance node to absorb leakage. |
| Metrology Section | The specific area of the PCB dedicated to measurement circuits (ADC, sensors, references). |
| Shunt Resistor | A precision resistor used to measure current by measuring the voltage drop across it. |
| SNR (Signal-to-Noise Ratio) | The ratio of the strength of an electrical signal to the background noise. |
| Thermal Drift | The change in measurement accuracy caused by changes in temperature. |
| IPC Class 3 | A manufacturing standard for high-reliability electronics where downtime is not acceptable. |
| Crosstalk | Unwanted signal transfer between communication lines and measurement lines. |
| Galvanic Isolation | Separating electrical circuits to prevent current flow, usually for safety or noise reduction. |
Conclusion (next steps)
From definitions to glossary, this guide covers the lifecycle of the Efficiency Meter PCB. Whether you are designing a high-voltage energy monitor or a sensitive pH analyzer, the principles of isolation, material selection, and rigorous validation remain the same. The difference between a reliable meter and a failing one often lies in the details of the PCB fabrication.
To move forward with your project, prepare the following for your manufacturer:
- Gerber Files: RS-274X format preferred.
- Fabrication Drawing: Specify CTI requirements, copper weight, and surface finish.
- Stackup: Define layer order and impedance constraints.
- Testing Requirements: Specify if Hi-Pot or Ionic Contamination testing is needed.
APTPCB is ready to assist with DFM reviews and precision manufacturing for your metering needs. Contact us today to ensure your next meter measures up to the highest standards.