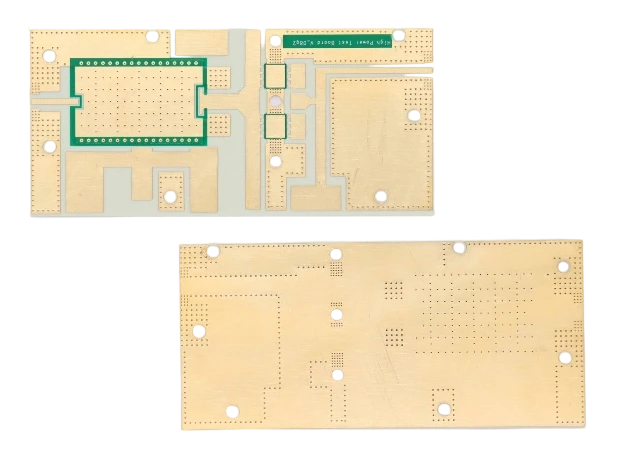
A heat pump pool heater pcb acts as the central nervous system for swimming pool thermal management, coordinating the compressor, fan motor, and expansion valve to transfer heat efficiently. Unlike standard consumer electronics, these boards must survive high humidity, chlorine or salt exposure, and wide temperature fluctuations while switching high-current loads. APTPCB (APTPCB PCB Factory) specializes in manufacturing these ruggedized control boards, ensuring they meet strict safety and durability standards required for outdoor pool equipment.
heat pump pool heater pcb quick answer (30 seconds)
- Moisture Protection is Non-Negotiable: Standard solder mask is insufficient; designs require conformal coating (acrylic or silicone) or full potting to prevent dendritic growth and corrosion.
- High-Current Management: The PCB must handle startup surges from compressors (often 30A–50A) using heavy copper traces (2oz+) or reinforced relay terminals.
- Safety Isolation: Strict creepage and clearance distances (>3mm for 220V/110V) are mandatory between high-voltage AC sections and low-voltage sensor logic.
- Sensor Integration: Inputs must support NTC thermistors (10kΩ/50kΩ) for water/air temp and digital inputs for flow switches and pressure transducers.
- Thermal Cycling: Solder joints must withstand expansion/contraction cycles; use high-Tg FR4 materials to prevent delamination.
- EMI/EMC Compliance: Inverter-driven heat pumps generate significant noise; onboard filtering is required to pass FCC/CE standards and prevent interference with other pool automation.
When heat pump pool heater pcb applies (and when it doesn’t)
Use a dedicated heat pump pool heater pcb when:
- Controlling a Vapor-Compression Cycle: The system uses a refrigerant loop (compressor, evaporator, condenser) to extract heat from the air.
- Managing Variable Loads: The design involves an inverter drive to modulate compressor speed for higher efficiency (COP).
- Integrating Safety Interlocks: The system requires hardware-level shutoffs for low water flow, high refrigerant pressure, or freezing temperatures.
- Outdoor Installation: The electronics reside in an enclosure exposed to ambient weather, requiring robust environmental protection.
- Smart Connectivity: The unit needs to communicate via RS485/Modbus with a central pool automation system or Wi-Fi module.
Do not use this specific PCB type when:
- Direct Electric Resistance Heating: Simple resistive heaters require different power switching topologies (SSR banks) rather than compressor logic.
- Gas-Fired Heaters: Gas heaters rely on ignition control modules and flame rectification circuits, which differ significantly from heat pump logic.
- Passive Solar Heating: Solar systems typically use simple differential controllers to toggle a valve, requiring much simpler logic than a heat pump controller.
- Standard Pool Pump Control: While related, a standalone variable speed pool pump pcb focuses on motor commutation rather than thermodynamic cycle management.
heat pump pool heater pcb rules and specifications (key parameters and limits)

Adhering to specific design rules ensures the longevity of the heat pump pool heater pcb in harsh chemical environments.
| Rule / Parameter | Recommended Value / Range | Why it matters | How to verify | If ignored |
|---|---|---|---|---|
| Base Material | FR4, Tg ≥ 150°C | Prevents warping and barrel cracking during thermal cycling. | Check datasheet (IPC-4101). | Pad cratering or via failure after one season. |
| Copper Weight | 2oz (70µm) or 3oz | Reduces resistance and heat in high-current paths (compressor/fan). | Microsection analysis. | Trace overheating, voltage drop, fire risk. |
| Conformal Coating | Acrylic (AR) or Silicone (SR) | Blocks moisture, chlorine, and salt fog from corroding traces. | UV light inspection (fluorescing). | Short circuits, dendritic growth, early failure. |
| Creepage Distance | ≥ 3.0mm (HV to LV) | Prevents arcing between AC mains and sensitive sensor lines. | CAD DRC & Hi-Pot testing. | Safety hazard, destroyed microcontroller. |
| Relay Rating | 30A–40A (Compressor) | Handles high inrush current during motor startup. | Component datasheet verification. | Relay contacts weld shut; compressor runs continuously. |
| Terminal Blocks | High-torque, rising clamp | Ensures secure wire connection under vibration. | Pull test & torque test. | Loose wires, arcing, melted connectors. |
| Temp Sensor Input | NTC 10kΩ / 50kΩ | Standard for pool water and refrigerant temp monitoring. | Resistance check at known temp. | Inaccurate readings, system freezing or overheating. |
| Flow Switch Logic | Normally Open (NO) | Ensures heater only runs when water is moving. | Continuity test with flow. | Heater runs dry, melting PVC piping. |
| EMI Filter | Onboard LC Filter | Suppresses noise from switching power supplies or inverters. | EMC chamber testing. | Interference with pool data logging pcb or Wi-Fi. |
| Surface Finish | ENIG or Lead-Free HASL | ENIG provides flat pads for SMDs; HASL offers robust corrosion resistance. | Visual inspection. | Poor solder joints or oxidation before assembly. |
| Defrost Logic | Reverse Cycle / Hot Gas | Prevents evaporator icing in cold ambient air. | Functional chamber test. | Evaporator freezes solid, blocking airflow. |
| User Interface | LED/LCD + Membrane | Must be water-resistant and UV stable. | IP rating test (spray). | Screen fades or buttons fail due to sun/rain. |
heat pump pool heater pcb implementation steps (process checkpoints)
Designing and manufacturing a reliable controller requires a structured approach to handle both power and logic.
Load Calculation & Component Selection:
- Determine the maximum current draw of the compressor and fan. Select relays or IGBT modules with a 20-30% safety margin.
- Check: Do the selected relays have UL/VDE approval for motor loads (HP rating)?
Schematic Capture & Safety Interlocks:
- Design the hardware safety chain: High Pressure Switch + Low Pressure Switch + Flow Switch must physically break the control circuit or trigger an immediate MCU interrupt.
- Check: Does the logic prevent startup if the flow switch is open?
PCB Layout & High-Voltage Isolation:
- Group high-voltage AC components away from low-voltage DC logic. Use slots (air gaps) in the PCB to increase creepage distance if space is tight.
- Check: Run a DRC for high-voltage clearance rules (e.g., >3mm).
Thermal Management Design:
- Place heat-generating components (power supply regulators, motor drivers) near the edges or on large copper pours. Add heatsinks for inverter drives.
- Check: Thermal simulation shows junction temperatures stay below 105°C.
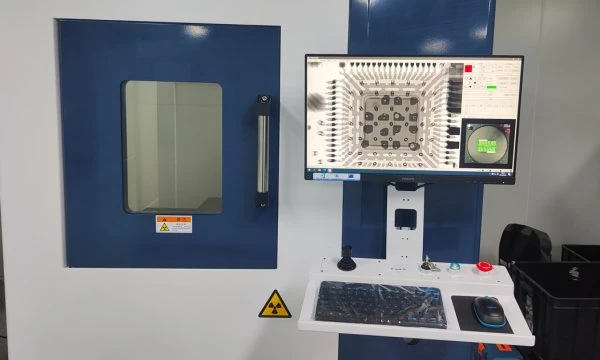
Prototype Fabrication (APTPCB):
- Send Gerbers for a quick-turn prototype. Specify heavy copper if required.
- Check: Verify stackup and impedance if using high-speed communication.
Bench Testing & Firmware Validation:
- Simulate sensor inputs (water temp, ambient temp) and verify relay switching logic. Test defrost cycle triggers.
- Check: Does the system shut down correctly when "water flow" is removed?
Environmental Stress Screening:
- Subject the PCBA to temperature cycling (-10°C to +60°C) and humidity tests.
- Check: No functional anomalies during environmental stress.
Conformal Coating Application:
- Apply coating to the entire assembly except connectors and heatsinks.
- Check: Inspect under UV light to ensure complete coverage of pins and vias.
Final Assembly & Enclosure Fit:
- Mount the PCB into the heat pump electrical box. Ensure cable routing does not stress connectors.
- Check: Verify IP rating of the final assembly (e.g., IPX4 or IPX5).
heat pump pool heater pcb troubleshooting (failure modes and fixes)
Diagnosing issues with a heat pump pool heater pcb often involves distinguishing between board failures and external sensor/component faults.
1. Symptom: Compressor does not start (No Error Code)
- Causes: Blown fuse, failed transformer, bad relay, or loose terminal.
- Checks: Measure 24V/12V AC/DC at the transformer secondary. Check continuity across the compressor relay contacts when energized.
- Fix: Replace fuse/transformer. If relay is stuck open, replace the PCB.
- Prevention: Use surge protection (MOV) on the AC input.
2. Symptom: "Water Flow" Error despite pump running
- Causes: Flow switch failure, corroded connector, or broken input trace.
- Checks: Short the flow switch input pins on the PCB. If error clears, the PCB is fine (replace switch). If error persists, the input circuit is damaged.
- Fix: Repair trace or replace optocoupler on input channel.
- Prevention: Use gold-plated headers to prevent contact oxidation.
3. Symptom: Erratic Temperature Readings
- Causes: Moisture ingress on sensor pins, damaged NTC thermistor, or ADC reference voltage drift.
- Checks: Measure sensor resistance disconnected from PCB. Measure voltage across sensor terminals on PCB.
- Fix: Clean PCB with isopropyl alcohol and re-coat. Replace sensor.
- Prevention: Apply silicone grease to sensor connectors; ensure conformal coating covers ADC pins.
4. Symptom: Display is blank but unit runs
- Causes: Ribbon cable corrosion, failed 5V regulator, or dead display driver.
- Checks: Check 5V rail. Inspect ribbon cable for green corrosion.
- Fix: Replace ribbon cable. If regulator is hot/dead, replace PCB.
- Prevention: Use an ip68 pool controller pcb enclosure design for the UI module.
5. Symptom: PCB Burnt/Charred at Relay
- Causes: Loose wire connection causing arcing, or relay contacts worn out.
- Checks: Visual inspection of terminal block and relay solder joints.
- Fix: Replace PCB. Ensure field wiring is torqued to spec.
- Prevention: Use high-quality terminal blocks and heavy copper traces.
6. Symptom: Random Resets or Glitches
- Causes: EMI from compressor startup, unstable power supply capacitors.
- Checks: Monitor 5V/3.3V rail with an oscilloscope during compressor start.
- Fix: Add external ferrite beads or replace aging electrolytic capacitors.
- Prevention: Better PCB layout with ground planes and decoupling capacitors.
How to choose heat pump pool heater pcb (design decisions and trade-offs)
Selecting the right architecture depends on the heat pump's complexity and efficiency goals.
1. On/Off vs. Inverter Control
- On/Off Control: Uses simple relays to turn the compressor 100% on or off.
- Pros: Lower cost, simpler PCB design, easier to troubleshoot.
- Cons: High startup current spikes, lower energy efficiency, louder operation.
- Inverter (Variable Speed) Control: Uses an IPM (Intelligent Power Module) to modulate frequency.
- Pros: Soft start (no spikes), high efficiency (COP > 10), quiet.
- Cons: Complex design, higher cost, requires advanced EMI filtering and heat dissipation.
2. Integrated vs. Modular Design
- All-in-One: Power, logic, and UI on a single board.
- Pros: Lower assembly cost, compact.
- Cons: If one part fails (e.g., relay), the whole board must be replaced. High voltage is close to logic.
- Modular (Split System): Separate power board and logic/UI board.
- Pros: Safer (HV isolated), cheaper repairs (replace only the failed module).
- Cons: More cabling, higher BOM count.
3. Universal vs. Proprietary
- Universal Aftermarket PCBs: Designed to retrofit various brands.
- Trade-off: May lack specific sensor curves or advanced features like electronic expansion valve (EEV) control.
- Custom OEM PCBs: Designed for specific thermal dynamics.
- Trade-off: Optimized for the specific compressor map and pool chemical monitor pcb integration.
heat pump pool heater pcb FAQ (cost, lead time, common defects, acceptance criteria, Design for Manufacturability (DFM) files)
Q: What is the typical lead time for manufacturing a custom heat pump pool heater pcb? A: For prototypes, APTPCB typically delivers in 24–72 hours. Mass production usually takes 2–3 weeks, depending on component availability (especially for specific relays or microcontrollers).
Q: How much does a heat pump pool heater pcb cost? A: Costs vary widely based on complexity. A simple On/Off control board might cost $15–$30 in volume, while a complex inverter drive PCB with heavy copper and aluminum substrate can range from $50–$100+.
Q: What are the acceptance criteria for these PCBs? A: Key criteria include IPC-A-610 Class 2 or 3 standards, passing a functional test (FCT) for all relays and sensors, and passing a Hi-Pot test to ensure isolation between high voltage and low voltage sections.
Q: Can you manufacture a replacement for an obsolete pool heater board? A: Yes, through reverse engineering. We would need the physical sample to generate the schematic, BOM, and Gerber files. This is common for older units where the OEM no longer supports the pool cover motor pcb or heater logic.
Q: What files are needed for DFM review? A: We need Gerber files (RS-274X), a Centroid file (Pick & Place), a BOM (Bill of Materials) with manufacturer part numbers, and assembly drawings. Mention any specific requirements for conformal coating or potting.
Q: How do you handle testing for high-current traces? A: We use E-test (flying probe) for continuity and isolation. For the design phase, we recommend thermal simulation. In production, automated optical inspection (AOI) checks solder joint quality on heavy components.
Q: Does the PCB need to be compatible with salt chlorinators? A: Yes. Salt systems generate chlorine gas which is corrosive. The PCB design must account for this via robust conformal coating and potentially using gold plating on edge connectors.
Q: Can I integrate Wi-Fi or Bluetooth? A: Yes. We can integrate modules (ESP32, etc.) directly onto the PCB. The design must account for RF antenna placement away from the metal enclosure and high-current switching noise.
Q: What is the difference between a pool heater PCB and a pool data logging pcb? A: A heater PCB controls active power components (compressor/fan). A data logging PCB is passive, recording temperatures and chemistry levels, often sending data to the cloud without directly controlling high-voltage loads.
Q: How do I ensure my design passes UL 60730 safety standards? A: The PCB layout must maintain specific creepage/clearance distances, use V-0 flammability rated materials, and employ software Class B safety routines (watchdog timers, memory checks).
Resources for heat pump pool heater pcb (related pages and tools)
- PCB Conformal Coating Services – Essential for protecting pool electronics from moisture and chlorine.
- Heavy Copper PCB Manufacturing – Required for handling high currents in compressor and heater circuits.
- Box Build Assembly – Full controller assembly including enclosure, wiring, and potting.
- Industrial Control PCB – General capabilities for ruggedized industrial electronics.
- DFM Guidelines – Design rules to ensure your board is manufacturable and cost-effective.
heat pump pool heater pcb glossary (key terms)
| Term | Definition |
|---|---|
| COP (Coefficient of Performance) | A measure of efficiency; ratio of heat output to electrical energy input. The PCB logic optimizes this. |
| Defrost Cycle | A mode where the heat pump reverses flow to melt ice on the evaporator coil, controlled by the PCB. |
| Flow Switch | A safety sensor that detects water movement; the PCB must read this before enabling the heater. |
| High Pressure Switch | A safety device that opens if refrigerant pressure is too high; the PCB must immediately stop the compressor. |
| Inverter Drive | Electronic circuit that varies the frequency of power to the compressor motor to control speed. |
| NTC Thermistor | Negative Temperature Coefficient sensor; resistance drops as temperature rises. Standard input for pool PCBs. |
| Potting | Encapsulating the entire PCB in resin (epoxy/silicone) for maximum water and vibration resistance. |
| Creepage | The shortest distance along the surface of the insulation material between two conductive parts. |
| EEV (Electronic Expansion Valve) | A stepper-motor driven valve controlled by the PCB to precisely regulate refrigerant flow. |
| Soft Start | A feature (often on the PCB) that ramps up current slowly to prevent dimming lights or tripping breakers. |
| Dry Contact | A voltage-free switch contact used for signaling (e.g., external automation trigger). |
Request a quote for heat pump pool heater pcb
APTPCB provides comprehensive manufacturing services for heat pump pool heater pcb, from heavy copper fabrication to conformal coating and final box build. Whether you need a prototype for a new inverter design or mass production for a standard on/off controller, our engineering team offers a full DFM review to identify potential reliability issues before production.
To get an accurate quote, please provide:
- Gerber Files: RS-274X format.
- BOM: Complete list with manufacturer part numbers (especially for relays and connectors).
- Specifications: Copper weight, surface finish, and conformal coating type.
- Volume: Estimated annual usage.
- Testing Requirements: Functional test procedures or firmware flashing needs.
Conclusion (next steps)
A robust heat pump pool heater pcb is the difference between a reliable appliance and one that fails after a single season of humidity and chemical exposure. By focusing on moisture protection, thermal management, and strict safety isolation, engineers can design controllers that withstand the rigorous demands of pool environments. APTPCB supports this process with specialized fabrication and assembly services tailored for high-reliability outdoor electronics.