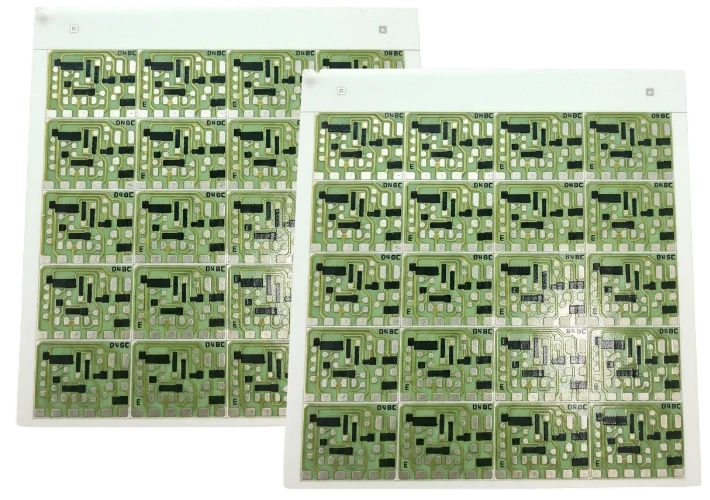
Designing a robust Laser driver PCB stackup is the single most critical step in achieving nanosecond pulse widths and protecting sensitive laser diodes from overshoot. Unlike standard power supplies, laser drivers—especially those for LIDAR, fiber lasers, or high-speed optical communications—require a physical layout that minimizes parasitic inductance to absolute near-zero levels. A poor stackup results in ringing, slow rise times, and potential catastrophic failure of the laser diode or the GaN switching elements.
At APTPCB (APTPCB PCB Factory), we specialize in manufacturing high-performance PCBs that meet the rigorous demands of optoelectronics. This guide provides the engineering specifications, rules, and troubleshooting steps necessary to define a functional Laser driver PCB stackup.
Quick Answer (30 seconds)
For engineers needing immediate direction on Laser driver PCB stackup, follow these core principles:
- Minimize L1-L2 Dielectric Thickness: Use a prepreg thickness of 3–4 mils (76–100 µm) between the Top Layer (components) and Layer 2 (Ground Plane). This maximizes inter-plane capacitance and minimizes loop inductance.
- Solid Ground Plane Reference: Layer 2 must be a solid, unbroken ground plane directly underneath the high-current switching loop. Do not route signals on Layer 2 in the driver area.
- Copper Weight Balance: Use at least 2 oz copper for high-current paths to manage heat, but verify that trace width allows for impedance control if high-speed signals are present.
- Material Selection: For rise times under 2ns, standard FR4 may be too lossy or inconsistent. Consider high-speed materials (like Megtron 6 or Rogers) or high-Tg FR4 with tight dielectric tolerance.
- Thermal Via Placement: Place thermal vias directly in the pads of high-power components (VIPPO) or immediately adjacent, connecting to internal ground planes for heat spreading.
- Symmetry is Key: Ensure the stackup is balanced around the center to prevent warping during reflow, which is critical for the precise alignment of optical components during Laser driver PCB assembly.
When Laser driver PCB stackup applies (and when it doesn’t)
Not all laser circuits require an advanced stackup. Understanding when to apply strict Laser driver PCB design rules saves cost and complexity.
When strict stackup rules apply
- LIDAR Systems: When driving pulsed lasers with rise times in the nanosecond or picosecond range (e.g., ToF applications).
- High-Power Fiber Lasers: Systems requiring continuous wave (CW) drive currents exceeding 10A where thermal management is the primary failure mode.
- GaN-based Drivers: Circuits utilizing Gallium Nitride FETs, which switch extremely fast and are highly sensitive to parasitic inductance in the gate and power loops.
- Telecom Optical Modules: High-speed data transmission (10G/25G/100G) where impedance matching and signal integrity are non-negotiable.
- Precision Medical Lasers: Devices requiring extremely stable current regulation where noise from the stackup could affect beam stability.
When standard stackups are sufficient
- Low-Power Pointer Lasers: Simple 5mW diode drivers do not require impedance-controlled stackups.
- Slow Switching Applications: If the laser is modulated at low frequencies (e.g., < 1 kHz) and edge rates are not critical.
- General Illumination: LED drivers or non-coherent light sources often function well on standard 2-layer FR4 boards.
- Prototyping Logic Only: If you are only testing the digital control logic and not the power stage, a standard stackup may suffice (though integration will eventually require the correct stackup).
Rules & specifications
The following table outlines the specific parameters required for a high-performance Laser driver PCB stackup. These values are derived from successful builds at APTPCB.
| Rule | Recommended Value/Range | Why it matters | How to verify | If ignored |
|---|---|---|---|---|
| L1-L2 Dielectric Thickness | 3 mil – 5 mil (76µm – 127µm) | Minimizes loop inductance ($L$) by reducing the loop area between forward current and return path. | Check stackup drawing or cross-section analysis. | High voltage spikes ($V = L \cdot di/dt$), ringing, blown laser diodes. |
| Ground Plane Continuity | 100% Solid under driver circuit | Provides the shortest return path for high-frequency current. | Visual inspection of Gerber files (Layer 2). | Increased EMI, ground bounce, unstable switching. |
| Copper Weight (Power Layers) | 2 oz (70µm) or greater | Reduces DC resistance ($R$) and improves thermal spreading for high-current pulses. | Specify in fabrication notes; check microsection. | Overheating traces, voltage droop, thermal shutdown. |
| Material Tg (Glass Transition) | > 170°C (High Tg) | Prevents Z-axis expansion during operation, protecting vias in high-heat environments. | Review material datasheet (e.g., Isola 370HR). | Pad lifting, barrel cracks in vias, board delamination. |
| Via Aspect Ratio | < 8:1 (Standard), < 10:1 (Advanced) | Ensures reliable plating in vias, especially for thick boards with heavy copper. | DFM review of drill size vs. board thickness. | Open circuits, unreliable via connections. |
| Gate Drive Trace Width | > 20 mil (short length) | Minimizes inductance in the gate loop to prevent false triggering of FETs. | Layout review; calculate inductance. | Slow switching, increased switching losses, FET failure. |
| Thermal Via Pitch | 1.0mm – 1.2mm grid | Optimizes heat transfer from top layer components to inner/bottom planes. | Drill drawing inspection. | Component overheating, reduced lifespan. |
| Solder Mask Web | > 3 mil (0.076mm) | Prevents solder bridging between fine-pitch pads on driver ICs. | DFM check of mask layers. | Short circuits during assembly. |
| Impedance Control (Signal) | 50Ω ± 10% (Single), 100Ω ± 10% (Diff) | Required for high-speed modulation signals entering the driver. | TDR (Time Domain Reflectometry) coupon test. | Signal reflection, data errors, jitter in pulse width. |
| Component Placement | < 2mm from Driver to Laser | Physical distance adds inductance regardless of stackup quality. | Layout measurement. | Excessive ringing, inability to achieve fast rise times. |
Implementation steps
Follow this process to execute a Laser driver PCB stackup that meets manufacturing and performance standards.
Define the Pulse Requirements:
- Action: Determine the peak current (e.g., 50A), pulse width (e.g., 5ns), and rise time.
- Key Parameter: Rise time determines the maximum allowable inductance.
- Check: If rise time is < 2ns, you must use a thin dielectric (3-4 mil) between L1 and L2.
Select the Material:
- Action: Choose a laminate based on thermal and speed needs.
- Key Parameter: Dk (Dielectric Constant) and Df (Dissipation Factor).
- Check: For high-power CW, prioritize High Tg FR4. For ultra-fast pulses, consider Rogers or specialized high-speed materials.
Draft the Stackup:
- Action: Create a 4-layer or 6-layer stackup proposal.
- Key Parameter: Layer 2 must be GND. Layer 3 (in 4-layer) can be Power.
- Check: Verify symmetry to prevent warping. Consult PCB stackup guidelines.
Calculate Trace Widths and Clearances:
- Action: Use an impedance calculator for signal lines and a temperature rise calculator for power lines.
- Key Parameter: Current density.
- Check: Ensure heavy copper traces have sufficient spacing (clearance) for manufacturing (typically > 6-8 mil for 2oz copper).
Place Components (Floorplanning):
- Action: Place the Laser Diode, GaN FET, and Capacitor bank as close as physically possible.
- Key Parameter: Loop area.
- Check: The total loop length should ideally be under 5mm for high-speed LIDAR drivers.
Route Critical Loops First:
- Action: Route the high-current discharge loop on the Top layer with a solid ground reference immediately below.
- Key Parameter: Inductance.
- Check: Do not use vias in the high-current switching loop if possible; if necessary, use multiple vias to reduce inductance.
Add Thermal Management:
- Action: Stitch ground planes with thermal vias.
- Key Parameter: Thermal resistance ($R_{th}$).
- Check: Ensure vias are not tented on the bottom side if a heatsink will be attached. See High Thermal PCB capabilities.
DFM Review:
- Action: Send the stackup and layout to the fab house before finalizing.
- Key Parameter: Manufacturability.
- Check: Confirm that the chosen prepreg thickness is available in stock to avoid lead time delays.
Failure modes & troubleshooting
Even with a good design, issues can arise. Here is how to troubleshoot common Laser driver PCB failures related to stackup.
1. Excessive Ringing / Overshoot
- Symptom: The optical output has a large spike at the leading edge, or the voltage across the laser diode oscillates.
- Causes: Loop inductance is too high; L1-L2 spacing is too large; Capacitor bank is too far from the switch.
- Checks: Measure the distance between the capacitor, FET, and laser. Check stackup report for dielectric thickness.
- Fix: Respin the board with thinner prepreg (e.g., 3 mil). Move components closer.
- Prevention: Simulate the parasitic inductance during the design phase.
2. Thermal Shutdown / Overheating
- Symptom: The driver works for a few seconds/minutes then shuts down or drifts in power.
- Causes: Insufficient copper weight; lack of thermal vias; interrupted ground plane.
- Checks: Use a thermal camera to identify hot spots. Verify copper thickness (1oz vs 2oz).
- Fix: Add external heatsinking. For new revs, increase copper weight or use Metal Core PCB technology if applicable.
- Prevention: Calculate thermal dissipation density ($W/cm^2$) early.
3. Slow Rise Times
- Symptom: The laser pulse is "lazy" or trapezoidal instead of square.
- Causes: High gate drive inductance; weak gate driver; excessive capacitance on the output node.
- Checks: Probe the Gate-Source voltage ($V_{gs}$) directly at the FET pins.
- Fix: Shorten the trace from the driver IC to the FET gate. Improve the stackup to reduce return path impedance.
- Prevention: Place the gate driver IC immediately next to the FET.
4. EMI / Noise Coupling
- Symptom: Logic circuits reset during laser firing; noise on power rails.
- Causes: Shared return paths (Common Impedance Coupling); breaks in the ground plane.
- Checks: Inspect Layer 2 for cuts or slots under the driver.
- Fix: Isolate the high-current ground from the logic ground, connecting them at a single point (star ground) or using a solid plane with careful placement.
- Prevention: Strict partitioning of the PCB layout.
5. Solder Joint Cracking
- Symptom: Intermittent operation after thermal cycling.
- Causes: CTE mismatch between component and PCB; board flexing.
- Checks: Inspect solder joints under a microscope. Check material Tg.
- Fix: Use underfill for large components. Switch to higher Tg material.
- Prevention: Ensure symmetric stackup to prevent warping.
FAQ
Q1: What is the ideal number of layers for a Laser driver PCB? A: 4 layers is the standard minimum. Layer 1 for components/routing, Layer 2 for solid Ground, Layer 3 for Power/Logic, Layer 4 for Bottom routing/heatsinking. 2-layer boards are rarely sufficient for high-speed nanosecond drivers due to higher inductance.
Q2: Can I use standard FR4 for LIDAR laser drivers? A: Yes, but only if the dielectric layer between L1 and L2 is very thin (3-4 mils) and the frequency isn't extremely high (e.g., > 5 GHz analog bandwidth). For extremely fast edge rates, lower loss materials may be required to preserve signal integrity.
Q3: How does copper thickness affect the stackup? A: Thicker copper (2oz, 3oz) increases the current carrying capacity but requires wider spacing (clearance) between traces. It also increases the overall board thickness slightly. You must balance thermal needs with the need for fine-pitch routing.
Q4: What is the "skin effect" and does it matter here? A: The skin effect causes high-frequency current to flow only on the outer surface of the conductor. For nanosecond pulses, this increases resistance. Wide, flat traces (surface layers) are better than round wires or internal layers for minimizing this loss.
Q5: Should I use blind or buried vias? A: Generally, no. Through-hole vias are cheaper and more reliable for thermal transfer. Blind vias are only necessary if the component density is extremely high (HDI designs), which is less common in power drivers.
Q6: How do I specify the stackup to the manufacturer? A: Provide a table listing each layer, the material type (Copper, Prepreg, Core), and the desired thickness. Explicitly state "Impedance Control Required" if applicable.
Q7: What is the best surface finish for laser drivers? A: ENIG (Electroless Nickel Immersion Gold) is preferred for its flat surface, which helps with the precise placement of small components and ensures good solderability for exposed pads.
Q8: Why is the loop inductance so critical? A: Voltage overshoot is defined by $V = L \cdot (di/dt)$. If you switch 50A in 5ns, even 1nH of inductance creates a 10V spike. This spike can exceed the breakdown voltage of the laser diode or FET.
Q9: Can APTPCB assist with DFM for these stackups? A: Yes. We review your Gerber files and stackup request to ensure the materials are compatible and the tolerances are achievable before production begins.
Q10: What is the lead time for a custom stackup? A: Standard materials (FR4) with custom stackups typically take 5-8 days. Specialized materials (Rogers, heavy copper) may add 3-5 days depending on stock availability.
Q11: How do I handle heat from the laser diode itself? A: The PCB stackup should include a dense array of thermal vias under the diode's thermal pad, connecting to a bottom-side copper pour where a heatsink can be attached.
Q12: Is controlled impedance needed for the gate drive trace? A: Usually, minimizing inductance is more important than matching impedance for the gate drive, as the line length should be very short. However, the input signal to the driver IC often requires 50Ω impedance control.
Glossary (key terms)
| Term | Definition | Relevance to Laser Drivers |
|---|---|---|
| Parasitic Inductance | Unwanted inductance inherent in PCB traces and vias. | The primary enemy of fast switching; causes voltage spikes. |
| GaN (Gallium Nitride) | A wide-bandgap semiconductor material used for high-speed FETs. | Enables nanosecond switching speeds required for LIDAR. |
| Prepreg | Fiberglass fabric impregnated with resin, used to bond PCB layers. | Its thickness determines the distance between L1 and L2 (critical for inductance). |
| Core | A rigid base material with copper on one or both sides. | Provides structural integrity to the PCB stackup. |
| Tg (Glass Transition Temp) | The temperature at which the PCB material begins to soften. | High Tg is required for high-power drivers to prevent failure. |
| Loop Area | The physical area enclosed by the current path and its return. | Must be minimized to reduce inductance ($L \propto Area$). |
| VIPPO | Via-in-Pad Plated Over. | Allows vias directly in component pads for maximum thermal transfer. |
| Dk (Dielectric Constant) | A measure of a material's ability to store electrical energy in an electric field. | Affects signal propagation speed and impedance. |
| CTE (Coefficient of Thermal Expansion) | How much the material expands under heat. | Mismatch causes stress on solder joints during laser operation. |
| LIDAR | Light Detection and Ranging. | A primary application for high-speed, high-current laser driver PCBs. |
Request a quote
Ready to manufacture your high-speed laser driver designs? APTPCB provides comprehensive DFM reviews to ensure your Laser driver PCB stackup is optimized for performance and manufacturability.
Please prepare the following for the most accurate quote:
- Gerber Files: RS-274X format.
- Stackup Drawing: Specify layer order, copper weight, and dielectric thickness (especially L1-L2).
- Material Requirements: Tg rating or specific brand (e.g., Isola, Rogers).
- Quantities: Prototype vs. Mass Production volumes.
Conclusion
Achieving the perfect Laser driver PCB stackup is a balancing act between minimizing parasitic inductance, managing high thermal loads, and ensuring manufacturability. By prioritizing a thin dielectric between the top layer and the ground plane, utilizing heavy copper where necessary, and selecting the right materials, you can ensure your laser system operates with the precision and speed required for modern applications. Whether you are building LIDAR systems or industrial fiber lasers, a disciplined approach to stackup design is the foundation of success.