Definition, scope, and who this guide is for
In the vast majority of PCB designs, the goal is to dissipate heat as quickly as possible. However, a specialized niche of engineering requires the exact opposite: a low thermal conductivity stackup. This design strategy is critical when the objective is to thermally isolate sensitive components from the environment or from other parts of the circuit. This is most common in cryogenic applications, quantum computing hardware, precision oven-controlled oscillators (OCXOs), and infrared sensor arrays where heat leakage equates to signal noise or system failure.
This playbook is designed for hardware engineers, thermal architects, and procurement leads who need to specify and source PCBs that act as thermal barriers. Unlike standard FR4 boards where copper planes are maximized, a low thermal conductivity stackup requires counter-intuitive design choices—such as minimizing copper cross-sections, utilizing specific resin systems, and employing complex routing strategies like thermal meanders.
At APTPCB (APTPCB PCB Factory), we often see designs fail not because of electrical connectivity issues, but because the thermal leak rate was higher than the cooling budget allowed. This guide moves beyond basic theory to provide a procurement-ready framework. It covers how to define specifications that limit thermal bridging, how to validate these boards before mass production, and how to audit suppliers to ensure they can handle the delicate materials often required for high-isolation circuits.
When to use low thermal conductivity stackup (and when a standard approach is better)
Understanding the thermal path is the first step in deciding if a specialized stackup is necessary. Heat in a PCB travels primarily through the copper layers (which have a thermal conductivity of ~385 W/m·K) rather than the dielectric material (typically 0.25–0.35 W/m·K). A low thermal conductivity stackup is required when the standard heat flow through power and ground planes would disrupt the system's thermal equilibrium.
Use a low thermal conductivity stackup when:
- Cryogenic Systems: You are designing a cryostat feedthrough PCB where the electronics bridge room temperature (300K) and cryogenic zones (4K or lower). Excessive heat conduction boils off liquid helium or overloads cryocoolers.
- Precision Sensing: You are implementing an ultra low noise readout layout for bolometers or IR sensors where thermal fluctuations appear as noise in the data stream.
- Thermal Isolation: You need to maintain a component at a stable high temperature (like a heater or sensor) without heating the surrounding control logic.
- Vacuum Environments: Convection is absent, meaning conduction through the PCB is the primary heat transfer mechanism that must be throttled.
Stick to a standard stackup when:
- High Power Density: If the components generate significant self-heat (Watts vs. Milliwatts), a low thermal conductivity design will cause the components to overheat and fail.
- High-Speed Digital: If you require continuous, unbroken reference planes for impedance control on long traces, the hatching and voiding required for thermal isolation may compromise signal integrity.
- Standard Consumer Electronics: If the goal is simply to keep the case cool, standard thermal vias and heat sinks are more cost-effective than engineering a specialized low-conductivity substrate.
low thermal conductivity stackup specifications (materials, stackup, tolerances)
Defining the correct parameters upfront prevents costly re-spins. The goal is to minimize the cross-sectional area of conductive materials while maintaining structural integrity.
- Dielectric Material Selection:
- Polyimide: Preferred for cryogenic and vacuum applications due to stability and moderate thermal resistance.
- Stainless Steel Cladding: Occasionally used in rigid segments for structural support because stainless steel has significantly lower thermal conductivity (~16 W/m·K) compared to copper.
- Epoxy/Glass (FR4): Acceptable for non-cryogenic isolation if the resin content is high (resin conducts less heat than glass fabric).
- Copper Weight:
- Specify 1/3 oz (12µm) or 1/2 oz (18µm) copper foil. Avoid 1 oz or 2 oz copper unless absolutely necessary for current carrying capacity, as copper is the primary thermal leak path.
- Trace Geometry & Routing:
- Trace Width: Minimum manufacturable width (e.g., 3–4 mils) to increase thermal resistance.
- Trace Length: Use "meandering" or "serpentine" routing to increase the effective thermal path length between hot and cold zones.
- Layer Stackup Configuration:
- No Solid Planes: Prohibit solid power/ground planes in the thermal isolation zone. Use hatched planes (mesh) with <20% copper density if shielding is required.
- Thinner Dielectrics: While counter-intuitive, thinner dielectrics allow for thinner overall boards, reducing the cross-sectional area of the glass/epoxy matrix.
- Plating & Surface Finish:
- ENIG (Electroless Nickel Immersion Gold): Preferred over HASL. Nickel acts as a diffusion barrier and has lower thermal conductivity than pure copper or tin-lead.
- Hard Gold: For edge connectors in cryostat feedthroughs.
- Via Design:
- Via Fencing: Do not use via fences in isolation zones.
- Via Size: Use the smallest mechanical drill (e.g., 0.15mm or 0.2mm) to minimize the plated copper barrel volume.
- Solder Mask:
- Standard LPI is acceptable, but for vacuum applications, specify low-outgassing soldermask or minimal mask coverage.
- Dimensional Tolerances:
- Thickness Tolerance: ±10% is standard, but for thermal calculations, tighter tolerance (±5%) may be needed to guarantee the cross-sectional area of the dielectric.
- Impedance Control:
- If impedance is required over hatched planes, specify 50Ω ±10% referencing the specific hatch pattern (pitch and width of mesh).
- Thermal Breaks:
- Design physical slots or cutouts (milling) in the PCB to sever the thermal path, leaving only narrow bridges for traces to pass.
- Connector Placement:
- Connectors act as massive thermal sinks. Place them as far as possible from the sensitive zone, connected by high-resistance traces.
low thermal conductivity stackup manufacturing risks (root causes and prevention)
Manufacturing a board designed to resist heat flow introduces mechanical and electrical risks that standard boards do not face.
- Risk: Warpage and Bowing
- Root Cause: Removal of copper planes creates an unbalanced stackup. Copper provides structural rigidity; without it, the dielectric relaxes and warps during reflow.
- Detection: 3D profilometry or simple flat-table measurement.
- Prevention: Use "copper thieving" (isolated dots) in waste areas to balance copper density without creating a thermal path. Use stiffeners for assembly.
- Risk: Plated Through Hole (PTH) Cracking (Cryogenic Failure)
- Root Cause: CTE (Coefficient of Thermal Expansion) mismatch. When a board goes from 300K to 4K, the z-axis epoxy shrinks faster than the copper barrel, causing barrel fatigue or corner cracks.
- Detection: Interconnect Stress Testing (IST) or liquid nitrogen dip testing followed by micro-sectioning.
- Prevention: Use high-reliability resin systems (low CTE z-axis) and ensure plating ductility meets IPC Class 3 requirements.
- Risk: Impedance Discontinuity
- Root Cause: Routing high-speed signals over hatched ground planes or thermal cutouts changes the reference capacitance, causing reflections.
- Detection: TDR (Time Domain Reflectometry) testing on coupons.
- Prevention: rigorous simulation of the hatch pattern; use differential pairs which are less sensitive to reference plane gaps than single-ended traces.
- Risk: Outgassing in Vacuum
- Root Cause: Volatile compounds in the laminate, solder mask, or adhesives release gas in a vacuum, contaminating sensors or optics.
- Detection: ASTM E595 testing (Total Mass Loss / CVCM).
- Prevention: Bake the PCBs (e.g., 120°C for 4 hours) prior to packaging. Specify vacuum-compatible materials (e.g., Polyimide without adhesive).
- Risk: Trace Peeling
- Root Cause: Very thin traces (3-4 mil) on materials like Teflon or Polyimide have lower peel strength, especially during hand soldering or rework.
- Detection: Tape test or peel strength test on coupons.
- Prevention: Use "teardrops" at pad junctions. Anchor pads with vias where possible.
- Risk: Acid Traps in Hatched Planes
- Root Cause: If the mesh angle is acute, etching chemistry can get trapped, causing corrosion later.
- Detection: Visual inspection / AOI.
- Prevention: Design hatched planes with 45-degree angles and ensure spacing is large enough for fluid exchange.
- Risk: Inconsistent Thermal Resistance
- Root Cause: Variation in plating thickness. If the copper plating varies from 20µm to 30µm, the thermal conductivity of the via changes significantly.
- Detection: Cross-section analysis.
- Prevention: Tighter control on plating bath current density; specify maximum copper wall thickness, not just minimum.
- Risk: Mechanical Fragility at Cutouts
- Root Cause: Narrow bridges left for thermal isolation are weak points that snap during handling or vibration.
- Detection: Drop testing or vibration testing.
- Prevention: Radius all internal corners of cutouts (no sharp 90° corners) to reduce stress concentrators.
low thermal conductivity stackup validation and acceptance (tests and pass criteria)
You cannot rely on standard E-test (continuity) alone. Validation must prove the board meets both electrical and thermal/mechanical requirements.
- Objective: Verify Thermal Isolation Performance
- Method: Apply a known heat load (heater resistor) to one side of the isolation zone and measure the temperature delta ($\Delta T$) across the gap in a vacuum chamber.
- Acceptance Criteria: Measured thermal resistance ($K/W$) must be within ±10% of the simulated value.
- Objective: Verify Cryogenic Reliability
- Method: Thermal shock testing. 5 to 10 cycles of plunging into Liquid Nitrogen (77K) and returning to room temperature.
- Acceptance Criteria: Change in resistance of daisy-chain vias < 5%. No visible micro-cracks in cross-section.
- Objective: Verify Impedance over Mesh
- Method: TDR measurement on test coupons designed with the specific hatch pattern used in the board.
- Acceptance Criteria: Impedance within ±10% of target (e.g., 50Ω).
- Objective: Verify Cleanliness (Ionic Contamination)
- Method: Ion chromatography or ROSE testing. Critical for ultra low noise readout layout designs where ionic residue creates leakage currents.
- Acceptance Criteria: < 1.56 µg/cm² NaCl equivalent (or tighter for sensitive analog).
- Objective: Verify Structural Integrity of Thin Dielectrics
- Method: Bow and Twist measurement per IPC-TM-650.
- Acceptance Criteria: < 0.75% for SMT assembly; < 1.0% for through-hole.
- Objective: Verify Plating Ductility
- Method: Tensile testing of plating foil or micro-section analysis after stress.
- Acceptance Criteria: Elongation > 18% (Class 3 standard) to survive thermal cycling.
- Objective: Verify Outgassing (if applicable)
- Method: Bake-out followed by Residual Gas Analysis (RGA) or ASTM E595.
- Acceptance Criteria: TML < 1.0%, CVCM < 0.1%.
- Objective: Verify Trace Adhesion
- Method: Tape test on test coupon.
- Acceptance Criteria: No lifting of traces or pads.
low thermal conductivity stackup supplier qualification checklist (RFQ, audit, traceability)
Use this checklist to vet suppliers. A generalist PCB shop may not understand the nuance of "maximum copper thickness" or "hatch plane impedance."
Group 1: RFQ Inputs (What you must send)
- Stackup Drawing: Explicitly showing dielectric types, thicknesses, and copper weights (e.g., "Start with 1/3 oz foil").
- Hatch Pattern Definition: DXF or Gerber detail defining the pitch and width of thermal isolation meshes.
- Material Spec: Specific callout (e.g., "Polyimide Arlon 85N" or "Isola 370HR") rather than generic "FR4".
- Thermal Constraints: Note on the fab drawing: "Low Thermal Conductivity Design – Do not add copper thieving in Zone A."
- Plating Spec: "ENIG per IPC-4552" or specific hard gold requirements.
- Drill Chart: Clearly identifying via sizes and tolerances.
- Testing Requirements: List any non-standard tests (Cryo-dip, TDR on mesh).
- Volume: Prototype quantity vs. production forecast.
Group 2: Capability Proof (What they must show)
- Thin Core Handling: Ability to process cores < 3 mil without stretching or wrinkling.
- Controlled Depth Milling: Capability to mill slots/cutouts with high precision (±0.1mm).
- Impedance Modeling: Software (e.g., Polar Si9000) capable of modeling hatched/mesh ground planes.
- Material Stock: Do they stock Polyimide or low-CTE laminates, or do they need to order (impacting lead time)?
- Fine Line Etching: Capability for 3 mil trace / 3 mil space (often needed for high-resistance traces).
- Vacuum Baking: Ovens available for post-fabrication bake-out.
Group 3: Quality System & Traceability
- Cross-Section Database: Can they provide cross-sections verifying plating thickness and wall quality?
- Material Certs (CoC): Traceability of the laminate back to the manufacturer.
- AOI Sensitivity: Is AOI calibrated to detect defects in complex hatch patterns?
- Calibration Records: Are TDR and CMM (Coordinate Measuring Machine) tools calibrated?
- IPC Class: Certification to manufacture to IPC Class 3 (High Reliability).
- Non-Conforming Material Process: How do they handle boards that fail impedance tests?
Group 4: Change Control & Delivery
- Process Freeze: Agreement that no changes to chemistry or lamination press cycles will occur without notice.
- Packaging: Vacuum sealing with desiccant and humidity indicator cards (HIC).
- Edge Protection: Protection for thin/fragile boards during shipping.
- First Article Inspection (FAI): Full dimensional report provided with the first shipment.
- Lead Time Buffer: Agreement on lead time buffers for exotic material procurement.
- Scrap Allowance: Agreement on acceptable yield loss for complex mechanical routing.
How to choose low thermal conductivity stackup (trade-offs and decision rules)
Engineering a low thermal conductivity stackup is an exercise in balancing thermal isolation against electrical performance and mechanical stability.
- Thermal Isolation vs. Signal Integrity (SI)
- If you prioritize maximum thermal isolation: Use hatched ground planes or no planes at all.
- If you prioritize Signal Integrity: Use solid planes.
- Decision Rule: If signal frequency > 1GHz, use hatched planes with careful impedance modeling. If DC/Low Frequency, remove planes entirely in the isolation zone.
- Rigidity vs. Conductivity
- If you prioritize rigidity: Use thicker FR4 or add a Stainless Steel stiffener.
- If you prioritize low conductivity: Use thin Polyimide (Flex) or very thin FR4.
- Decision Rule: If the board must support heavy components, use a rigid-flex approach where the "flex" area provides the thermal break.
- Cost vs. Performance
- If you prioritize cost: Use standard FR4 with routing cutouts (slots) to reduce heat flow.
- If you prioritize performance: Use Polyimide or Teflon with Manganin traces.
- Decision Rule: Start with FR4 + Slots. Only move to exotic materials if thermal modeling shows FR4 fails the budget.
- Vacuum Compatibility vs. Standard Processing
- If you prioritize vacuum use: Avoid soldermask (or use specific types) and require bake-outs.
- If you prioritize standard processing: Use standard LPI soldermask.
- Decision Rule: If pressure < $10^{-6}$ Torr, treat as a vacuum application (strict material control).
- Connector Durability vs. Thermal Leak
- If you prioritize durability: Use through-hole connectors with robust annular rings.
- If you prioritize low thermal leak: Use surface mount connectors or wire bonding to minimize copper volume.
- Decision Rule: Use SMT where possible; if mechanical stress is high, use through-hole but back-drill to remove stubs.
low thermal conductivity stackup FAQ (cost, lead time, Design for Manufacturability (DFM) files, materials, testing)
Q: How does a low thermal conductivity stackup affect PCB cost? A: Expect a cost increase of 30–50% over standard rigid boards. This is driven by specialized materials (like Polyimide), slower processing for thin cores, and the need for complex routing (milling slots).
Q: What is the typical lead time for these specialized boards? A: Standard lead time is 15–20 working days. If exotic materials (like specific Rogers or Arlon laminates) are not in stock, add 2–4 weeks for material procurement.
Q: Can I use standard FR4 for a low thermal conductivity stackup? A: Yes, but you must rely on geometry. By using thin FR4 (e.g., 0.4mm) and milling out 80% of the material width (creating narrow bridges), you can achieve significant isolation without expensive materials.
Q: What specific DFM files are required for the thermal isolation zones? A: Provide a mechanical layer clearly marking "Cutout / Mill Regions." Also, if using hatched planes, provide the specific hatch pitch and width in the Gerber files or fabrication notes to ensure the CAM engineer doesn't "fix" it to solid copper.
Q: How do you test the acceptance criteria for thermal conductivity? A: We typically do not measure thermal conductivity directly on every production board. Instead, we validate the geometry (copper thickness, trace width, dielectric thickness) via cross-section, which guarantees the thermal performance matches the design simulation.
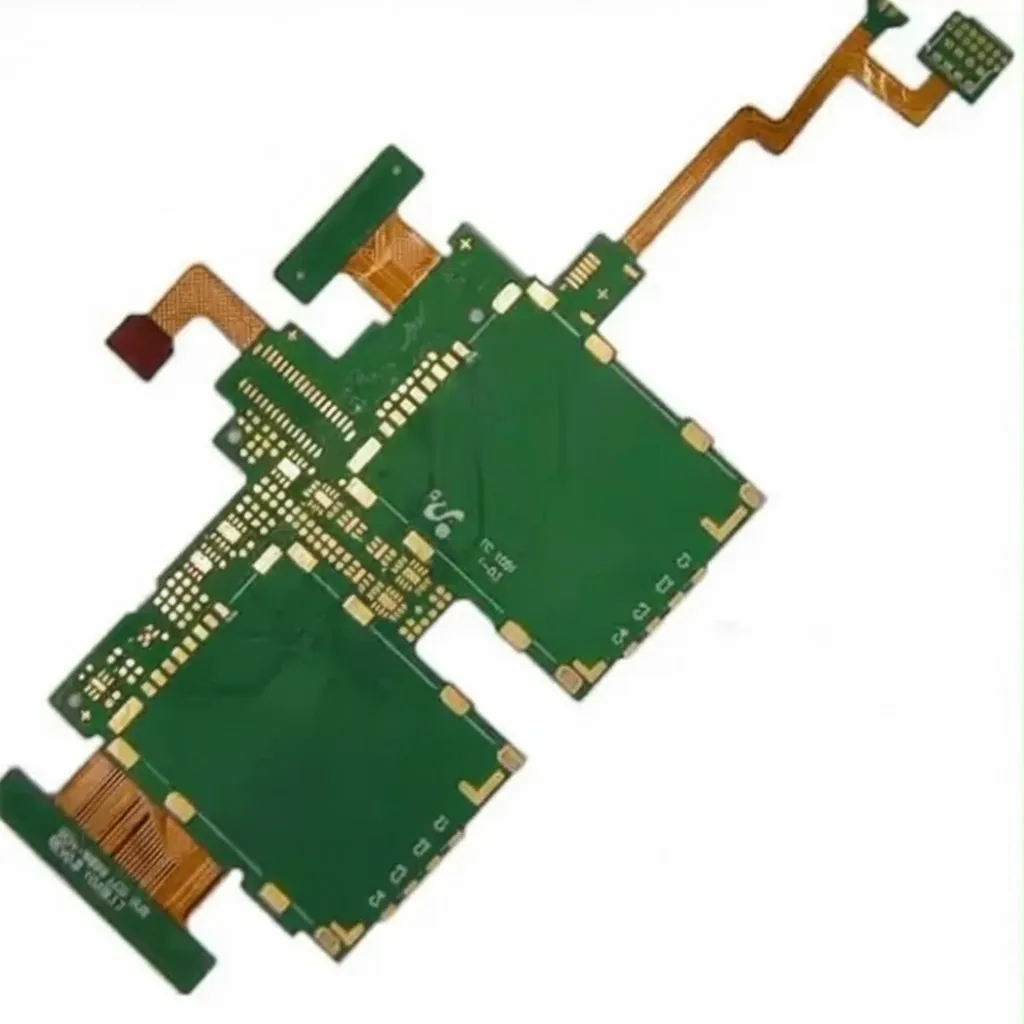
Q: Is a cryostat feedthrough PCB considered a standard rigid board? A: Usually, no. It is often a rigid-flex PCB or a specialized rigid board with hermetic sealing requirements. The "feedthrough" aspect often requires specific tolerance control for connector mating.
Q: What is the best surface finish for low thermal conductivity stackup? A: ENIG is the standard. It provides a flat surface for fine-pitch components and has lower thermal conductivity than HASL (which adds a thick, variable layer of tin-lead).
Q: How does an ultra low noise readout layout impact the stackup? A: It requires high-impedance isolation. You may need to increase the spacing between the noisy digital layers and the sensitive analog layers, potentially requiring a thicker dielectric or a specific layer count to facilitate shielding without creating thermal shorts.
Q: Can APTPCB assist with the thermal modeling? A: We provide DFM feedback on the manufacturability of your thermal features (e.g., "this bridge is too narrow to mill safely"), but the thermal simulation (heat flow analysis) should be performed by the design engineer.
Resources for low thermal conductivity stackup (related pages and tools)
- PCB Stackup Design: Understand how to configure layers and select dielectrics to minimize thermal bridging while maintaining signal integrity.
- Rigid-Flex PCB Capabilities: Explore how combining rigid and flex substrates can create the ultimate thermal break for cryogenic systems.
- PCB Quality Control: Review our testing protocols, including cross-sectioning and IPC Class 3 compliance, essential for high-reliability isolation.
- DFM Guidelines: Learn the design rules for milling slots and handling thin materials to ensure your low-conductivity design is manufacturable.
- Flex PCB Manufacturing: Details on Polyimide materials, which are the industry standard for low thermal conductivity and vacuum compatibility.
Request a quote for low thermal conductivity stackup (Design for Manufacturability (DFM) review + pricing)
Ready to validate your design? Click here to Request a Quote and get a comprehensive DFM review that checks your stackup for both manufacturability and thermal isolation integrity.
To get the most accurate quote and DFM, please include:
- Gerber Files (RS-274X): With clear outlines for thermal cutouts.
- Stackup Drawing: Specifying copper weight (e.g., 1/3 oz) and material type.
- Fabrication Notes: Mention "Low Thermal Conductivity Requirement" so our CAM engineers preserve your hatched planes.
- Test Requirements: Specify if TDR or specific cross-section reports are needed.
Conclusion (next steps)
Designing a low thermal conductivity stackup is about precision subtraction—removing every microgram of unnecessary copper and dielectric to choke off heat flow without compromising the circuit's function. Whether you are building a cryostat feedthrough PCB or an ultra low noise readout layout, the success of the project depends on strict material control, precise milling, and rigorous validation. By defining your specs early and partnering with a capable manufacturer like APTPCB, you can ensure your thermal barriers hold up in the most demanding environments.