Key Takeaways
- Core Definition: A Power Factor Meter measures the ratio of real power (working power) to apparent power (total power) in an AC circuit.
- Efficiency Indicator: A reading closer to 1.0 (or 100%) indicates high electrical efficiency, while a low reading suggests wasted energy.
- PCB Design Criticality: The accuracy of the meter depends heavily on the Power Meter PCB layout, specifically regarding signal isolation and grounding.
- Phase Angle: The meter essentially calculates the cosine of the phase angle between voltage and current waveforms.
- Calibration: Regular validation against a known standard is required to maintain accuracy over time.
- Safety: High-voltage isolation is the primary safety concern during the manufacturing of these devices.
- Validation: Functional testing must verify performance under both leading (capacitive) and lagging (inductive) load conditions.
What Power Factor Meter really means (scope & boundaries)
Understanding the fundamental purpose of this device is the prerequisite to designing or selecting one effectively. A Power Factor Meter is a specialized instrument used to monitor the efficiency of an Alternating Current (AC) power system. In ideal conditions, voltage and current waveforms are perfectly synchronized. However, inductive loads like motors and transformers cause the current to lag behind the voltage, while capacitive loads cause it to lead. This misalignment results in "reactive power," which does no useful work but still burdens the electrical infrastructure.
The meter quantifies this misalignment. It provides a numerical value between 0 and 1 (or -1 to +1 in some digital systems) representing the "Power Factor" (PF). A low PF means the utility company must supply more current to do the same amount of work, often leading to surcharges for industrial consumers. Therefore, this meter is not just a measurement tool; it is a cost-control device.
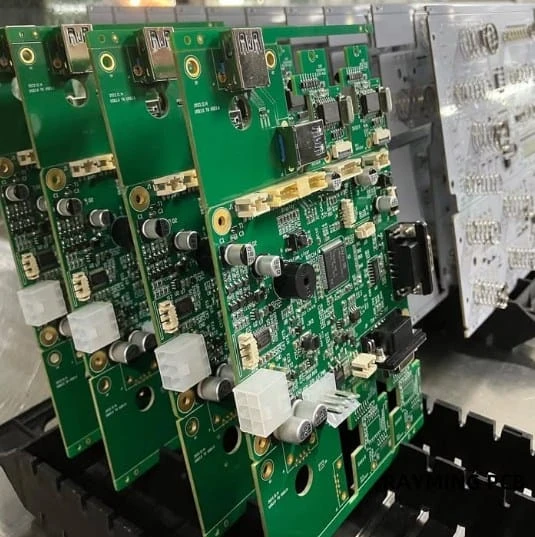
For engineers and manufacturers, the scope extends beyond simple measurement. It involves integrating precise sensing circuits onto a printed circuit board. APTPCB (APTPCB PCB Factory) specializes in fabricating these high-precision boards, ensuring that the physical hardware supports the theoretical design requirements. Whether the application is a standalone handheld unit or an integrated panel mount device, the underlying principles of phase detection and signal processing remain constant.
The device differs from a standard multimeter. While a multimeter measures voltage and current independently, a Power Factor Meter must measure them simultaneously and compute the phase relationship in real-time. This requires specialized circuitry, often involving zero-crossing detectors or Digital Signal Processing (DSP) chips, to achieve the necessary precision.
Metrics that matter (how to evaluate quality)
Once the scope of the device is defined, the next step is to understand the specific technical metrics that determine performance. Not all meters are created equal, and the specifications must match the intended application.
| Metric | Why it matters | Typical Range / Factors | How to measure |
|---|---|---|---|
| Accuracy Class | Determines the reliability of the data for billing or critical control. | 0.5% to 2.5% (Class 0.5 is standard for industrial). | Compare reading against a calibrated reference standard under stable load. |
| Current Range | The meter must handle the load without saturation or damage. | 5A to 100A direct; higher with Current Transformers (CT). | Verify linearity across the full scale using a variable load bank. |
| Voltage Range | Must match the system voltage to prevent insulation breakdown. | 110V, 220V, 480V, up to kV ranges with Potential Transformers (PT). | Dielectric withstand test (Hi-Pot) on the input terminals. |
| Frequency Response | Critical for systems with variable frequency drives (VFDs) or harmonics. | 50Hz / 60Hz standard; 400Hz for aerospace; wideband for harmonic analysis. | Sweep input frequency and observe deviation in PF reading. |
| Burden (VA) | The power consumed by the meter itself from the circuit being measured. | Typically < 2 VA. Lower is better for measurement integrity. | Measure voltage drop across the meter inputs at rated current. |
| Resolution | The smallest change in power factor the device can detect and display. | 0.01 to 0.001. | Incrementally change the phase angle of the test source. |
| Phase Angle Error | The internal delay caused by the meter's electronics. | < 1 degree is preferred for high precision. | Compare the input phase difference vs. the displayed calculation. |
| Operating Temperature | Ensures stability in harsh industrial environments. | -10°C to +55°C is common. | Environmental chamber cycling while monitoring drift. |
Selection guidance by scenario (trade-offs)
Understanding the metrics allows you to navigate the trade-offs required for different operational environments. A meter perfect for a laboratory might fail in a heavy industrial plant.
1. Heavy Industrial Motor Control In this scenario, the primary load is inductive (lagging). The environment is noisy, with high electromagnetic interference (EMI).
- Recommendation: Use a robust, panel-mount digital meter with a high IP rating (dust/moisture protection).
- Trade-off: You sacrifice some resolution for durability and noise immunity.
- Key Feature: Compatibility with external Current Transformers (CTs) is essential to handle hundreds of amperes.
2. Residential Smart Metering Here, the focus is on billing accuracy and integration with home automation.
- Recommendation: A compact Demand Meter PCB design integrated into the main energy monitor.
- Trade-off: Size constraints limit the isolation distance, requiring advanced PCB materials.
- Key Feature: Communication protocols (Zigbee, Wi-Fi) to transmit data to the utility or user app.
3. RF and Telecommunications High-frequency applications require specialized measurement of forward and reflected power, often referred to as an RF Power Meter. While slightly different from utility PF meters, the concept of efficiency (VSWR) is parallel.
- Recommendation: High-frequency analog inputs with impedance-controlled PCB traces.
- Trade-off: Extremely high cost and sensitivity; not suitable for general power measurements.
- Key Feature: Low insertion loss to prevent the meter from affecting the signal.
4. Laboratory and Calibration Precision is the only metric that matters here.
- Recommendation: A benchtop unit with Class 0.1 accuracy or better.
- Trade-off: Large physical size, high cost, and fragility. Not portable.
- Key Feature: Ability to measure non-sinusoidal waveforms and high harmonic content.
5. Portable Field Testing Technicians need to troubleshoot various sites quickly.
- Recommendation: A handheld clamp-on meter.
- Trade-off: Lower accuracy compared to hardwired units due to clamp positioning errors.
- Key Feature: Battery life and ruggedness (drop protection).
6. Renewable Energy (Inverters) Solar inverters switch between pushing power (unity PF) and supporting grid voltage (reactive power).
- Recommendation: A bidirectional Efficiency Meter PCB capable of reading four-quadrant power (import/export, lead/lag).
- Trade-off: Complex software algorithms required to interpret rapid direction changes.
- Key Feature: Fast sampling rate to capture transient changes during cloud cover or grid switching.
From design to manufacturing (implementation checkpoints)

Selecting the right type is only the first step; building the hardware requires strict process control to ensure safety and accuracy. When manufacturing a Power Factor Meter at the PCB level, specific design-for-manufacturing (DFM) rules apply. APTPCB utilizes advanced PCB manufacturing capabilities to address these specific challenges.
| Checkpoint | Recommendation | Risk | Acceptance Method |
|---|---|---|---|
| 1. High Voltage Isolation | Maintain strict creepage and clearance distances (e.g., >3mm for 220V) between AC mains and low-voltage logic. | Arcing, user shock, or catastrophic board failure. | Visual inspection and Hi-Pot testing (dielectric withstand). |
| 2. Current Sensing Traces | Use heavy copper (2oz or 3oz) or busbars for high-current paths on the Power Meter PCB. | Overheating traces leading to delamination or fire. | Thermal imaging during load testing; resistance calculation. |
| 3. Analog/Digital Separation | Physically separate the analog sensing section from the digital processing section (MCU/Display). | Digital noise coupling into the measurement, causing erratic readings. | Noise floor analysis using an oscilloscope. |
| 4. Grounding Strategy | Implement a star ground or split ground plane joined at a single point (ADC). | Ground loops introducing offset errors in voltage measurements. | Review Gerber files for ground loops; signal integrity simulation. |
| 5. Component Tolerance | Use 0.1% or 1% precision resistors for voltage dividers and sensing networks. | Inaccurate scaling factors leading to wrong PF calculations. | Bill of Materials (BOM) verification and incoming component inspection. |
| 6. Thermal Management | Place shunt resistors away from temperature-sensitive components (like voltage references). | Thermal drift causing accuracy loss as the device warms up. | Temperature cycling test (-10°C to +60°C). |
| 7. Impedance Control | For high-frequency or RF variants, use an Impedance Calculator to define trace widths. | Signal reflection and loss of measurement fidelity. | TDR (Time Domain Reflectometry) testing on coupons. |
| 8. Solder Mask Quality | Ensure high-quality solder mask dams between fine-pitch pins on the ADC/MCU. | Solder bridges causing short circuits during assembly. | Automated Optical Inspection (AOI). |
| 9. Input Protection | Include MOVs (Metal Oxide Varistors) and fuses at the input stage. | Damage from voltage spikes or lightning surges. | Surge immunity testing (IEC 61000-4-5). |
| 10. Conformal Coating | Apply coating if the meter is intended for humid or industrial environments. | Moisture causing leakage currents across the PCB surface. | UV light inspection after coating application. |
| 11. Test Points | Design accessible test points for calibration signals (Voltage and Current injection). | Inability to calibrate the unit after assembly. | Fixture fit check during prototyping. |
| 12. Mechanical Stress | Ensure heavy components (transformers, large caps) are mechanically secured (silicone/glue). | Vibration causing solder joint fatigue and open circuits. | Vibration testing. |
Common mistakes (and the correct approach)
Even with a solid design plan, errors often occur during the integration and usage phases. Avoiding these pitfalls ensures the Power Factor Meter delivers reliable data.
1. Reversing Current Transformer (CT) Polarity
- The Mistake: Installing the CT backwards on the conductor.
- The Result: The meter reads a negative power factor or calculates power flow in the wrong direction.
- The Fix: Always observe the P1/P2 (primary) and S1/S2 (secondary) markings. Follow the "Source to Load" orientation rule.
2. Ignoring Harmonic Distortion
- The Mistake: Using a standard "displacement power factor" meter on a circuit heavy with non-linear loads (LEDs, VFDs, computers).
- The Result: The meter shows a high PF (e.g., 0.95), but the true efficiency is lower due to harmonic currents.
- The Fix: Use a "True RMS" or "True Power Factor" meter that accounts for total harmonic distortion (THD).
3. Improper PCB Grounding Layout
- The Mistake: Mixing high-current return paths with sensitive analog reference grounds on the Power Meter PCB.
- The Result: The reading fluctuates wildly or has a permanent offset.
- The Fix: Use separate ground planes and connect them only at the ADC or power supply entry point.
4. Overlooking Burden Voltage
- The Mistake: Using long, thin wires to connect the CT to the meter.
- The Result: The resistance of the wire adds to the "burden," causing the CT to saturate or lose accuracy.
- The Fix: Keep CT leads short and use a gauge appropriate for the secondary current (usually 14-12 AWG).
5. Confusing Similar Instrumentation
- The Mistake: Assuming a Conductivity Meter PCB or an Efficiency Meter PCB can serve the same purpose.
- The Result: While they share design similarities (precision analog inputs), a conductivity meter measures liquid resistance, not electrical phase angles.
- The Fix: Specify the exact application during the design phase.
6. Neglecting Calibration
- The Mistake: Installing the meter and never checking it again.
- The Result: Component aging (capacitor drift) causes the reading to slowly deviate over years.
- The Fix: Establish a yearly calibration schedule using a certified power source.
7. Wrong Voltage Reference Point
- The Mistake: Tapping the voltage reference from a different phase than the current being measured.
- The Result: The meter calculates the phase angle between Phase A Voltage and Phase B Current, resulting in a meaningless value.
- The Fix: Ensure Voltage Phase A and Current Phase A are paired correctly.
8. Undersizing the Input Traces
- The Mistake: Designing PCB traces that are too narrow for the potential fault current.
- The Result: In a short-circuit event, the traces vaporize before the fuse blows.
- The Fix: Follow IPC-2221 standards for trace width based on temperature rise and current.
FAQ
To clarify any remaining confusion regarding these mistakes, here are answers to frequent inquiries about Power Factor Meters.
Q: What is the difference between Displacement Power Factor and True Power Factor? A: Displacement PF only considers the phase shift of the fundamental frequency (50/60Hz). True PF includes the effects of harmonic distortion. For modern electronics, True PF is the more accurate metric.
Q: Can a Power Factor Meter help reduce my electricity bill? A: The meter itself does not reduce the bill; it provides the data needed to install correction capacitors. If your utility charges a penalty for low PF, using the meter to size a correction bank can save significant money.
Q: Why does my meter read "Lead" or "Lag"? A: "Lag" means the current is behind the voltage (inductive load, like a motor). "Lead" means current is ahead of voltage (capacitive load). Most industrial sites are "Lagging."
Q: Is a digital meter better than an analog one? A: Digital meters are generally more accurate, easier to read, and can output data to computers. Analog meters are better for visualizing trends or fluctuating loads quickly without "digit jitter."
Q: Can I use a standard PCB for a Power Factor Meter? A: It depends on the voltage. For low-voltage inputs (via transformers), standard FR4 is fine. For direct mains connection, you need high-quality FR4 with specific CTI (Comparative Tracking Index) ratings to prevent arcing.
Q: How does this differ from an RF Power Meter? A: An RF Power Meter measures signal strength in radio frequencies (MHz to GHz range) and focuses on transmission line matching (VSWR). A Power Factor Meter operates at utility frequencies (50/60Hz) and focuses on energy efficiency.
Q: What is a Demand Meter PCB? A: A Demand Meter PCB is designed to calculate the maximum average power usage over a specific interval (e.g., 15 minutes). It is often integrated with PF measurement for billing purposes.
Q: How often should the meter be calibrated? A: For billing or critical control, once a year. For general monitoring, every 2-3 years is typically sufficient.
Q: What happens if the PF is 1.0? A: This is "Unity Power Factor." It is the ideal state where 100% of the supplied energy is being converted into useful work.
Q: Why is isolation important in the PCB design? A: Without isolation, the low-voltage user interface buttons or data ports could carry lethal mains voltage in the event of a fault.
Glossary (key terms)
Technical discussions often use specific terminology; this table defines the essential vocabulary used in the design and operation of these meters.
| Term | Definition |
|---|---|
| Active Power (kW) | The "real" power that actually performs work (turns motors, lights lamps). |
| Apparent Power (kVA) | The vector sum of Active and Reactive power; the total power supplied by the grid. |
| Reactive Power (kVAR) | Power that oscillates back and forth between source and load due to inductance/capacitance. |
| Phase Angle ($\phi$) | The angular difference (in degrees) between the voltage and current waveforms. |
| Cos Phi ($\cos\phi$) | Another term for Power Factor in pure sine wave systems (Displacement PF). |
| Leading PF | A condition where current peaks before voltage (Capacitive load). |
| Lagging PF | A condition where current peaks after voltage (Inductive load). |
| Harmonics | Frequencies that are integer multiples of the fundamental frequency, causing waveform distortion. |
| CT (Current Transformer) | A sensor that steps down high current to a safe level for the meter to read. |
| PT (Potential Transformer) | A sensor that steps down high voltage to a safe level for the meter. |
| Burden | The load (impedance) placed on the secondary side of a CT or PT by the meter and wiring. |
| True RMS | A measurement method that accurately calculates the effective value of non-sinusoidal waves. |
| Zero-Crossing Detector | A circuit used to identify the exact moment a waveform passes through zero volts/amps. |
| Creepage | The shortest distance along the surface of the PCB insulation between two conductive parts. |
| Clearance | The shortest distance through the air between two conductive parts. |
Conclusion (next steps)
The Power Factor Meter is a cornerstone of energy management, bridging the gap between raw electricity consumption and operational efficiency. Whether you are monitoring a single industrial motor or designing a complex smart grid node, the accuracy of your data relies on the quality of the underlying hardware. From the initial selection of metrics to the rigorous checkpoints in PCB fabrication, every detail contributes to the reliability of the final reading.
For engineers looking to move from prototype to production, APTPCB provides the manufacturing expertise required to handle the high-voltage isolation, precision copper etching, and material selection these devices demand.
When you are ready to contact our engineering team for a quote or DFM review, please ensure you provide the following:
- Gerber Files: Including all copper layers, solder mask, and drill files.
- Stackup Specifications: Copper weight (e.g., 2oz for current paths) and dielectric thickness.
- Material Requirements: CTI rating for high-voltage safety or specific substrates for RF variants.
- Test Requirements: Specify if Hi-Pot testing or impedance control coupons are needed.
By adhering to these guidelines, you ensure that your Power Factor Meter is not just a design concept, but a robust, field-ready instrument.