
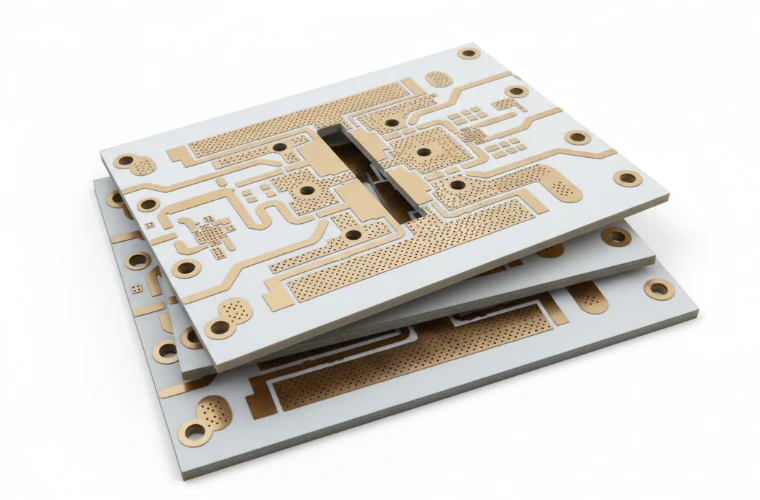
A low-noise RF front-end PCB determines how much of the antenna signal reaches the receiver with usable sensitivity. The path from antenna connector to LNA includes connectors, protection devices, filters, switches, matching networks, transmission lines, grounding structures, and bias circuits. Each element can consume noise margin.
For low-volume builds, RF performance depends on more than schematic correctness. The released stack-up, material construction, assembly process, substitutions, fixtures, and verification plan must remain controlled from prototype through repeat builds.
Key takeaways
- Define the RF budget, reference planes, interfaces, enclosure, and test method before layout release.
- Loss before the LNA directly affects receiver noise performance.
- LNA matching requires a balance between noise figure, gain, bandwidth, return loss, and stability.
- RF traces, return paths, vias, pads, and shielding structures operate as one electromagnetic system.
- Low-volume RF production requires configuration control, not simply tighter fabrication tolerances.
Table of Contents
- What should be defined before low-noise RF PCB layout?
- How does PCB loss affect RF receiver noise figure?
- How should an LNA matching network and bias circuit be designed?
- How do you select an RF PCB stack-up and material?
- How should RF grounding and routing be controlled?
- What changes for low-volume RF PCB manufacturing?
- How do you verify a low-noise RF front-end PCB?
- What causes RF front-end failures?
- Low-volume RF front-end PCB RFQ checklist
- Standards and responsibility boundary
- FAQ
What should be defined before low-noise RF PCB layout?
Low noise is a receiver requirement, not a PCB material choice. Convert the system target into measurable limits before routing begins.
| Requirement | Freeze before layout | Why it matters |
|---|---|---|
| Frequency plan | Bands, bandwidth, harmonics, blockers | Defines RF geometry and filtering needs |
| Sensitivity | Noise figure, sensitivity target, reference conditions | Allocates allowable loss before the LNA |
| Linearity | Gain, P1dB, IP3, blocker limits | Controls matching and isolation decisions |
| Interfaces | Antenna, connectors, filters, switches, mixers | Defines impedance and calibration planes |
| Environment | Temperature, enclosure, supply, nearby radios | Determines validation requirements |
Create a gain, loss, and noise budget that identifies every passive element before the first active gain stage.
How does PCB loss affect RF receiver noise figure?
Loss before the LNA is especially important because passive insertion loss directly reduces receiver sensitivity. A connector, protection device, filter, switch, launch, or PCB transmission line can consume noise budget before amplification occurs.
Use a loss ledger:
| Element | Measure or model | Evidence |
|---|---|---|
| Connector and launch | Insertion loss and return loss | Vendor data and measured RF structures |
| Filter or switch | Loss, isolation, compression | Component data and RF testing |
| PCB transmission line | Dielectric loss, conductor loss, discontinuities | Stack-up model and coupon data |
| Assembly effects | Pads, solder, package parasitics | RF model and first article measurement |
A controlled impedance coupon confirms transmission-line construction. It does not prove receiver sensitivity because matching, components, bias, oscillation, and fixtures also affect performance.
How should an LNA matching network and bias circuit be designed?
The LNA input match is an optimization problem. The lowest S11 value does not always produce the lowest noise figure.
Evaluate:
- Noise parameters.
- Gain stability.
- Bandwidth.
- Return loss.
- Component tolerance.
- Source/load mismatch conditions.
Keep the matching network physically close to the device. Include package pads, vias, copper geometry, solder effects, and component parasitics in the RF model when operating at microwave frequencies.
Bias networks require RF isolation. Place decoupling close to device pins, control return-current paths, and separate sensitive RF regions from digital switching noise.
How do you select an RF PCB stack-up and material?
Choose the construction from electrical requirements and manufacturing capability.
| Decision factor | Specify | Design impact |
|---|---|---|
| Frequency | Operating band and harmonics | Determines loss and phase sensitivity |
| Dielectric | Dk, Df, thickness, temperature behavior | Controls impedance and propagation |
| Copper | Thickness and surface profile | Affects conductor loss |
| RF geometry | Microstrip, stripline, grounded coplanar | Defines field distribution |
| Production | Available materials and repeatability | Controls future builds |
A practical selection matrix:
| Application condition | Typical choice |
|---|---|
| Short RF paths and moderate frequencies | Controlled FR-4 construction may be suitable |
| Longer microwave paths | Lower-loss RF laminate may be required |
| Mixed RF and digital design | Hybrid construction may provide separation |
| Repeat low-volume builds | Stable, available, documented construction |
Specify the exact laminate family, thickness, copper condition, and finished construction. Material names alone are insufficient.
Review the Rogers RF material guide and high-frequency PCB fabrication guide before releasing the stack-up.
How should RF grounding and routing be controlled?
RF current follows the complete electromagnetic structure of the trace and its return path.
Control:
- Continuous reference planes.
- Short antenna-to-LNA routing.
- Controlled transitions between layers.
- Ground via placement.
- Separation from clocks, converters, and switching nodes.
- Shielding structures where required.
Use grounded coplanar waveguide, microstrip, or stripline based on loss, isolation, test access, and manufacturability requirements.
Use the impedance calculator for early estimates, then validate final geometry with the fabrication stack-up.
What changes for low-volume RF PCB manufacturing?
Low-volume RF builds require stronger documentation because each board represents a larger percentage of the production history.
| Control area | Required decision |
|---|---|
| Stack-up | Approved materials, thicknesses, copper, substitutions |
| RF geometry | Trace dimensions, impedance targets, reference planes |
| Assembly | RF component sources, orientation, reflow, cleaning |
| Testing | Fixtures, calibration method, acceptance limits |
| Traceability | Material lots, build records, revision history |
A repeat build should reproduce the approved RF baseline, not simply produce a board with the same part number.
Early DFM review should confirm panelization, RF structures, test access, material availability, and documentation requirements.
How do you verify a low-noise RF front-end PCB?
Verification should progress from physical construction to receiver performance.
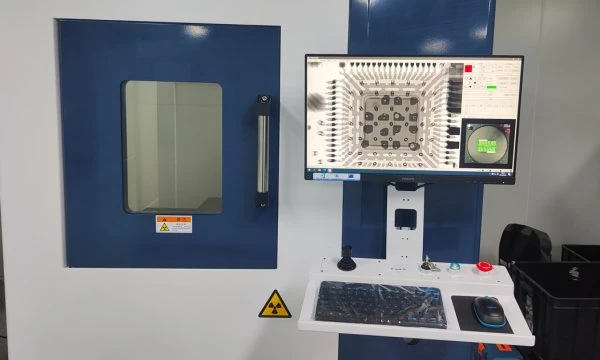
| Verification stage | Confirms | Does not confirm |
|---|---|---|
| PCB inspection | Manufacturing quality and dimensions | RF sensitivity |
| TDR/coupon testing | Controlled impedance behavior | Complete RF chain performance |
| VNA testing | Reflection, insertion loss, isolation | System sensitivity |
| Board RF testing | Gain, current, S-parameters, stability | Antenna installation effects |
| Receiver testing | Noise figure and sensitivity margin | Every deployment environment |
Noise figure and VNA measurements require defined reference planes, calibration, and fixture control.
What causes RF front-end failures?
| Symptom | Possible causes | Investigation |
|---|---|---|
| High noise figure | Pre-LNA loss, mismatch, bias noise, oscillation | Measure loss, gain, current, and NF separately |
| Gain variation | Material variation, component tolerance, assembly changes | Compare RF data with build records |
| Good S11 but poor sensitivity | Return-loss match used instead of noise match | Recheck receiver budget |
| High current | Instability or unintended oscillation | Test across frequency, voltage, and temperature |
| Match shift after assembly | Solder, enclosure, finish, substitutions | Measure final assembled configuration |
Low-volume RF front-end PCB RFQ checklist
Design and fabrication package
- Gerber, ODB++, or IPC-2581 files.
- Drill files and fabrication drawings.
- BOM and assembly data.
- Approved stack-up and impedance requirements.
- Material, copper, finish, and substitution requirements.
RF requirements
- Frequency bands and bandwidth.
- Critical RF nets and reference planes.
- Noise figure, gain, return loss, insertion loss, and isolation targets.
- Test fixture requirements.
- Calibration and reporting requirements.
Production requirements
- Quantities and build stages.
- First article requirements.
- Coupon requirements.
- Material traceability.
- RF inspection and test records.
Standards and responsibility boundary
Relevant references may include:
- IPC-6012 — Qualification and Performance Specification for Rigid Printed Boards
- IPC-2221 — Generic Standard on Printed Board Design
- IPC-2141 — Design Guide for High-Speed Controlled Impedance Circuit Boards
- IPC-TM-650 — Test Methods Manual
- IEC 62037 — Passive RF and Microwave Devices, Intermodulation Level Measurement
Confirm current revisions, acceptance criteria, and product requirements for each project.
APTPCB can review a submitted package through its high-frequency PCB and assembly workflow. RF architecture, antenna integration, firmware states, regulatory approval, and system acceptance remain the responsibility of the product design team.
FAQ
What is a low-noise RF front-end PCB?
It is the receiver input section containing elements such as protection, filtering, switching, matching networks, and an LNA that preserve weak RF signals.
Does every RF front-end PCB require Rogers material?
No. Material selection depends on frequency, loss, geometry, temperature, availability, and qualification requirements.
Must an LNA input always be matched for minimum S11?
No. The optimum impedance may balance noise figure, gain, stability, and bandwidth rather than only return loss.
Does PCB loss before the LNA matter?
Yes. Passive loss before the first gain stage reduces receiver sensitivity and must be included in the RF budget.
What files are required for a low-volume RF PCB quote?
Provide fabrication files, assembly files, stack-up details, RF requirements, test limits, quantities, fixtures, and documentation expectations.
Request an RF front-end PCB review
Submit the released package, RF budget, stack-up, material controls, substitution rules, reference planes, test plan, limits, quantities, and required records through the RF PCB quote workflow.