RF shield can design PCB: what this playbook covers (and who it’s for)
Electromagnetic Interference (EMI) and Radio Frequency Interference (RFI) are the silent killers of wireless product performance. For engineers and procurement leads, the integration of shielding at the board level is often the most cost-effective solution to regulatory failures and signal degradation. This guide focuses specifically on the RF shield can design PCB process—moving beyond simple component selection to the holistic integration of the shield into the printed circuit board architecture.
This playbook is designed for hardware engineers, PCB layout designers, and procurement managers who need to source high-reliability RF boards. We will bypass theoretical physics and focus on the practicalities of manufacturing: defining specifications that factories can actually build, identifying risks that cause yield loss during assembly, and validating the final product. Whether you are designing a compact IoT sensor or a high-power base station, the principles of RF shield can design PCB remain consistent: isolation, grounding, and thermal management.
At APTPCB (APTPCB PCB Factory), we see hundreds of RF designs annually. The difference between a smooth production run and a nightmare of rework often comes down to how well the shield interface was defined in the initial data package. This guide will help you structure your requirements to ensure your manufacturing partner succeeds on the first attempt.
When RF shield can design PCB is the right approach (and when it isn’t)
Understanding the manufacturing implications of your shielding strategy is the first step before finalizing your RF shield can design PCB layout.
When to use Board-Level Shielding (BLS):
- High-Density Integration: When you have multiple radio modules (e.g., Wi-Fi, Bluetooth, GPS) on a single board and need to prevent cross-talk.
- Regulatory Compliance: When you need to pass FCC/CE emissions testing without redesigning the entire external enclosure.
- Sensitive Analog Circuitry: When low-noise amplifiers (LNAs) are placed near noisy power management units (PMUs) or high-speed digital lines.
- Modular Design: When you want the option to populate or depopulate the shield based on the specific SKU without changing the PCB layout.
When to avoid it (or use alternatives):
- Extreme Height Constraints: If the Z-axis clearance is less than 1.5mm, a standard can might not fit. In these cases, sputtering or conformal shielding (conductive paint) might be necessary, though they are more expensive.
- High-Power Thermal Dissipation: If the components under the shield generate significant heat and cannot be heatsinked through the bottom of the PCB, a closed metal can will act as an oven, trapping heat and reducing component life.
- Prototyping Phase: During early R&D, permanently soldering a shield makes debugging nearly impossible. Use clips or snap-on covers during development before committing to a soldered frame for mass production.
Specs & requirements (before quoting)

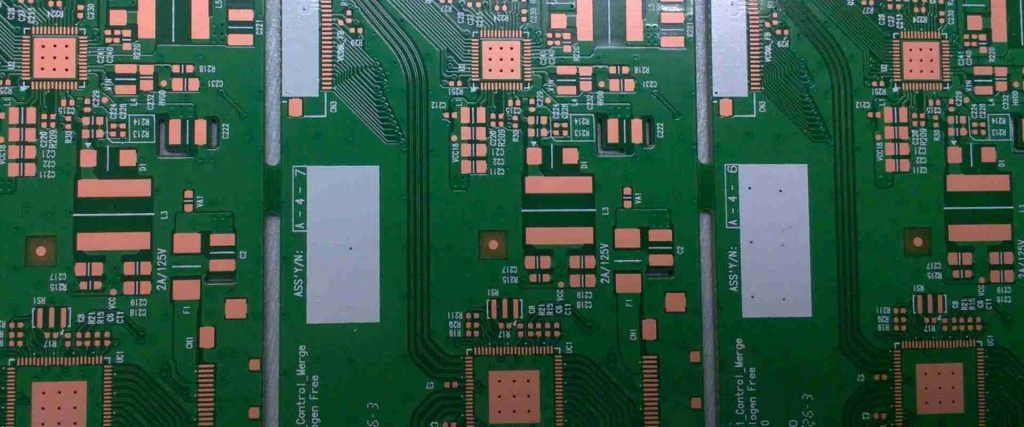
To get an accurate quote and a viable DFM (Design for Manufacturability) report for an RF shield can design PCB project, you must move beyond generic requests. You need to define the interaction between the metal can and the PCB substrate.
Material and Mechanical Specs:
- Shield Material: Specify Nickel Silver (standard for solderability and corrosion resistance) or Tin-Plated Steel (lower cost, slightly lower performance).
- Material Thickness: Define the range (typically 0.15mm to 0.30mm). Thinner materials save weight but warp easily during reflow; thicker materials are rigid but harder to form.
- Planarity Tolerance: Specify a coplanarity requirement of ≤0.10mm (4 mils) for the shield frame to ensure all pins touch the solder paste during reflow.
- Ventilation: Explicitly state if the top cover requires perforation holes for heat dissipation (e.g., "1.5mm diameter holes, 30% open area").
PCB Layout and Stackup:
- Ground Ring Width: Define the minimum width of the exposed ground trace on the PCB (typically 0.8mm to 1.0mm) to accommodate the shield footprint and solder fillet.
- Via Stitching Density: Specify the maximum distance between ground vias connecting the shield pad to the internal ground planes (e.g., "Vias every 2.0mm along the shield perimeter").
- Solder Mask Clearance: Define the expansion of the solder mask opening relative to the shield pad (usually 1:1 or +0.05mm).
- Component Clearance: Set a strict "keep-out" zone rule. Components must be at least 0.5mm away from the inner wall of the shield to prevent shorting during vibration.
Assembly and Reliability:
- Mounting Method: Clearly choose between "Surface Mount Clips," "Two-Piece Frame + Cover," or "One-Piece Soldered Can."
- Reflow Profile: If using custom shields with high thermal mass, request a specialized reflow profile to ensure the solder melts without overheating sensitive ICs inside.
- Packaging: Specify if shields should be delivered in Tape & Reel (for automated pick-and-place) or Trays (for manual placement or larger shields).
- Reworkability: Define if the shield must be removable for repair (favors clips or two-piece designs) or if it is a permanent fixture.
Hidden risks (root causes & prevention)
Even with perfect specs, the RF shield can design PCB process introduces specific risks during mass production. These issues often pass initial prototypes but cause yield drop-off when volumes increase.
1. The "Shadow Effect" in Reflow
- Risk: Large metal shields block convective heat in the reflow oven. Solder joints inside the shield or near the shield walls may not reach liquidus temperature (cold solder joints).
- Detection: Intermittent failures that disappear when the board is pressed; X-ray showing granular solder structure.
- Prevention: Design the shield with holes to allow airflow, or optimize the reflow profile with "soak" zones to equalize temperature.
2. Floating Shields (Tombstoning)
- Risk: If the solder paste deposits on the ground ring are uneven, or if the shield is slightly bent, the surface tension of the molten solder can pull the shield upright or cause it to float out of alignment.
- Detection: Visual inspection showing the shield is skewed or lifted on one side.
- Prevention: Use "segmented" solder paste stencils (dashed lines of paste rather than a continuous line) to prevent excessive solder build-up and floating.
3. Internal Short Circuits
- Risk: During assembly or drop testing, the metal shield flexes and touches tall components inside. This is common near the
RF connector launch assemblywhere signal pins are exposed. - Detection: Immediate functional failure or shorts to ground.
- Prevention: Implement a strict Z-height keep-out zone in the CAD software. Apply insulating Kapton tape to the inside roof of the shield if height margins are tight.
4. Thermal Traps
- Risk: The shield acts as a thermal blanket. High-power RF amplifiers inside the shield overheat, causing frequency drift or burnout.
- Detection: Thermal imaging (difficult with shield on) or internal temperature sensors reporting high values.
- Prevention: Use thermal interface material (TIM) to bridge the gap between the component and the shield, turning the shield into a heatsink, or ensure sufficient ground vias under the hot component to transfer heat to the PCB core.
5. Inspection Blind Spots
- Risk: Automated Optical Inspection (AOI) cameras cannot see components covered by a one-piece shield. Missing or skewed components inside go undetected until functional test.
- Detection: High fallout at Functional Circuit Test (FCT).
- Prevention: Use two-piece shields (frame + removable lid) so AOI can happen before the lid is snapped on. Alternatively, rely on 2D/3D X-ray inspection for critical internal parts.
6. Overmolding Pressure
- Risk: If the PCB undergoes
overmolding for RF front-endprotection (low-pressure molding), the injection pressure can crush thin shields or displace them. - Detection: Physical deformation of the shield or cracked solder joints.
- Prevention: Specify rigid shields with internal support ribs if overmolding is required.
7. Via-in-Pad Solder Wicking
- Risk: If the ground ring has unplugged vias, solder paste will wick down the holes during reflow, leaving insufficient solder to hold the shield.
- Detection: Weak mechanical bond; shield falls off during drop test.
- Prevention: Tent vias on the bottom side or use filled/capped vias (VIPPO) for the ground ring.
8. CTE Mismatch
- Risk: The Coefficient of Thermal Expansion (CTE) of the metal shield differs from the FR4 PCB. Repeated thermal cycling causes the solder joints to crack.
- Detection: Field failures after months of use.
- Prevention: Use flexible clip mounting for large shields or ensure the solder fillet is substantial enough to absorb stress.
Validation plan (what to test, when, and what “pass” means)
To certify that your RF shield can design PCB strategy is robust, you need a validation plan that goes beyond simple continuity checks.
1. Solder Paste Inspection (SPI)
- Objective: Ensure sufficient solder volume on the ground ring.
- Method: 3D SPI machine measures paste height and volume.
- Acceptance: Volume within 80%-120% of stencil aperture calculation. No bridging.
2. First Article X-Ray
- Objective: Verify solder wetting under the shield frame and check for shorts inside.
- Method: 2D or 3D X-ray of the first 5-10 assembled boards.
- Acceptance: >75% void-free solder coverage on the ground ring; no solder balls inside the can.
3. Shield Retention / Pull Test
- Objective: Verify mechanical strength of the shield attachment.
- Method: Apply vertical pull force to the shield until failure (destructive test on sample).
- Acceptance: Failure must occur in the metal or PCB substrate, not at the solder interface. Minimum force threshold (e.g., >50N) met.
4. Thermal Shock / Cycling
- Objective: Stress-test the CTE mismatch between shield and PCB.
- Method: -40°C to +85°C (or +125°C), 500 cycles.
- Acceptance: No visible cracks in solder joints; ground continuity remains <0.1 Ohms.
5. EMI Chamber Effectiveness
- Objective: Verify the shield actually blocks RF noise.
- Method: Radiated emissions scan with and without the shield.
- Acceptance: Reduction in noise floor matches simulation (e.g., -20dB attenuation at target frequency).
6. Thermal Profiling (Live)
- Objective: Ensure components inside don't overheat.
- Method: Attach thermocouples to internal ICs, run device at max power with shield installed.
- Acceptance: Junction temperatures remain 10°C below maximum rating.
7. Vibration Testing
- Objective: Ensure the shield doesn't rattle or short against components.
- Method: Random vibration profile (e.g., automotive or aerospace standard).
- Acceptance: No physical displacement; no intermittent electrical shorts.
8. Rework Simulation
- Objective: Prove the board can be repaired.
- Method: Attempt to remove and replace the shield using standard hot air tools.
- Acceptance: PCB pads do not lift; adjacent components are not desoldered; replacement shield sits flat.
Supplier checklist (RFQ + audit questions)
When selecting a partner for RF shield can design PCB manufacturing, use this checklist to vet their capabilities.
Group 1: RFQ Inputs (What you send)
- Gerber Files: Including specific layers for the shield paste mask and solder mask.
- 3D STEP File: Of the shield can itself (critical for interference checking).
- Assembly Drawing: Clearly showing orientation and "Keep Out" zones.
- Stackup Diagram: Specifying the ground plane layer immediately below the shield.
- BOM: Including the shield part number and clip part numbers (if applicable).
- Test Requirements: Specific pass/fail criteria for RF functional testing.
- Volume Estimates: EAU (Estimated Annual Usage) to determine tooling strategy (soft tool vs. hard tool).
- Packaging Specs: Tape & Reel requirements for the shields.
Group 2: Capability Proof (What they must show)
- Stencil Design: Do they have standard guidelines for shield paste apertures (e.g., segmented patterns)?
- Placement Accuracy: Can their pick-and-place machines handle the weight and size of your specific shield?
- Reflow Profiling: Do they have experience profiling boards with high-mass metal cans?
- Custom Shield Sourcing: Do they have a network of metal stamping partners, or do you need to consign the parts?
- RF Experience: Have they assembled boards with
RF connector launch assemblyrequirements before? - Material Handling: How do they prevent oxidation of Nickel Silver shields before assembly?
Group 3: Quality System & Traceability
- X-Ray Capacity: Do they have in-line or offline X-ray for inspecting solder joints under the shield?
- AOI Strategy: How do they inspect components before the shield is placed (if using one-piece)?
- Solder Voiding Limits: What is their standard acceptable void percentage for large ground pads?
- ESD Control: Is the floor grounded properly to prevent static buildup on large metal shields?
- Traceability: Can they trace which batch of shields was used on a specific PCB serial number?
- Non-Conforming Material: What is the procedure if a shield is found to be warped?
Group 4: Change Control & Delivery
- Tooling Maintenance: Who owns the stamping die for the shield? Who pays for maintenance?
- ECN Process: How fast can they implement a change if the shield footprint needs to move?
- Lead Time: What is the lead time for custom metal stamping vs. the PCB fabrication?
- Storage: Do they have humidity-controlled storage for the shields to ensure solderability?
- Logistics: Can they ship the final PCBA in ESD trays that accommodate the height of the shield?
Decision guidance (trade-offs you can actually choose)
Every RF shield can design PCB decision involves a compromise. Here is how to navigate the most common trade-offs.
1. One-Piece Can vs. Two-Piece Frame & Lid
- If you prioritize Cost: Choose One-Piece. It requires only one stamping tool and one placement action.
- If you prioritize Repair/Inspection: Choose Two-Piece. You can inspect the board after reflow and snap the lid on later. It also allows for easy rework in the field.
2. SMT Clips vs. Continuous Solder Ring
- If you prioritize Board Space: Choose Continuous Solder Ring. It usually requires a narrower footprint than clips.
- If you prioritize Flexibility: Choose SMT Clips. They absorb thermal stress better and allow for easy shield removal without desoldering.
3. Perforated vs. Solid Shield
- If you prioritize Thermal Management: Choose Perforated. Holes allow heat to escape and reflow convection to work better.
- If you prioritize Maximum Shielding: Choose Solid. Holes can leak high-frequency RF energy (depending on wavelength).
4. Custom Shield vs. Off-the-Shelf (OTS)
- If you prioritize Speed/Low Volume: Choose OTS. No tooling fees, immediate availability (e.g., Laird, Masach).
- If you prioritize Fit/High Volume: Choose Custom. You get the exact height and shape you need, and unit cost drops significantly at scale.
5. Nickel Silver vs. Tin-Plated Steel
- If you prioritize Performance/Solderability: Choose Nickel Silver. It doesn't rust easily and solders beautifully.
- If you prioritize Cost: Choose Tin-Plated Steel. It is cheaper but heavier and can be prone to corrosion on cut edges.
6. Through-Hole Pins vs. Surface Mount
- If you prioritize Mechanical Ruggedness: Choose Through-Hole. The pins anchor the shield deeply into the board (good for heavy vibration).
- If you prioritize Routing Density: Choose Surface Mount. You don't block routing channels on inner layers with drill holes.
FAQ
Q: What is the minimum clearance between the shield wall and internal components? A: We recommend a minimum of 0.5mm (20 mils). This accounts for placement tolerance of the component, placement tolerance of the shield, and the thickness of the shield wall itself. Tighter spacing increases the risk of shorts.
Q: How do I design the solder paste stencil for a large shield ground ring? A: Do not use a continuous aperture. Use a "dashed" or segmented pattern (e.g., 6mm paste, 2mm gap). This prevents the shield from floating (tombstoning) and allows outgassing of flux volatiles, reducing voids.
Q: Can I place vias directly in the shield solder pad? A: Yes, but they must be managed. Open vias will wick solder away, leading to dry joints. We recommend using "plugged" or "tented" vias. If you must use open vias, place them on the inside edge of the pad, not the center, and ensure the solder mask dam is sufficient.
Q: How does shield height affect the RF connector launch assembly?
A: If the shield is too close to the RF connector, it can detune the impedance match of the launch. Ensure the shield wall is cut out or spaced far enough away from the connector signal pin to maintain 50-ohm impedance.
Q: Is it better to solder the shield manually or via reflow? A: Reflow is always preferred for consistency and quality. Manual soldering is inconsistent, slow, and risks overheating adjacent components. Only use manual soldering for prototyping or very low-volume rework.
Q: What if I need to use overmolding for RF front-end modules?
A: You must use a reinforced shield design. Standard thin-wall shields will crush under molding pressure. You may also need to use a high-temperature solder alloy to prevent the shield from reflowing again during the molding process if the mold temperature is high.
Q: How do I handle thermal management for chips inside the shield? A: Use the PCB itself as the heatsink. Place dense via arrays under the hot component to transfer heat to the bottom layer. If that's not enough, use a thermal pad on top of the chip to conduct heat into the metal shield can.
Q: Does the shield need to be grounded at every point? A: Ideally, yes. A continuous ground connection provides the best Faraday cage effect. However, for lower frequencies, gaps are acceptable. For mmWave or high-speed digital, the gap between ground points must be smaller than 1/20th of the wavelength.
Related pages & tools
- High Frequency PCB Manufacturing – Understand the base materials (Rogers, Teflon) that pair best with RF shielding designs.
- SMT & THT Assembly Services – Explore how we handle the automated placement of shields and clips during the assembly process.
- PCB Stack-up Design – Learn how to configure your ground planes to maximize the effectiveness of your shielding strategy.
- DFM Guidelines – Access technical rules for spacing, clearances, and tolerances to prevent manufacturing holds.
- Get a Quote – Ready to move forward? Upload your files for a comprehensive review of your RF shield design.
Conclusion
The RF shield can design PCB process is a critical intersection of electrical performance and mechanical reality. It is not enough to simply draw a box around your RF circuit; you must design a manufacturable interface that accounts for solder flow, thermal expansion, and inspection access. By defining clear requirements for materials and flatness, anticipating risks like the "shadow effect," and validating with a rigorous test plan, you can scale your wireless product without yield losses.
At APTPCB, we specialize in turning complex RF designs into reliable hardware. When you are ready to validate your design, send us your Gerber files (with clear shield mask layers), stackup details, and assembly drawings. We will help you optimize the footprint for mass production, ensuring your shields stay grounded and your signals stay clean.