Solder paste printing is widely recognized as the most critical step in Surface Mount Technology (SMT) assembly. Industry data suggests that over 60% of soldering defects originate at the printing stage. This makes a solid spi measurement intro (Solder Paste Inspection) essential for any high-reliability electronics manufacturer.
SPI is not merely about taking photographs of the circuit board. It is a quantitative process that measures the volume, height, and area of solder deposits to ensure they meet strict engineering specifications. By catching errors before components are placed, manufacturers save time and reduce rework costs.
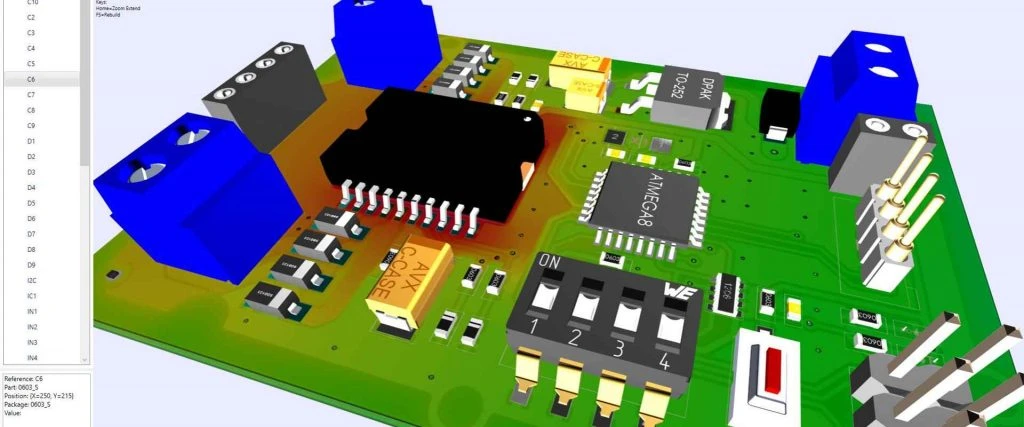
At APTPCB (APTPCB PCB Factory), we integrate advanced 3D SPI systems into our production lines to guarantee yield quality. This guide serves as a comprehensive resource for engineers and procurement managers looking to understand the mechanics, metrics, and implementation strategies of solder paste inspection.
Key Takeaways
- Definition: SPI is the automated optical assessment of solder paste deposits focused on volume and structural integrity.
- Critical Metrics: Volume percentage and height are more reliable indicators of joint quality than simple area coverage.
- Technology: 3D inspection using Moiré fringe projection provides data that 2D inspection misses.
- Process Control: SPI should form a closed loop with the screen printer to automatically correct alignment offsets.
- Validation: Regular calibration using golden boards is necessary to maintain measurement accuracy.
- Misconception: A "pass" on SPI does not guarantee a perfect joint if the reflow profile is incorrect, but it eliminates the most common cause of failure.
- Cost Benefit: Catching a defect at SPI costs pennies; catching it at ICT or functional test costs dollars.
What spi measurement intro really means (scope & boundaries)
Understanding the core definition is the first step before analyzing specific metrics and data points. A proper spi measurement intro involves defining the scope of inspection and the boundaries of what the machine can physically detect.
The Scope of Inspection
SPI systems operate immediately after the solder paste printing process and before the pick-and-place machine. The primary goal is to verify that the correct amount of paste has been deposited on the correct pad location. Unlike aoi programming basics which focus on component presence and polarity after reflow, SPI focuses entirely on the "wet" paste.
The scope includes:
- Volumetric Analysis: Calculating the total volume of the paste deposit.
- Topography: Mapping the shape of the deposit (e.g., "dog ears" or scooping).
- Positioning: Verifying the X/Y offset relative to the copper pad.
2D vs. 3D Inspection Boundaries
Early iterations of SPI used 2D imaging. This method relies on contrast to determine if paste exists on the pad. It is essentially a dimensional inspection guide for area only.
- 2D Limitations: A 2D system cannot distinguish between a thin smear of paste and a proper brick-shaped deposit. Both appear as "covered" pads.
- 3D Capabilities: Modern 3D SPI uses structured light (often laser triangulation or Phase Shift Profilometry) to measure height. This allows the system to calculate volume, which is the single most critical factor for solder joint reliability.
The Feedback Loop
A robust SPI implementation does not just reject bad boards. It communicates with the screen printer. If the SPI detects a consistent trend—for example, paste shifting 10 microns to the right—it signals the printer to adjust the stencil alignment automatically. This capability transforms SPI from a gatekeeper into a process control tool.
Metrics that matter (how to evaluate quality)
Once you understand the scope of the technology, you must define the specific data points that determine pass or fail status. The following table outlines the critical metrics used in a standard spi measurement intro context.
| Metric | Why it matters | Typical range or influencing factors | How to measure |
|---|---|---|---|
| Volume % | Determines if there is enough alloy to form a fillet. | 75% – 125% of theoretical stencil aperture volume. | Calculated by integrating height over the defined area. |
| Height | Critical for coplanarity, especially for BGAs. | 60um – 150um (depends on stencil foil thickness). | Structured light projection (Moiré fringe). |
| Area % | Ensures the pad is sufficiently covered to prevent oxidation. | 80% – 120% of aperture opening. | 2D contrast analysis or 3D slice at threshold. |
| Offset (X/Y) | Prevents bridging and tombstoning due to imbalance. | < 25% of the pad width (or specific IPC class limit). | Distance from pad center to paste centroid. |
| Bridge Width | Detects shorts between fine-pitch pads. | Must be 0 (no connection between separate nets). | Algorithm checks for paste continuity between defined ROIs. |
| Shape/Slope | Identifies slumping or poor release from stencil. | Qualitative score or gradient analysis. | Topographic mapping analysis. |
Deep Dive: Volume vs. Area
Volume is the superior metric. A pad might have 100% area coverage but only 50% height due to the squeegee scooping paste out of the aperture. This results in a "starved" solder joint that may pass electrical testing but fail under mechanical stress. Conversely, a deposit might have perfect height but cover only 50% of the area, leading to poor wetting.
Deep Dive: Offset and Self-Alignment
Solder has a self-alignment property during reflow due to surface tension. Small offsets detected during SPI might correct themselves in the oven. However, excessive offset leads to solder balls or bridging. Setting the correct tolerance in the SPI machine requires balancing the risk of false calls against the risk of actual defects.
Selection guidance by scenario (trade-offs)
Knowing the metrics helps, but applying them depends heavily on the specific board design and component density. Different manufacturing scenarios require different configurations of your SPI equipment.
Scenario 1: Fine Pitch Components (0.3mm - 0.4mm)
- Challenge: High risk of bridging and insufficient volume.
- Trade-off: You must increase resolution (smaller pixel size), which slows down the inspection speed.
- Guidance: Prioritize resolution over speed. Use a tighter volume tolerance (e.g., 85%-115%).
Scenario 2: Ball Grid Arrays (BGAs)
- Challenge: Coplanarity is critical. If one ball has low paste height, it may not touch the component, causing a "head-in-pillow" defect.
- Trade-off: Height measurement accuracy is more important than X/Y offset.
- Guidance: Enable specific BGA algorithms that compare the height of each pad against the average height of the group, rather than just absolute height.
Scenario 3: Large Connectors and Shields
- Challenge: Large apertures often require "window pane" stencil designs to prevent scooping.
- Trade-off: The SPI might interpret the gaps in the window pane as missing paste.
- Guidance: Program the SPI to treat the segmented deposits as a single logical group or adjust the Region of Interest (ROI) to match the stencil modification, not the copper pad.
Scenario 4: Flexible PCBs
- Challenge: Flex boards do not lie perfectly flat. Warpage distorts the height reference plane.
- Trade-off: Standard zero-reference planes will generate false height failures.
- Guidance: Use SPI systems with "warpage compensation" or "local fiducial referencing." This technology maps the board surface dynamically and measures paste height relative to the local surface, not a theoretical flat plane.
Scenario 5: High-Mix, Low-Volume Production
- Challenge: Frequent changeovers mean programming time is a bottleneck.
- Trade-off: Spending hours tuning thresholds for a batch of 50 boards is inefficient.
- Guidance: Utilize auto-learning algorithms or libraries based on IPC standards. Rely on Gerber import data rather than manual teaching.
Scenario 6: LED Assemblies (Large Arrays)
- Challenge: White soldermask reflects light, interfering with optical measurement.
- Trade-off: High reflection causes sensor saturation or noise.
- Guidance: Select SPI equipment with multi-frequency projection or specific lighting colors (e.g., blue light) designed to handle high-contrast backgrounds.
From design to manufacturing (implementation checkpoints)
Selecting the right approach is useless without a solid process flow that connects design intent to machine execution. The following checklist outlines the journey from data preparation to final validation.
1. Data Preparation (Gerber & Stencil)
- Recommendation: Use the stencil layer (paste mask) for SPI programming, not the copper layer.
- Risk: If you use the copper layer, the SPI expects paste on the entire pad. If the stencil design includes reductions (e.g., 10% reduction), the SPI will falsely flag "insufficient volume."
- Acceptance: Verify the SPI program overlay matches the physical stencil apertures.
2. PCB Support Setup
- Recommendation: Ensure the board is fully supported underneath, especially for thin PCBs.
- Risk: Board vibration or sagging during the scan results in blurry images and inaccurate height readings.
- Acceptance: Check for zero Z-axis movement when the table moves.
3. Zero-Reference Calibration
- Recommendation: The machine must establish where "zero height" is (the surface of the soldermask or copper).
- Risk: If the reference is taken on a silkscreen legend, the paste height will calculate lower than reality.
- Acceptance: Verify the measurement strategy excludes silkscreen areas for Z-reference.
4. Threshold Settings
- Recommendation: Set the "noise filter" threshold correctly (usually around 15-20um).
- Risk: Setting it too low measures dust and board texture as paste. Setting it too high ignores thin deposits.
- Acceptance: Run a bare board (no paste) through the machine; the volume reading should be zero.
5. Lighting and Projection
- Recommendation: Adjust projector intensity based on the PCB surface finish (HASL vs. ENIG vs. OSP).
- Risk: HASL is shiny and uneven; OSP is flat and copper-colored. Wrong lighting causes scatter.
- Acceptance: Image clarity check—edges of pads should be sharp, not fuzzy.
6. Warpage Compensation
- Recommendation: Enable dynamic warping mapping.
- Risk: Without this, a bowed board will show false "high" paste in the center and "low" paste at the edges.
- Acceptance: Review the 3D map of the board surface generated by the machine.
7. Verification of "Fail" Results
- Recommendation: Operators must verify failures under a microscope before washing the board.
- Risk: Blindly accepting machine calls leads to excessive scrap. Blindly ignoring them leads to defects.
- Acceptance: Implement a "3-strike" rule. If 3 boards fail consecutively, stop the line.
8. Closed-Loop Feedback
- Recommendation: Link SPI to the printer.
- Risk: Without feedback, the printer continues to print with a clogged stencil or offset.
- Acceptance: Verify that offset data is actually updating the printer's X/Y/Theta tables.
9. Maintenance Schedule
- Recommendation: Clean camera lenses and calibrate height targets weekly.
- Risk: Flux fumes can coat the optics, dimming the light and altering volume calculations.
- Acceptance: Pass a certified calibration target (Golden Sample) with known heights.
10. DFM Feedback Loop
- Recommendation: Feed SPI data back to the design team.
- Risk: If a specific footprint always fails volume requirements, the footprint or stencil design is likely wrong.
- Acceptance: Monthly quality review meetings reviewing top 5 SPI defects.
For more details on how manufacturing processes integrate, you can review our PCB manufacturing overview.
Common mistakes (and the correct approach)
Even with a rigorous process, manufacturers often fall into specific traps. Recognizing these mistakes is part of a mature spi measurement intro strategy.
Mistake 1: Relying Solely on Area
Many older machines or budget setups focus on area coverage. As discussed, a deposit can be flat (insufficient volume) but still cover the pad.
- Correct Approach: Always prioritize volume and height. If you must use 2D, combine it with strict process controls on squeegee pressure.
Mistake 2: Ignoring the "Shadowing" Effect
Tall components or clamps near the inspection area can cast shadows, blocking the structured light projection. This results in "missing paste" errors.
- Correct Approach: Use multi-directional projection systems (e.g., 4-way or 8-way projectors) to eliminate blind spots.
Mistake 3: Incorrect Stencil Thickness Data
The SPI machine calculates volume percentage based on the theoretical volume (Area × Stencil Thickness). If the machine thinks the stencil is 120um but it is actually 100um, all readings will appear as 120% volume.
- Correct Approach: Verify the foil thickness of the stencil in use matches the program parameters exactly.
Mistake 4: Over-Tightening Tolerances
Engineers often set tolerances too tight (e.g., +/- 10%) in an attempt to be "high quality." This causes frequent line stops for acceptable variations.
- Correct Approach: Start with IPC Class 2 or 3 standard tolerances (typically +/- 50% for volume) and tighten them only if downstream defects occur.
Mistake 5: Neglecting Board Support
If the board vibrates during the high-speed movement of the camera gantry, the fringe pattern blurs.
- Correct Approach: Use high-quality support blocks or vacuum support systems to keep the PCB rigid.
Mistake 6: Confusing SPI with AOI
Some teams try to use AOI logic for SPI. However, aoi programming basics rely on color algorithms (red/green/blue light reflection) to detect component bodies and polarity. SPI relies on height topology.
- Correct Approach: Treat them as separate disciplines. Do not apply component inspection logic to paste inspection.
Mistake 7: Not Cleaning the Stencil Under-wipe
SPI detects "smearing" or bridging. Often, this is not a print parameter issue but a dirty stencil underside.
- Correct Approach: If SPI detects bridging, the first corrective action should be to increase the frequency of the automatic stencil under-wipe cycle.
FAQ
To clarify remaining doubts regarding spi measurement intro, here are answers to the most frequently asked questions.
Q1: Is SPI mandatory for all PCB assembly? While not legally mandatory, it is practically essential for any board with Fine Pitch (<0.5mm) components, BGAs, or 0201/01005 passives. For simple through-hole boards, it may be optional.
Q2: Can SPI detect oxidized pads? Indirectly. If the pad is oxidized, the paste may not release well from the stencil or may slump differently. However, SPI is not designed to inspect the PCB finish itself; that is a job for incoming inspection.
Q3: How long does SPI programming take? With modern software that imports Gerber files (specifically the Paste Mask layer), a basic program can be generated in 10-15 minutes. Fine-tuning for complex boards may take an hour.
Q4: What is the difference between SPI and AOI? SPI inspects solder paste before component placement. AOI (Automated Optical Inspection) inspects the board after reflow (or sometimes pre-reflow) to check component placement and solder joint formation.
Q5: Does SPI slow down the production line? It can if not optimized. However, modern machines are faster than the print cycle time. The printer is usually the bottleneck, so SPI operates within the "masked time" of the printer cleaning cycle.
Q6: What is "False Call" vs. "Escape"? A "False Call" is when the machine rejects a good board (wastes operator time). An "Escape" is when the machine passes a bad board (leads to defects). The goal is to minimize escapes while keeping false calls manageable.
Q7: Can SPI measure glue dispensing? Yes, most 3D SPI machines can be configured to inspect SMT adhesive dots for height and volume, similar to solder paste.
Q8: How often should the SPI machine be calibrated? Typically, a calibration verification using a certified target plate is recommended weekly or bi-weekly, depending on the machine usage and manufacturer guidelines.
Q9: What happens if the board is warped? If the warpage exceeds the machine's compensation range (usually a few millimeters), the measurement will be inaccurate. Severe warpage should be addressed at the bare board fabrication level.
Q10: Does APTPCB use 3D SPI? Yes, APTPCB utilizes advanced 3D SPI systems in our assembly lines to ensure high yield and reliability for our customers.
Related pages & tools
For broader manufacturing context and tools to assist in your design process, consider these resources:
- DFM Guidelines: Learn how to design your pads and stencils to maximize SPI pass rates.
- Gerber Viewer: Verify your paste mask layers before sending data to production.
- PCB Materials: Understand how material selection (like FR4 vs. Rogers) affects board warpage and inspection.
Glossary (key terms)
Technical terms can be confusing. This table defines the essential vocabulary used in spi measurement intro and daily operations.
| Term | Definition |
|---|---|
| Aperture | The opening in the stencil through which paste is printed. |
| Aspect Ratio | The ratio of aperture width to stencil foil thickness (should be > 1.5). |
| Area Ratio | The ratio of the area of the aperture opening to the area of the aperture walls (should be > 0.66). |
| Bridging | Unwanted connection of solder paste between two adjacent pads. |
| Coplanarity | The maximum height difference between the highest and lowest solder deposits on a component footprint (critical for BGAs). |
| FOV (Field of View) | The area the camera can see in a single capture. Larger FOV means faster speed but potentially lower resolution. |
| Gerber File | The standard file format used to convey PCB design data, including the paste layer. |
| Golden Board | A known good board used to teach the machine or verify calibration. |
| Moiré Fringe | A pattern created by projecting structured light (lines) onto an object to measure height via triangulation. |
| Offset | The misalignment distance between the center of the paste deposit and the center of the pad. |
| Slumping | When solder paste loses its shape and spreads out after printing, reducing height and increasing area. |
| Volume | The total amount of solder paste in cubic measurement (Area × Height). |
| Zero Reference | The baseline height level (usually the soldermask surface) from which paste height is measured. |
Conclusion (next steps)
Mastering the concepts in this spi measurement intro is pivotal for achieving high-yield electronics manufacturing. By shifting focus from simple area inspection to volumetric analysis and integrating closed-loop feedback, manufacturers can virtually eliminate printing-related defects.
Remember, the quality of the solder joint is determined the moment the squeegee passes over the stencil. No amount of reflow profiling can fix a board that lacks sufficient paste volume.
When you are ready to move your design into production, ensure you provide your manufacturing partner with:
- Complete Gerber Files: Including the Paste Mask layer.
- Stackup Details: To anticipate board thickness and potential warpage.
- IPC Class Requirements: Specify if you need Class 2 or Class 3 inspection criteria.
- Stencil Modifications: Any specific requests for aperture reduction or enlargement.
At APTPCB, we handle these details rigorously. If you have a project ready for review, visit our Quote page to get started with a partner who understands the science of quality.