Definition, scope, and who this guide is for
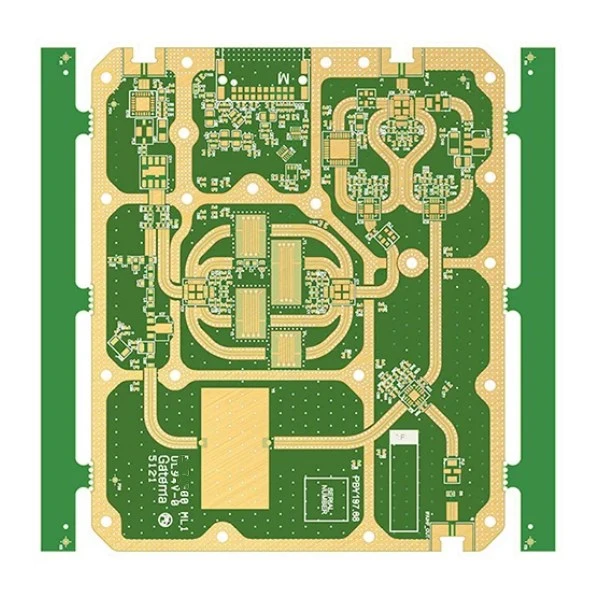
Three-phase inverter control PCB design refers to the engineering and layout of the printed circuit board responsible for managing the switching logic, signal processing, and safety monitoring in a three-phase power system. Unlike the power stage board, which handles high currents and voltages (IGBTs/MOSFETs), the control board focuses on precision, noise immunity, and reliable communication. It typically houses the microcontroller (MCU) or DSP, gate driver interfaces, sensor signal conditioning circuits, and communication ports like CAN or RS485.
This playbook is designed for engineering leads, product managers, and procurement specialists who need to source or validate a Three-phase inverter control PCB design. It moves beyond basic theory into actionable procurement and manufacturing strategies. You will learn how to define specifications that prevent field failures, how to audit suppliers for high-reliability electronics, and how to balance cost against performance in industrial or automotive environments.
At APTPCB (APTPCB PCB Factory), we see many designs fail not because of bad logic, but because of poor manufacturability or inadequate noise suppression in the layout. This guide bridges the gap between the schematic and the final assembled board. It ensures your control unit remains stable even when the power stage is switching high currents nearby.
When to use this approach (and when not to)
Deciding when to invest in a custom Three-phase inverter control PCB design versus using an off-the-shelf module depends on volume, integration requirements, and specific performance targets.
Use a custom Three-phase inverter control PCB design when:
- Form Factor Constraints: The enclosure is non-standard, requiring a specific shape or connector placement that generic controllers cannot match.
- Specific Control Algorithms: You are running proprietary motor control algorithms (FOC, DTC) requiring specific MCU peripherals or FPGA integration not found on standard boards.
- High Noise Environments: The application involves high dV/dt switching (e.g., SiC or GaN inverters) requiring a custom stackup and shielding strategy to prevent EMI from crashing the MCU.
- Safety Integration: You need to integrate functional safety circuits (STO, SS1) directly onto the control board to meet ISO 13849 or IEC 61508 standards.
- Cost Optimization at Scale: For volumes exceeding 1,000 units/year, a custom design eliminates unused features found on general-purpose drives, reducing BOM cost.
Stick to standard/off-the-shelf controllers when:
- Prototyping: You are in the early proof-of-concept phase and need to spin a motor immediately.
- Low Volume: Production volume is under 100 units, where NRE (Non-Recurring Engineering) costs for a custom PCB outweigh the unit savings.
- Standard Applications: The motor drive requirements are generic (e.g., simple V/f control for a fan) and do not require tight integration or special communication protocols.
Specs to define (materials, isolation, stackup, tolerances)
Defining the right specifications upfront prevents costly revisions during the CAM review process. For a robust Three-phase inverter control PCB design, the following parameters are critical for signal integrity and isolation.
- Base Material (Laminate):
- Type: FR-4 High Tg (Tg ≥ 170°C).
- Reason: Control boards often sit near hot power stages. High Tg prevents barrel cracking and pad lifting during thermal cycling.
- CTI (Comparative Tracking Index): Grade 0 or 1 (CTI ≥ 600V) is recommended if the board handles any high-voltage feedback directly, to reduce creepage requirements.
- Layer Stackup:
- Count: Minimum 4 layers, preferably 6 layers for complex MCUs.
- Configuration: Signal / Ground / Power / Signal (4-layer) or Signal / Ground / Signal / Signal / Power / Signal (6-layer).
- Objective: A solid ground plane is non-negotiable to shield sensitive analog signals from PWM switching noise.
- Copper Weight:
- Outer Layers: 1 oz (35µm) finished.
- Inner Layers: 0.5 oz to 1 oz.
- Note: Unlike power boards, control boards rarely need heavy copper unless they distribute gate drive power directly.
- Trace Width and Spacing:
- Minimum Width: 4-5 mil (0.1mm) for fine-pitch MCUs.
- Impedance Control: 50Ω single-ended / 100Ω differential for communication lines (CAN, Ethernet, USB).
- High Voltage Spacing: Strictly follow IPC-2221B for creepage/clearance on any isolated sections (e.g., between HV DC bus sensing and LV logic).
- Surface Finish:
- Type: ENIG (Electroless Nickel Immersion Gold).
- Reason: Provides the flat surface required for fine-pitch components (QFP, BGA) common on control boards. HASL is often too uneven.
- Solder Mask:
- Color: Green (standard) or Matte Black (for optical sensors/LED contrast).
- Clearance: 1:1 or slightly larger than pads (2-3 mil expansion).
- Via Specifications:
- Tenting: All vias under components must be tented or plugged to prevent solder wicking.
- Size: 0.2mm to 0.3mm drill size is standard for signal routing.
- Cleanliness:
- Requirement: Ionic contamination < 1.56 µg/cm² NaCl equivalent.
- Reason: Prevents electrochemical migration (dendrites) in humid environments.
- Marking and Legend:
- Traceability: QR code or Data Matrix printed on the silk screen or etched in copper for serial number tracking.
- Safety: High voltage warning symbols on isolation boundaries.
Manufacturing risks (root causes & prevention)
Manufacturing defects in control boards can lead to intermittent faults that are notoriously difficult to debug. Understanding these risks helps you implement prevention strategies early.
- Risk: Electrochemical Migration (ECM)
- Root Cause: Flux residues combined with humidity and voltage bias across closely spaced traces.
- Detection: Surface Insulation Resistance (SIR) testing.
- Prevention: Specify "No-Clean" flux compatible with the conformal coating, or require a full wash process. Use materials with high CTI.
- Risk: Signal Integrity Loss (Noise Coupling)
- Root Cause: Split ground planes or routing analog signals over noisy power traces (e.g., DC-DC converter sections).
- Detection: Signal integrity simulation; Oscilloscope checks during prototype validation.
- Prevention: Maintain continuous ground reference planes. Use differential pairs for sensitive signals. Keep PWM traces away from ADC inputs.
- Risk: Component Tombstoning
- Root Cause: Uneven heating during reflow or mismatched pad sizes for small passives (0402/0201).
- Detection: AOI (Automated Optical Inspection).
- Prevention: DFM review of footprint design. Ensure thermal relief connections are symmetric.
- Risk: Plated Through Hole (PTH) Fatigue
- Root Cause: Thermal expansion mismatch between copper and FR-4 Z-axis during thermal cycling.
- Detection: Thermal shock testing (-40°C to +125°C).
- Prevention: Use High Tg materials. Ensure aspect ratio (board thickness / drill diameter) is < 8:1 for standard processes.
- Risk: Solder Voiding in Thermal Pads
- Root Cause: Outgassing of flux in large ground pads under QFNs or drivers.
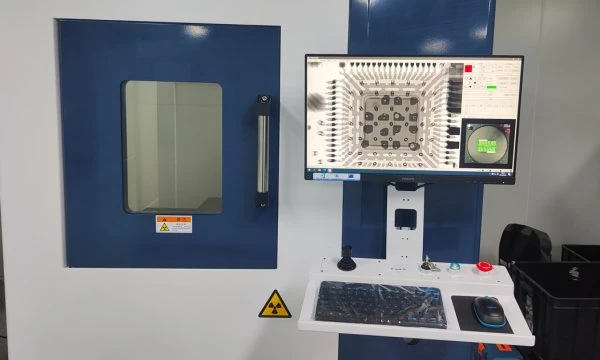
- Detection: X-Ray inspection.
- Prevention: Use window-pane stencil designs to allow gas escape. Target < 25% voiding area.
- Risk: CAF (Conductive Anodic Filament) Growth
- Root Cause: Separation of glass fibers from resin, allowing copper migration along the fibers under high voltage bias.
- Detection: High voltage bias testing over time.
- Prevention: Specify "CAF-resistant" materials. Increase hole-to-hole spacing in high voltage areas.
- Risk: Connector Mechanical Failure
- Root Cause: Mechanical stress from cable vibration cracking solder joints.
- Detection: Vibration testing.
- Prevention: Use through-hole connectors for I/O or add mechanical hold-downs/glue for SMT connectors.
- Risk: Firmware Corruption during Assembly
- Root Cause: ESD strikes or unstable power during IC programming.
- Detection: Checksum verification post-programming.
- Prevention: ESD controlled environment. Stable programming fixtures.
- Risk: Warpage
- Root Cause: Unbalanced copper distribution between layers.
- Detection: Bow and twist measurement.
- Prevention: Copper thieving (balancing) on outer layers. Symmetrical stackup design.
- Risk: False Positives in ICT
- Root Cause: Test probes damaging vias or pads, or poor contact due to flux residue.
- Detection: Visual inspection of test points.
- Prevention: Design dedicated test points (do not probe component leads). Ensure test points are kept clean.
Validation & acceptance (tests and pass criteria)
Validation ensures the Three-phase inverter control PCB design meets performance and reliability goals before mass production.
- Electrical Continuity & Isolation Test:
- Objective: Verify no shorts/opens and safe isolation.
- Method: Flying probe or bed-of-nails. Hi-Pot test across isolation barrier (e.g., 2.5kV AC for 1 min).
- Criteria: 100% pass. Leakage current < 1mA during Hi-Pot.
- Impedance Verification:
- Objective: Ensure communication lines match design intent.
- Method: TDR (Time Domain Reflectometry) on coupons or actual boards.
- Criteria: Within ±10% of target impedance (e.g., 50Ω ± 5Ω).
- Thermal Stress Test (Interconnect Stress Test - IST):
- Objective: Verify via reliability.
- Method: Cycle coupons through reflow temperatures multiple times.
- Criteria: Resistance change < 10%.
- Ionic Contamination Test:
- Objective: Ensure board cleanliness.
- Method: ROSE test (Resistivity of Solvent Extract).
- Criteria: < 1.56 µg/cm² NaCl equivalent.
- Solderability Test:
- Objective: Ensure pads accept solder properly.
- Method: Dip and look / Wetting balance.
- Criteria: > 95% coverage, smooth coating.
- Functional Testing (FCT):
- Objective: Verify logic and analog performance.
- Method: Power up board, inject signals to ADC, verify PWM output, check communication packets.
- Criteria: All functional blocks operate within specified tolerances.
- Burn-In Testing:
- Objective: Weed out infant mortality.
- Method: Run board at elevated temperature (e.g., 85°C) under power for 24-48 hours.
- Criteria: No functional failures during or after the test.
- X-Ray Inspection:
- Objective: Check BGA/QFN solder joints.
- Method: Automated X-Ray.
- Criteria: Voiding < 25%, no bridging, proper alignment.
- Microsection Analysis:
- Objective: Verify plating thickness and layer alignment.
- Method: Cross-section of a sample board.
- Criteria: Copper thickness meets spec (e.g., min 20µm in hole), no cracks.
Supplier qualification checklist (RFQ, audit, traceability)
Use this checklist to vet suppliers for your Three-phase inverter control PCB design. A capable supplier must demonstrate control over both PCB fabrication and assembly processes.
1. RFQ Inputs (What you must provide)
- Gerber Files: RS-274X format, clear layer naming.
- Fabrication Drawing: Specifying material, color, finish, tolerances, and stackup.
- BOM (Bill of Materials): Excel format with MPN, manufacturer, and acceptable alternates.
- Pick and Place File: Centroid data (X, Y, Rotation, Side).
- Assembly Drawing: Showing component orientation, polarity marks, and special assembly notes.
- Test Specification: Detailed procedure for ICT/FCT.
- Volume Projections: EAU (Estimated Annual Usage) and batch sizes.
- IPC Class: Specify Class 2 (Standard) or Class 3 (High Reliability).
2. Capability Proof (What the supplier must show)
- Certifications: ISO 9001 is mandatory. IATF 16949 is required for automotive. UL listing for flammability.
- Min Trace/Space: Capability down to 3/3 mil or 4/4 mil.
- Layer Count: Proven capability for 4-8+ layers.
- Impedance Control: In-house TDR testing equipment.
- Surface Finish: In-house ENIG line (preferred) or qualified subcontractor.
- Assembly Equipment: High-speed pick & place machines capable of 0201 and fine-pitch BGAs.
- Inspection Tech: 3D AOI, X-Ray, and SPI (Solder Paste Inspection) availability.
3. Quality System & Traceability
- Incoming QC: Process for verifying raw materials and electronic components (counterfeit detection).
- Process Control: Statistical Process Control (SPC) charts for key processes (plating, etching).
- Traceability: Ability to trace a specific board serial number to the date code of components and process batches.
- Non-Conforming Material: Procedure for quarantining and analyzing defects (MRB process).
- Calibration: Records showing regular calibration of test equipment.
- ESD Control: Documented ESD program (flooring, wrist straps, grounding).
4. Change Control & Delivery
- PCN (Product Change Notification): Agreement to notify you before changing materials or processes.
- DFM Support: Engineering team available to review files and suggest improvements before production.
- Lead Time: Clear commitment on standard and expedited lead times.
- Packaging: ESD safe packaging, moisture barrier bags (MBB) for moisture-sensitive boards.
- Logistics: Experience shipping DDP (Delivered Duty Paid) to your location.
- RMA Process: Clear policy for handling returns and warranty claims.
Decision guidance (trade-offs and decision rules)
Engineering is about trade-offs. Here is how to navigate the common decisions in Three-phase inverter control PCB design.
- 4-Layer vs. 6-Layer Stackup:
- Decision Rule: If you have high-speed communication (Ethernet/USB) or a complex MCU with many analog inputs, choose 6-Layer. The extra ground planes provide superior noise shielding.
- Trade-off: 6-layer costs ~20-30% more than 4-layer but saves hours of debugging EMI issues.
- Integrated Gate Drivers vs. Separate Board:
- Decision Rule: If thermal management is a concern or the power stage is very large, keep gate drivers on the Power Board or a separate driver board. Keep the control board purely digital/low voltage.
- Trade-off: Separation improves noise immunity but increases connector/cabling cost and assembly complexity.
- ENIG vs. HASL Surface Finish:
- Decision Rule: If using BGA, QFN, or fine-pitch (<0.5mm) components, choose ENIG.
- Trade-off: ENIG is more expensive than HASL but ensures flat pads and better reliability for fine-pitch assembly.
- Class 2 vs. Class 3 (IPC Standards):
- Decision Rule: If the inverter is for a critical safety application (medical, automotive, elevator), choose Class 3. For general industrial use, Class 2 is usually sufficient.
- Trade-off: Class 3 requires tighter manufacturing tolerances and more inspection, increasing cost by 15-25%.
- Tented Vias vs. Plugged Vias:
- Decision Rule: If placing vias in pads (VIP) to save space, choose Plugged and Capped. Otherwise, standard Tented vias are fine.
- Trade-off: VIP technology is significantly more expensive due to extra plating steps.
- Single-Sided vs. Double-Sided Assembly:
- Decision Rule: Try to keep all components on one side (Top).
- Trade-off: Double-sided assembly requires two reflow passes, increasing assembly cost. Only use bottom side for decoupling capacitors if absolutely necessary.
FAQ (cost, lead time, Design for Manufacturability (DFM) files, testing)
1. What are the main cost drivers for a Three-phase inverter control PCB design? The primary cost drivers are layer count (4 vs 6+), surface finish (ENIG is costlier than HASL), and the density of components (affecting assembly time). Using specialized materials like High Tg FR4 also adds a small premium but is recommended for reliability.
2. How does lead time vary for Three-phase inverter control PCB prototypes vs. production? Prototypes typically take 3-5 days for fabrication and 3-5 days for assembly (turnkey). Mass production usually requires 2-3 weeks for PCB fabrication and 2-4 weeks for component sourcing and assembly, depending on component availability.
3. What DFM files are required to quote a Three-phase inverter control PCB design accurately? You must provide Gerber files (RS-274X), a Centroid/Pick-and-Place file, a complete BOM with manufacturer part numbers, and assembly drawings. Including a "Read Me" file with stackup and impedance requirements prevents delays.
4. Why is High Tg material recommended for Three-phase inverter control PCB materials? Inverters generate heat. High Tg (Glass Transition Temperature) materials maintain mechanical stability at higher temperatures, preventing pad lifting and plated through-hole failures during operation and soldering.
5. What testing coverage is needed for a Three-phase inverter control PCB assembly? For high reliability, combine AOI (for visible joints), X-Ray (for BGAs/QFNs), and Functional Testing (FCT) to verify logic and analog signals. ICT (In-Circuit Test) is excellent for high-volume production to catch shorts/opens quickly.
6. Can I use standard FR4 for Three-phase inverter control PCB design? Standard FR4 (Tg 130-140°C) is risky for industrial inverters. It is better to specify Tg 150°C or Tg 170°C to ensure the board survives the thermal stresses of the power environment and lead-free soldering profiles.
7. How do I define acceptance criteria for Three-phase inverter control PCB cleanliness? Specify IPC-J-STD-001 Class 2 or 3 cleanliness levels. Require an ionic contamination test report with the shipment to ensure flux residues are within safe limits (<1.56 µg/cm²).
8. What is the best way to handle obsolete components in a Three-phase inverter control PCB BOM? During the quote phase, ask your supplier for a BOM scrub. They should identify End-of-Life (EOL) parts and suggest form-fit-function alternates before you commit to the PCB layout, saving a redesign later.
Related pages & tools
- Industrial Control PCB Manufacturing: Explore our specific capabilities for industrial drive and control electronics.
- High Tg PCB Material Guide: Understand why thermal properties matter for inverter reliability and how to choose the right laminate.
- Multi-layer PCB Stackup: Learn how to configure 4, 6, and 8-layer boards for optimal noise immunity and signal integrity.
- Turnkey PCB Assembly Services: See how we handle the entire process from component sourcing to final assembly and testing.
- DFM Guidelines for PCB Design: Download our design rules to ensure your inverter board is manufacturable at scale.
- PCB Quality Control System: Review the certifications and inspection processes that guarantee zero-defect shipments.
Request a quote (Design for Manufacturability (DFM) review + pricing)
Ready to move from design to hardware? APTPCB provides a comprehensive DFM review alongside your quote to catch potential issues before they hit the production line.
To get an accurate quote and DFM analysis, please prepare:
- Gerber Files: Including all copper layers, drill files, and outline.
- BOM: With manufacturer part numbers and quantities.
- Assembly Drawings: Indicating any special mounting or coating requirements.
- Test Requirements: If you need FCT or ICT programming.
- Volume: Prototype quantity and estimated annual usage.
Click here to Request a Quote & DFM Review – Our engineering team will review your files and provide a detailed cost breakdown and lead time estimate within 24 hours.
Conclusion (next steps)
Successful Three-phase inverter control PCB design requires more than just connecting pins on a schematic; it demands a rigorous approach to material selection, stackup definition, and manufacturing validation. By prioritizing noise immunity through proper layering, selecting robust High Tg materials, and enforcing strict supplier quality checks, you ensure your inverter performs reliably in harsh industrial environments. Use the checklist and specifications provided in this guide to align your procurement and engineering teams, reducing risk and accelerating your time to market.