
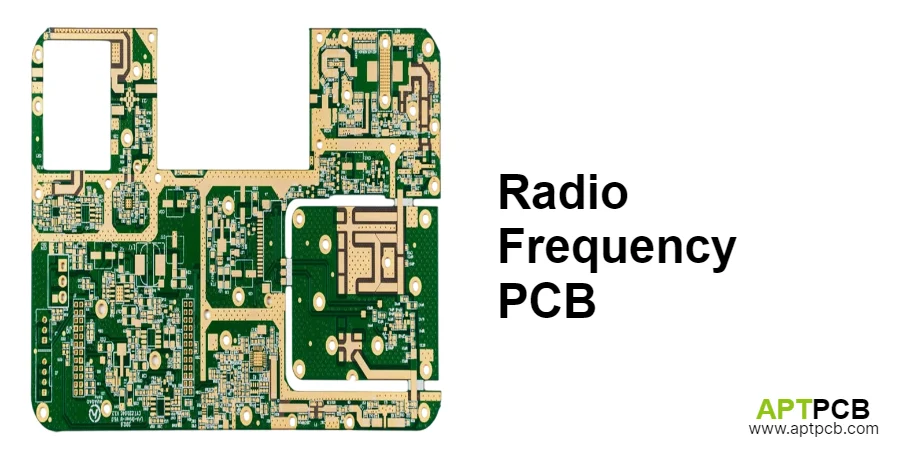
A radio frequency PCB is a printed circuit board whose conductor geometry, dielectric system and transitions are intentionally controlled so RF signals reach their loads with acceptable impedance, loss, phase, isolation and radiation. The engineering challenge begins when interconnects behave as transmission lines; it is not defined by one universal frequency threshold.
Key takeaways
- Select the laminate from frequency, loss budget, phase stability, power, temperature, moisture, thickness tolerance, copper profile, availability and cost—not Dk alone.
- Release the stack-up with the PCB fabricator before final routing because finished dielectric thickness and etch compensation determine impedance.
- Keep RF return paths continuous and transitions compact; every pad, bend, via, launch and connector is a discontinuity.
- State whether impedance tolerance applies to a coupon or the product trace, and define the test method and reporting format.
- Include insertion loss, return loss, isolation, phase or antenna measurements only when the design has fixtures, calibration planes and acceptance limits.
- Quote RF boards with controlled material and stack-up details; “Rogers or equivalent” is usually too vague for repeatable production.
What makes an RF PCB different from a standard PCB?
At RF and microwave frequencies, a trace is part of an electromagnetic structure formed by the conductor, adjacent reference plane, dielectric and nearby metal. Changes in width, spacing, dielectric thickness, copper thickness or surroundings change its characteristic impedance and propagation.
| RF behavior | PCB consequence | Design control |
|---|---|---|
| Reflection | Power returns toward the source | Match impedances and reduce discontinuities |
| Conductor/dielectric loss | Signal amplitude falls and heat may rise | Control copper profile, Df, geometry and length |
| Coupling | Energy transfers to neighboring structures | Increase isolation and manage field confinement |
| Radiation | Trace or enclosure acts as an antenna | Maintain return paths, shielding and transition control |
| Phase variation | Timing, beamforming or filter response shifts | Control Dk, length, temperature and fabrication variation |
| Mode conversion | Differential energy becomes common mode | Keep geometry and transitions symmetrical |
The same principles also apply to fast digital edges. A board may need transmission-line control even when its clock frequency appears modest.
Choose RF PCB material from the real loss and stability budget
Competitor guides often reduce material selection to “FR-4 versus Rogers.” In practice, the material system includes laminate chemistry, glass reinforcement, resin content, copper foil, bondply, solder mask and surface finish.
| Property | Why RF designers care | What to verify |
|---|---|---|
| Design Dk | Sets impedance and electrical length | Frequency, method, direction and construction |
| Df | Contributes to dielectric loss | Test frequency and method |
| Dk tolerance and TCDk | Affects phase and filter/antenna response | Lot variation and temperature range |
| Copper roughness | Increases conductor loss and changes effective behavior | Foil type and treated-profile data |
| Thickness tolerance | Moves impedance and coupling | Finished dielectric and copper tolerance |
| Moisture absorption | Can shift loss and Dk | Environment and conditioning |
| Thermal properties | Affect power handling and assembly durability | Tg, Td, CTE and thermal conductivity |
| Peel strength/process fit | Influences manufacturability | Copper, treatment, lamination and rework limits |
Standard FR-4 can be appropriate for short, lower-loss-demand RF paths. Hydrocarbon-ceramic and PTFE-based laminates can provide lower loss or tighter electrical stability, but may require different drilling, surface preparation, bonding and dimensional compensation. A hybrid construction can control cost, provided its mixed-material lamination and movement are qualified.
Rogers Corporation's published guidance emphasizes that Dk alone is insufficient; loss, temperature behavior and copper effects also matter. Use the laminate maker's current design values and the fabricator's qualified stack-up rather than a generic internet calculator input.
Build the RF stack-up before final routing
The field distribution of microstrip, stripline and grounded coplanar waveguide depends on geometry and materials.
| Structure | Strength | Trade-off |
|---|---|---|
| Microstrip | Easy component access and probing | More exposed fields and radiation |
| Stripline | Strong shielding between planes | More dielectric loss and via transitions |
| Grounded coplanar waveguide | Field confinement and convenient grounding | Sensitive to gap, via fence and fabrication tolerance |
| Differential pair | Rejects some common noise and supports balanced interfaces | Requires symmetry and mode-conversion control |
Release these items with the manufacturer:
- layer order and reference planes;
- core/bondply or prepreg part numbers and finished thicknesses;
- copper foil type, base copper and finished copper;
- target single-ended/differential impedance and tolerance;
- minimum trace width/gap and etch-compensation assumptions;
- solder-mask presence over RF traces;
- controlled-depth routing, cavities or backdrilling;
- coupon design and impedance-test method.
Changing laminate thickness after routing can force trace-width changes that disturb pads, coupling gaps, launches and tuning structures. Close the stack-up early.
Control launches, vias and return-current transitions
An RF link is only as good as its largest discontinuity. Common trouble spots are connector launches, component pads, layer changes, via stubs, ground voids, test points and abrupt geometry changes.
Use electromagnetic simulation when the transition is electrically significant or difficult to tune empirically. For layout and fabrication review:
- taper width changes instead of using unnecessary steps;
- keep the reference plane continuous beneath the line;
- place return vias close to signal-layer transitions;
- minimize via stub length or specify backdrilling where justified;
- model connector footprint, pad, anti-pad and ground-via pattern together;
- keep shunt-component grounding short and low inductance;
- avoid routing RF across plane splits, dense via voids or noisy power regions;
- define RF shield-wall and enclosure contact points before board release.
Rounded or mitered bends can help at higher frequencies, but a compact 45-degree bend is not automatically the dominant error. Prioritize the complete discontinuity and tolerance budget.
Grounding, isolation and power integrity
“Add more ground” is incomplete advice. RF performance depends on where current returns and how the layout prevents shared impedance between sensitive and noisy functions.
- Keep local RF loops compact and reference them to a continuous plane.
- Use via fences where they meaningfully contain fields or connect coplanar grounds; spacing follows frequency and geometry, not a decorative rule.
- Separate high-gain receive paths from power amplifiers, clocks, converters and digital interfaces by placement, orientation, filtering and shielding.
- Decouple devices across the required frequency range with a low-inductance connection to the reference.
- Route bias networks so they do not become RF resonators or leakage paths.
- Treat chassis, cable shields and PCB ground as an enclosure-level EMC problem.
- Review thermal paths for power amplifiers because temperature changes gain, phase, matching and laminate properties.
RF PCB fabrication controls that affect performance
| Fabrication variable | RF impact | Control evidence |
|---|---|---|
| Dielectric thickness | Impedance and coupling | Finished stack-up record |
| Etched width and trapezoid | Impedance and loss | Microsection or calibrated process data |
| Copper roughness/orientation | Conductor loss | Controlled foil callout |
| Registration | Coupled structures, anti-pads and transitions | Layer-registration capability |
| Drill/route quality | Launches, plated slots and cavities | Dimensional inspection |
| Surface finish | Pad loss, bondability and assembly | Approved finish and thickness control |
| Solder mask | Effective dielectric around exposed lines | Mask-defined or mask-clear drawing |
| Material substitution | Dk, Df, thickness and process change | Customer approval before use |
IPC-6018 provides qualification and performance requirements for high-frequency printed boards, while IPC-2221 and IPC-6012 may also apply depending on construction and contract. The drawing must still define product-specific electrical and dimensional requirements.
How should RF PCBs be tested?
Choose tests from the product's failure risk and available calibration plane.
- Bare-board electrical test: Detect opens and shorts.
- TDR impedance test: Verify controlled-impedance coupons or agreed product structures.
- Dimensional and microsection inspection: Confirm width, dielectric, plating, registration and transition geometry.
- VNA measurement: Measure S-parameters such as insertion loss and return loss when fixtures and de-embedding are defined.
- Assembly inspection: Use SPI/AOI and targeted X-ray for bottom-terminated or hidden RF joints.
- Functional RF test: Measure output power, gain, noise, sensitivity, frequency response, isolation or antenna behavior against product limits.
- Environmental validation: Repeat critical measurements across temperature, humidity, vibration or power stress as the application requires.
A VNA result is meaningful only when port calibration, fixture loss, reference planes, cable stability, frequency span and acceptance limits are controlled.
Common RF PCB mistakes
| Mistake | Result | Better approach |
|---|---|---|
| Selecting material by Dk alone | Unexpected loss or phase drift | Review full electrical, thermal and supply profile |
| Finalizing layout before stack-up | Unbuildable widths or moved impedance | Co-design stack-up and routing geometry |
| Treating every RF line as 50 ohms | Incorrect matching for filters, devices or antennas | Use the circuit's required impedance |
| Adding test pads to RF traces casually | Stub and pad discontinuities | Use designed probe structures |
| Ground via fences with arbitrary spacing | False confidence and added voids | Size from field containment and frequency |
| Allowing “equivalent” laminate | Uncontrolled Dk, Df and thickness | Approve exact substitutions |
| Comparing simulations to fixture-inclusive measurements | Apparent mismatch | Align reference planes and de-embed fixtures |
Radio frequency PCB RFQ checklist
- Application: Frequency bands, bandwidth, power, noise/sensitivity, phase, isolation, temperature and enclosure
- Design data: Gerber X2, ODB++ or IPC-2581; netlist; drill; route; controlled-depth features and revision
- Stack-up: Exact laminate/bondply, finished dielectric, foil type, copper, solder mask and approved substitutions
- Electrical: Target impedances, tolerance, coupon/product-trace requirement, insertion-loss or phase targets and test frequency
- Transitions: RF connectors, via structures, backdrill, cavities, edge plating, via fences and critical dimensions
- Assembly: Controlled BOM, placement, RF components, shield cans, thermal interfaces, cleaning and rework limits
- Test: TDR/VNA/functional fixtures, calibration planes, de-embedding, limits, sampling and report format
- Commercial: Quantity, panel constraints, first article, material availability, traceability and delivery target
For a controlled build, submit the stack-up and test expectations through the PCB quotation page. Related services include antenna PCB manufacturing and PCB impedance control.
Standards and reference documents
- IPC-6018 — Qualification and Performance Specification for High Frequency (Microwave) Printed Boards
- IPC-2221 — Generic Standard on Printed Board Design
- IPC-6012 — Qualification and Performance Specification for Rigid Printed Boards
- IPC-TM-650 — Test Methods Manual
- IEEE 370 — Electrical Characterization of Printed Circuit Board and Related Interconnects
- Applicable laminate manufacturer datasheets and processing guides
Confirm current editions and contractual requirements for the actual application.
Radio frequency PCB FAQ
At what frequency does a PCB become an RF PCB?
There is no single threshold. Transmission-line behavior depends on signal rise time, wavelength in the dielectric, interconnect length and allowed error. A fast digital edge can require RF-style control even at a lower repetition frequency.
Is FR-4 suitable for radio frequency circuits?
Sometimes. It can work for short paths and moderate loss or stability requirements. Calculate the channel loss and variation using verified material data before choosing a more specialized laminate or accepting FR-4.
Are all RF traces 50 ohms?
No. Fifty ohms is common for instruments and many single-ended interfaces, but devices, antennas, filters, balanced circuits and matching networks may require other impedances.
What is the difference between Dk and Df?
Dk affects impedance and propagation velocity. Df represents one contribution to dielectric loss. Both depend on test method, frequency and material construction, so use appropriate design values.
How is RF PCB impedance verified?
Manufacturers commonly use TDR on a representative coupon. If the product trace itself must be measured, define access, calibration, fixture and acceptance rules in advance.
What files are needed for an RF PCB quote?
Provide controlled fabrication data, exact stack-up/materials, impedance and loss requirements, critical transition dimensions, assembly files, test methods, quantities and approved substitution rules.